Leon (P1) and Helena (P2) are on the plane to China, chasing Simmons and Ada. The chapter changes pace: it opens with a fight in a cramped cockpit against the Lepotitsa, then a crash landing in Lanshiang, a four-player fight with Jake and Sherry against the Ustanak, a market where an enemy that won’t die (the Rasklapanje) hunts you while you look for three keys, a race against Chris and Piers in a medical center and, last, Simmons turned into a beast on a moving train. It’s Leon’s most QTE-heavy chapter and the one that gives you the Lightning Hawk.
Chapter order: 4-1 Inside the Airplane (Lepotitsa in the cockpit, Lightning Hawk, Serpent Emblem #13, 5,000 SP case, Serpent Emblem #14, cargo hold, landing) → 4-2 Airplane Crash Site (intersection with Jake: Ustanak, the bus) → 4-3 Market (Serpent Emblem #16 and #15, the triple-lock door: Storage Key B, C and A, Rasklapanje, 5,000 and 2,000 SP cases) → 4-4 Medical Research Center (intersection with Chris: lasers, the race, the hack, 14,000 SP) → 4-5 Train (Derek C. Simmons).
Before you start
Gear and skills: four bosses or near-bosses and an enemy that won’t die. There’s no shop: between chapters, if you don’t have them yet, buy Firearm Lv1 (12,000 skill points, SP) and Defense Lv1 (3,200); with SP to spare, Firearm Lv2 (29,000). For Leon and Helena the most common 3-skill set is Firearm + Defense + Zombie Hunter; if you have SP left over, Magnum Ammo Pickup Increase (25,000) pays off in this chapter and the next. The Lightning Hawk turns up at the very start and is this chapter’s gun: save its .50 AE ammo for the Lepotitsa, the Rasklapanje and Simmons. Bring Incendiary Grenades (fire stops the Rasklapanje regenerating) and a Remote Bomb or two. The Assault Rifle RN is the best gun against Simmons on the train, because there’s plenty of 5.56mm there. A rank: accuracy ≥70%, ≤2 deaths and ≤75 minutes; for kills, two guides give “≥7”, but two players report a B with 8 and with 10: kill at least 11 to be safe.
Intersections: both in this chapter are 4-player; offline, Jake and Sherry (4-2) and Chris and Piers (4-4) are AI-controlled. The silver medal Aided a partner in need during a story intersection counts even when you help the AI.
What slips by if nobody warns you: the Lightning Hawk is on the cockpit floor and has to be taken before you go after the Lepotitsa; the hold’s First Aid Spray, before you turn the red valve; the medical center’s 14,000 SP only if you open the door before Chris and Piers; and the microwave medal has to be hunted down in the market. All of it can be replayed from chapter select.
Saving: autosave only. The main checkpoints (4-1 Inside the Airplane, 4-2 Airplane Crash Site, 4-3 Market, 4-4 Medical Research Center and 4-5 Train) are where the game resumes after you quit. In the market, every key you pick up and every door you unbar gives you an interim (pin) checkpoint, which only lasts while you keep playing. Weapons you pick up (the Lightning Hawk) and SP need a save before you quit the game. Skills (Firearm, Defense) can only be bought between chapters.
Difficulty: on Amateur the life-and-death QTEs complete themselves and mash QTEs fill faster (climbing back into the plane, the landing, the bus wiring, the train jump), and the Lepotitsa dies faster, which helps farm the Finish What You Start achievement (PowerPyx). On Professional QTE timers are shorter and mash QTEs fill more slowly: Simmons’ special melee needs really fast tapping (Gamer Guides). Enemies also rarely drop items and never Green Herbs, and breakables give SP: that ruins the Rasklapanje ammo farm with Item Drop Increase and the ammo you’d expect to pick up during Simmons, so arrive stocked. On No Hope there are no skills, SP count double and you respawn with your checkpoint health.
4-1 Inside the Airplane
The cockpit. The creature in the “pilot” cocoon hatches in the cockpit: it’s the Lepotitsa (see the boss below). Before you fight, take the Lightning Hawk: it’s on the floor by the co-pilot’s seat, next to the dead pilot. It’s the gun’s only spot in the campaign (Evil Resource), and it only appears if you don’t already have it. There’s .50 AE ammo on both sides of the cockpit, by the wall devices. If you miss it: inventory is saved per campaign, so replay checkpoint 4-1 from chapter select, take it and wait for a save before you quit. Sources disagree on whether a weapon you didn’t pick up unlocks on its own at the end of the chapter (one guide says yes; another says you must pick it up and reach a save point with both characters): don’t gamble, take it. When the Lepotitsa flees into the ceiling, examine the panel: the autopilot is on and there’s trouble in the hold.
Serpent Emblem #13. Take the stairs down from the cockpit and turn right: a half-open crew luggage shutter. The emblem is bottom right, next to the suitcases. It unlocks the file Leon and Ada.
The passenger cabin. Green Herb in the small office in the middle of the plane. In the next cabin, another office with a Green Herb on the corner table. (Gamer Guides and IGN count 3 Green Herbs in 4-1: these two and the one in the cargo-hold cabinet downstairs.)
The gas-cylinder hold: 5,000 SP and Serpent Emblem #14. Go down into the cargo hold with the big gas cylinders. Right in front of you, at the foot of the stairs, is a metal suitcase with 5,000 SP. To the right of the stairs, smash the glass cabinets: among the bottles is Serpent Emblem #14, plus a Green Herb. It unlocks the file Helena’s Crime.
The tail: the red valve. Turn the first valve to open the door to the tail. In the pressure hold, far left by a canister, is a First Aid Spray (another guide puts it on the cabinet by the cargo lever): take it before you touch the big red valve. Then turn the big red valve together: the Lepotitsa comes back and this time it’s invulnerable. Don’t waste bullets. Roles:
- One player distracts it, running circles round the cylinders nonstop.
- The other smashes the grey-and-red box on the wall opposite the valve (mash the button shown, B) and pulls the lever. The cargo door opens, everyone is sucked out and the Lepotitsa goes flying out of the plane.
Climbing back up. Leon is left hanging: hold both triggers (ZL + ZR), then release and re-grab each one in turn, in rhythm with Leon’s arms (press what the screen shows). Dodge the cargo box sliding at you with the 2-button QTE. Upstairs the passengers are zombies now: the gas got out. 9mm Ammo on the table by the dead lady. Halfway along the plane, clear the debris together: after that nobody can reach you. Head for the cockpit.
Split: the landing. Before Leon sits down, Helena plants a Remote Bomb at the cockpit entrance.
- Leon (P1) takes the controls: look up and press the prompt twice on time (autopilot off), look right and mash to pull the throttle lever, then mash again to pull back the yoke (on Switch it’s usually B; the icon on screen decides).
- Helena (P2) keeps the zombies coming through the door off him (the bomb or grenades).
You crash anyway. Copper medal: Piloted the aircraft.
4-2 Airplane Crash Site
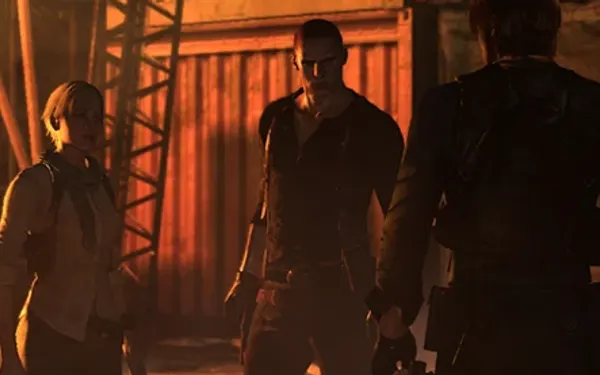
Intersection with Jake and Sherry. The plane comes down in the Chinese city, and this is where you cross Jake’s campaign (Jake Chapter 4, checkpoint 4-5). All four of you take on the Ustanak (see the boss below, with the container loot and the bus roles). After the fight, on the walkway, 5 wooden crates. Story copper medal: Provided Sherry and Jake backup.
4-3 Market
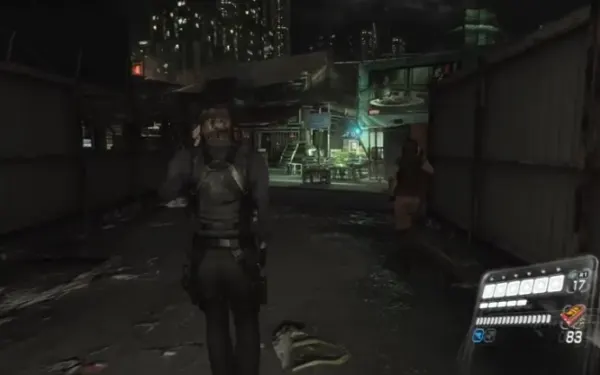
Arriving. Follow the path (the chicken can be killed and counts as a kill). Cutscene: a Rasklapanje attacks a man. Go right into the building and examine the body. Behind the building: 2 wooden crates. The locked door by the body is a shortcut that opens later.
Serpent Emblem #16 (the shop). After that cutscene, follow the right-hand frontage, take the first right and then the next right: a small open shop down an alley. The emblem is on the desk left of the doorway, by some boxes. It unlocks the file Rasklapanje. You nearly always reach this one before the sign emblem: its menu number is still #16.
Serpent Emblem #15 (the neon sign). It sits on some wires next to the top of a neon sign with red lettering and a green outline, between buildings. Two ways: from the corner on the left side of the street where you enter the market, with the Semi-Auto Sniper Rifle, look diagonally left: it’s in the distance, left of the sign (you can do it from ground level before the Rasklapanje is active). Or later, from the rooftop where Leon throws Helena (Storage Key C), look up and right between the buildings: any gun works from there. It unlocks the file Brzak. (Guides disagree on which emblem is #15 and which #16; we follow the menu order two sources give. It only matters for the “column” figures: break both and you’re done.)
The triple-lock door. At the far end of the market is a door with three locks. Walking up to it spawns the first Rasklapanje, and every key you pick up spawns another. It can’t be killed for good (see “Dealing with the Rasklapanje” below): running is usually the right call. Every key and every opened door gives you a checkpoint, which is why you should leave Storage Key A, the one closest to the door, for last.
Storage Key B. Facing the triple-lock door, go right into the butcher’s shop: wooden crate. Round the corner and down the street: a wooden box on your right and another on your left (Gamer Guides). Carry on: a body drops by a ladder. Unlock the door next to it first (it gives you a checkpoint; you don’t need to go through yet), then follow the corridor past the ladder to the body at the end: it has Storage Key B. Taking it spawns another Rasklapanje.
Storage Key C: the rooftop. Climb that ladder to the roof. Leon throws Helena across the gap (partner action, A): Serpent Emblem #15 is visible from here. Short split:
- Helena (P2) lands on the far roof and unlocks a door below.
- Leon (P1) goes back right to the triple-lock door, turns left past the fish store and waits for Helena to open the far door.
Inside, go right and up the ladder: at the far-left end of the roof is a metal suitcase with 5,000 SP. In split-screen its contents are one pickup for the pair: whoever gets there first takes it. Back down: Green Herb across the street by the red light, plus a wooden crate. Kick in the red door together: Storage Key C is on the floor of the toilet block. Taking it spawns another Rasklapanje.
Storage Key A: the electrified gate. In the fish-store square there’s an electrified gate. Its lever is in the little room to its left (behind the counter). Flip it and kick the door in together: Storage Key A is on the body in the fishmonger’s storeroom. Taking it sends another Rasklapanje out of a grate. 9mm Ammo in the rubbish and a wooden crate in the hanging-fish room. In the fish store’s back room, in the corner (the stall left of the triple-lock door), there’s a Red Herb and a suitcase with 2,000 SP.
The microwave medal. The market’s back alleys have three appliances that destroy a Rasklapanje hand for good: a pot of boiling soup, a microwave oven and a furnace (RE Wiki). Only the microwave earns the bronze medal Put a B.O.W.’s hand into the microwave; GameWith places it in a kitchen in the market and Gamer Guides also mentions an oven, but no full guide names the exact building. The most concrete clue is a player comment on TrueAchievements (a single source, read in a search snippet): the microwave is next to one of the barred doors you unbar while hunting the keys (like the one you unlock by the Storage Key B ladder). Check the shop kitchens beside each door you unbar. How it works:
- Knock a hand off (shotgun or shots to the arm) and lure it right up to the microwave.
- Pick it up with the prompt that appears next to it (action or grab; the same comment describes it as the melee button, ZR).
- If you’re close enough to the appliance, your character puts it in automatically; too far away and you just throw it, so try again.
If it won’t work, replay checkpoint 4-3 from chapter select. The carriers in Chris Chapter 4 and Ada Chapter 4 also have microwaves, but the medal list ties this one to Leon Chapter 4.
Opening the door. With all three keys in, the unlocking takes a while: hold off the Rasklapanje. Then kick the door in together. In the next room a Rasklapanje grabs you twice: waggle the stick, then press the trigger on time. Leave through the double doors at the end: cutscene.
Dealing with the Rasklapanje. It splits into torso, legs and two hands, and each part keeps attacking on its own. A stunned part turns white, and grey again when it’s active. Tag it with A while holding ZL to follow its dot. Order: hands first (before they re-attach), then legs and torso. The shotgun splits it in half; an Incendiary Grenade right after stops it regenerating for about 2 minutes. Flash Grenades do nothing to it. If a hand latches onto your face you can still move and shoot slowly, and your partner can shoot it off. Its grab needs your partner or button-mashing. According to one source, the last part you kill drops 3,000 SP, and its parts drop ammo, so it can be farmed with Item Drop Increase (not on Professional, where they barely drop anything).
4-4 Medical Research Center
Intersection with Chris and Piers. This is where you cross Chris Chapter 3 (checkpoint 3-5). In the server room, go downstairs and through the door into the laser corridor (Ada trips the security). Dash and slide (dash, then ZL) under the sweeping beams: the gap is in the middle or at the sides; run on the right and slide. By the door, destroy the 2 fuses to open the way to the elevator.
The race. It’s against Chris and Piers, in two legs:
- To the elevator. According to the Chris campaign guide (Gamer Guides, Chris Chapter 3), the team that gets there first goes to room “01”, with a back room holding 2 suitcases of 2,000 SP and 3 wooden crates; the team that arrives second goes up (5 wooden crates on the way) to room “00”. Leon-side guides don’t mention that branch: IGN says Leon and Helena almost always end up locked in the security room anyway.
- The door. In your room, Helena (P2) hacks the computer while Leon (P1) shoots the moving explosive mines: they go off after ~1 second, so keep moving and set them off away from Helena (the less she gets hit, the faster she finishes). Wait until all the lights are green.
If you open the door before Chris and Piers, the next room has 3 suitcases: 5,000 + 5,000 + 4,000 SP (14,000; one source says the 4,000 one is only on Chris’s side). If they win, there’s nothing. Beating them earns the bronze medal Beat Chris and Piers in the race.
Farming trick. From chapter select pick checkpoint 4-4: lasers → elevator → hack → the 14,000 SP → carry on to the next cutscene (it autosaves) → quit and repeat. About 6–7 minutes a loop.
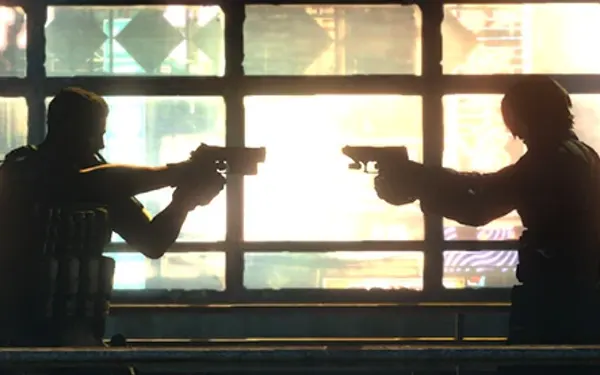
The walkway and the chase. In the monitor room, break the grate at the back and crawl through; follow the walkway. Cutscene: Leon and Chris hold each other at gunpoint and Ada escapes. Afterwards, in the room on the right (at the end of the rail, on the desk in the computer room) there’s a First Aid Spray. Downstairs, 8 wooden crates in all. Go through the back door to the gate (cutscene), down the stairs and, past several doors, Simmons is waiting.
4-5 Train
Go through the first two cars. In the third: 2 × 9mm Ammo + 5.56mm NATO Ammo on the right-hand bench and, further along on the left, a Red Herb. One guide also has a First Aid Spray on the train roof, before Simmons throws Leon onto the other train; you need a boost from your partner. Climb onto the roof: the fight starts (see the boss below).
Boss — Lepotitsa (cockpit)
The cockpit is cramped, and that’s the problem. Its grab (Tongue Shove) leaves you Dying if you fail the QTE, unless your partner frees you; shooting its body vents grey gas that hurts up close (about 1.5 blocks on Normal). It can be countered (ZR as it attacks).
- Take the Lightning Hawk first from the floor by the co-pilot’s seat, plus the .50 AE ammo on both sides of the cockpit.
- Use the back of the cockpit for distance. If it closes in, circle behind it to avoid the grab.
- Shoot it with the Lightning Hawk and don’t miss: it’s the fastest way to drop it. Alternatives: empty the Assault Rifle RN into it, or chain counters (no ammo, but slow).
- When it kneels, do the coup de grâce (ZR next to it). It flees into the ceiling and the fight ends.
- In co-op: one shoots from the back while the other waits nearby for the coup de grâce or to free a grabbed partner.
- Achievement Finish What You Start (coup de grâce on 10 enemies): this coup de grâce counts. Restart chapter 4 from the menu and repeat it until you reach 10 (it dies sooner on Amateur); the count is under Records → Weapons.
Boss — Ustanak
The crash site: stacked containers, two forklifts, a cage, a bus and green plane wreckage that blocks the right-hand side at first. The fight is scripted: you don’t kill it, you drive it off. Its weak point is the head (the metal arm takes less damage), and the real damage comes from the explosive-canister crates. Attacks: kick (short range; stuns you for a few seconds), foot crush (pins you, then a kick), stuffing you into the capsule on its back (your partner frees you by hitting it with A), grab and throw (it can throw one character into another), a short and an extending claw (it pulls the claw back first: dodge sideways) and, in phase 2, grenades from a launcher (keep moving). Keep your distance: at range it loses half its moveset. Flash Grenades do nothing to it.
- Phase 1. Lower the forklift in the open area (red button by the ladder) and ride it up: on top of the containers are 6 wooden crates and 2 canister crates you can push off. They’re separate objects: push both. Up the ladder opposite, on other containers: 3 wooden crates and 1 canister crate; jump to the next container: 3 more wooden crates.
- Push the canister crates down, lure it underneath and shoot them. On the container tops you’re nearly safe: it rarely climbs up.
- 2+2 split, the bus. When it retreats, Leon + Sherry start the bus while Helena + Jake dodge the Ustanak, which now has a grenade launcher. By the bus, 4 wooden boxes. Leon examines the steering wheel, you open the rear panel together and Leon presses the prompt 5 times to fix the wiring; Sherry drives it through the gate. If Helena is P2, her job is to survive: run in circles and never stop.
- Phase 2. The right side opens up. 3 wooden crates (2 behind the truck, 1 by the cage) and another further on. Another forklift takes you up to a platform with 4 canister crates. Jump onto the cage: wooden crate + 1 canister crate. One more wooden crate at the end, with a ladder up to a vantage point. The bus ladder in the first area leads to the last container: 3 wooden crates + 1 wooden box. Blow every canister crate with the Ustanak nearby: the bronze medal Blew up all the fuel tanks at the crash site needs all of them.
- Optional: the tower. If you’re out of canisters, all four of you can push a “tower” against the container wall to reach a suitcase with a First Aid Spray + 3 Remote Bombs in the middle. It takes all four; offline the Jake and Sherry AI would have to help (unconfirmed).
- Finale. The Ustanak swaps the grenade launcher for a spare claw. Damage it (head) until the claw is torn off: from then on it only grabs, throws and kicks. A little more and a metal structure falls on it (cutscene).
Boss — Derek C. Simmons (train)
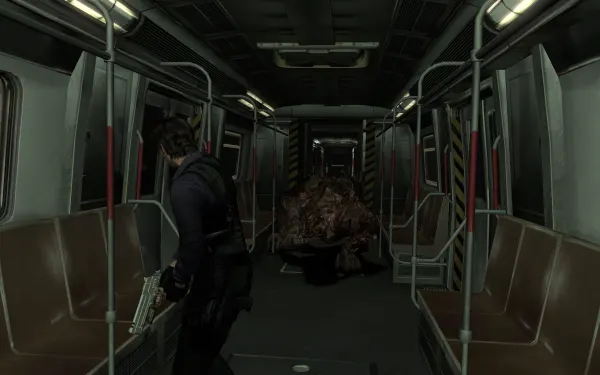
A moving train: the roof, the inside of the cars and a second train running alongside. Simmons turns into a very fast four-legged beast. The loop is the same for all his forms: damage the beast until he turns human again, shoot him once in the head so he kneels, and run in for the special melee (ZR, then mash B; on Professional and No Hope you have to mash really fast). Miss that window and you’ll have to spend more ammo to set it up again. Recommended: the Assault Rifle RN (there’s lots of 5.56mm in the cars) or grenades.
- On the roof. After the transformation, grab the 9mm Ammo and 5.56mm NATO Ammo and shoot fast so he reverts before he charges.
- Inside the cars. Back up while collecting 2 × 5.56mm NATO Ammo + 12-Gauge Shells; further on there’s 9mm + 12-Gauge. Always keep a doorway between you and him. The beast → human → special melee loop happens twice inside and once on the roof.
- Up to the roof. When he climbs onto the roof, boost Helena (A) and she pulls Leon up. Empty your guns into him.
- Split: the train jump. Simmons throws Leon onto the next train. Leon (P1) sprints (hold dash) to the back of that train and jumps back, then hits the final prompt. Helena (P2) shoots the beast with anything to stun it before it reaches Leon.
- Phase 3: galloping alongside. He fires bone darts: they hover around him first, then fly; take cover behind the wall until the volley ends. Shoot him when he stops, at the upper body and head: that cuts off the projectiles. He rips wall panels off: those gaps drop ammo but cost you cover. Take the rear ammo first, because he claws in from the back. When he comes into the train, dodge with the 2-button QTE.
- Finale. You’re on the roof and he charges head-on. Shoot him before he reaches the train (rifle, machine gun or pistol): if he gets there, the train derails and you retry.
- Reward: walk up the stairs and the chapter ends (the C-virus missile over Tatchi). Achievement Big Trouble in China, the Silencer - Red dog tag template and, over the chapter, the story copper medals Piloted the aircraft, Provided Sherry and Jake backup and Agreed to fight towards a common goal. All 4 of this chapter’s emblems unlock the President Adam Benford figure.
Don’t leave without:
- The Lightning Hawk (4-1 cockpit), and a save after taking it.
- Serpent Emblem #13 (luggage shutter), #14 (hold cabinet), #16 (desk in the little shop) and #15 (neon sign; rifle from the entrance or any gun from the roof).
- The 5,000 SP cases (plane hold and market roof) and the 2,000 SP case (fish store back room).
- The medical-center race: 14,000 SP and a medal.
- Medals: every fuel tank at the crash site and the hand in the market’s microwave.
- Between chapters: keep .50 AE for chapter 5 and raise Firearm and Defense; if you’re short on SP, checkpoint 4-4 is the best farm.