Leon (P1) and Helena (P2) head down into the catacombs under Tall Oaks with the Simmons Family Ring Ada left Leon. It’s a short chapter but full of splits: nearly always one of you moves through a passage while the other covers from range or opens a gate with a crank. There are traps that kill in one hit (blades, spears, fire), rope bridges with Whoppers on them, a long underground swim and, at the end, the Brzak, a water creature that can’t be killed by gunfire: you run from it and finish it with an explosive barrel.
Chapter order: 3-1 Altar Corridor (Serpent Emblem #9, levers, 2,000 SP coffin, Assault Rifle RN, blades, fire wall, the serpent door with the Simmons Family Ring and a siege) → 3-2 Catacombs (Serpent Emblem #10, red-gem gate, the crank relay: Old Crank, 5,000 SP coffin) → 3-3 Cavern (Shriekers, Whoppers on the bridges, the pillar split, Serpent Emblem #11, boulder, collapse) → 3-4 Underground Water Channel (swim, 500 SP, Brzak, rescuing Helena, Serpent Emblem #12) → Brzak in the rapids.
Before you start
Gear and skills: one player is nearly always covering the other from range, so the Semi-Auto Sniper Rifle from chapter 2 is key for both of you. Bring shotgun shells for the Shriekers and Bloodshots, and a Remote Bomb for the second Whopper. Dynamite zombies explode: kill them at range and away from the torches. There are no fixed herbs here: everything comes from vases and enemies, so don’t waste tablets. There’s no shop: if you bought nothing after chapter 2, Zombie Hunter Lv1 (3,000 skill points, SP) and Defense Lv1 (3,200) are still the best value; Firearm Lv1 (12,000) next. During a split you can’t collect SP from enemies your partner kills on their side. A rank (Gamer Guides and a Steam guide agree): accuracy ≥70%, ≤2 deaths, ≤55 minutes and ≥70 kills. Closed coffins can hide a snake that strikes when opened: dodge it. Killing it adds to your kill count but it drops nothing.
What slips by if nobody warns you: Serpent Emblem #9 is visible from the opening rotunda before you pull the levers; the fire-wall medal needs Helena not to go through the tunnel (decide before you boost her); and the 5,000 SP coffin is on Helena’s path in 3-2. None of it is lost for good: every checkpoint can be replayed from chapter select.
Saving: RE6 has no typewriter and no merchant: it only autosaves. Checkpoints with the pin icon are where you respawn after a Game Over while the session lasts. The main checkpoints (the starts of 3-1 Altar Corridor, 3-2 Catacombs, 3-3 Cavern and 3-4 Underground Water Channel) are where the game resumes after you quit. A Serpent Emblem counts the moment you shoot it; a weapon you find (the Assault Rifle RN) and SP, on the other hand, need a later save point: wait for the saving icon before you quit. Skills can only be bought between chapters.
Difficulty: on Amateur the life-and-death QTEs complete themselves and mash QTEs fill faster; according to a single guide (unconfirmed), the Brzak is slower in this chapter, giving Helena more time to save Leon. On Professional QTE timers are shorter, mash QTEs fill more slowly, enemies rarely drop items and never Green Herbs, and random breakables (every vase here) give SP: since this chapter has no fixed herbs, bring plenty of tablets. On No Hope there are no skills, SP count double and you respawn with the health you had at the checkpoint. Veteran is Normal with more damage taken.
3-1 Altar Corridor
The rotunda. You start in a round chamber with double doors and two levers. Before pulling them, turn around and look up: Serpent Emblem #9 is in a small opening high up, above and to the right of the entrance you came in by. It unlocks the file Helena Harper 1. Then pull both levers together. Ada gave Leon the Simmons Family Ring at the end of the previous chapter; the copper medal Acquired the Simmons Family ring belongs to this checkpoint (3-1).
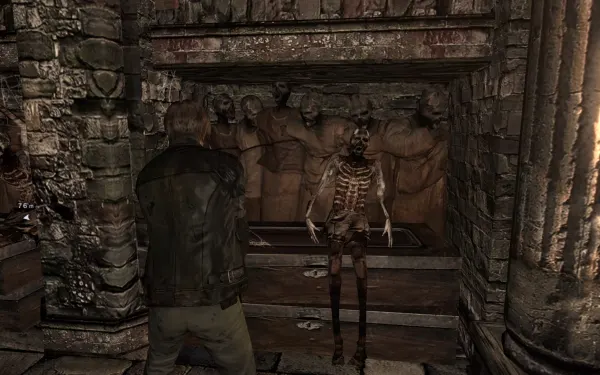
The coffin corridor. 2 large vases + 1 small. There are two closed coffins: the left one holds 2,000 SP and the right one a snake. The path curves left: another coffin, on your left, holds the Assault Rifle RN (one guide found it in the 3rd casket, opening them in order; the exact coffin may vary) and there’s a large vase. Both players get the weapon. If you don’t find it here, it’s stuck in a stone pillar at the start of 3-3.
Spinning blades. They come out of the wall and kill in one hit. Sprint and press ZL to slide under them, or go prone and crawl. On the other side 2 zombies and a Bloodshot spawn: shoot from the floor without getting up. Further on, a zombie staring into the fire: sneak up behind it for an instant kill.
Split: the fire wall. A wall of flames blocks the overpass. The usual way is to boost Helena up the broken ladder on the right:
- Helena (P2): crawl through the cobwebbed hole, drop down, turn around and kill the zombie turning the crank that feeds the fire. By the crank: large vase + small vase.
- Leon (P1): meanwhile zombies come out of the crypt walls behind him; hold on with your back to the fire.
Medal Stopped the flames without your partner’s help (bronze). If you want it, decide before you boost Helena: from Leon’s side, look to the right of the burning bridge; on the walkway on that side a zombie is turning the crank. Kill it from here with the Semi-Auto Sniper Rifle, without sending Helena through the tunnel: the flames stop and the medal counts. Capcom’s RE.NET event “Go with the Flow” (May 2013) places this medal at checkpoint 3-1. The method comes from a single guide (Krystal109’s on GameFAQs, which we could only read in a search snippet). If you’ve already boosted Helena, replay checkpoint 3-1 from chapter select.
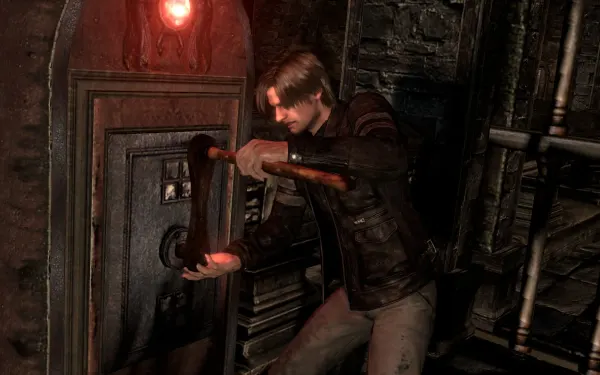
The serpent door. Use the Simmons Family Ring on the door with the serpent relief and survive until it unlocks itself. The crank by the door fires a flame trap across the bridge the zombies come over: the first wave burns whole. The second spawns close to you: regular guns, and explosives on the groups. Crank again for the third (Bloodshots and armored zombies; the armored ones are worth 400 SP each). The flames only come in bursts even if you keep cranking. Watch out for spitters’ acid. In co-op, one player works the crank and the other covers the door. When it opens, go through together.
3-2 Catacombs
The water. Wade through the water: every splash is a submerged zombie; stomp it or go around. Past the waterfall, on the right, a dry path with several coffins on an island at the bend: large vase + small vase and, in the only sarcophagus that opens (halfway along the path), Serpent Emblem #10. It unlocks the file Helena Harper 2.
The red-gem gate. Boost Helena up the left wall (the reddish gate). Leon: 2 “invisible” zombies bite at your feet from the water; stomp them. When Helena opens it, zombies and a Bloodshot attack her: cover her with the rifle.
Long split: the blue-gem gate and the crank relay. Each of you opens the other’s gates:
- Helena (P2): crawl through the hole and kill the zombie halfway along. Behind the box by the first crank is a large vase (usually SP). Turn the crank: it opens Leon’s gate. Kill the zombies and a Bloodshot and turn it again for Leon’s next gate. Then wait for Leon to open yours.
- Leon (P1): kill the zombie and take the 7.62mm NATO Ammo and 2 large vases; slide under the next blades: large vase. Spike floor trap: with the rifle, kill the zombie turning the crank on the left of the bridge and the spears stop. The next gate is missing its crank: go back and kill the attackers (Bloodshots included; Helena can snipe from her side). One of them drops the Old Crank. Use it on the crankless panel to open Helena’s gate.
- Helena, once her gate opens: two coffins: left = 5,000 SP, right = snake. When the spikes stop, move on: large vase. Climb onto the crate to cover Leon at range. Kill the nearby zombie first (it revives) and turn the last crank to open Leon’s final gate.
If Helena didn’t open the 5,000 SP coffin: Leon can walk back down Helena’s path after you regroup. Since you’re walking it the other way, the sides swap: from Leon’s direction it’s the first coffin on the RIGHT after the water (the left one is the snake). If in doubt, open both and dodge the snake.
Once together, pull two levers together: cutscene, and you drop into the cavern. Capcom lists the copper medal Discovered the exit of the underground caves at checkpoint 3-2; in practice it shows up on the chapter results.
3-3 Cavern
The first bridges. Across the first bridge, the Assault Rifle RN is stuck in the stone pillar ahead of you if you didn’t take it earlier. Platforms: large vase, zombies spawn; drop down to 2 lantern zombies; large vase. The crank lowers a bridge; cross it and fight a group of zombies and a Shrieker. Zombies here respawn forever: don’t linger. Another Shrieker (shotgun). The walkway collapses: climb up with your partner’s help and blast the incoming zombies. On the next platform, hit the Shrieker in the throat with the rifle.
Dynamite zombies and Whoppers. From here on there are dynamite zombies: shoot them at range and never near the torches. Before crossing any bridge, look across: a Whopper on a rope bridge shakes it and pins you (you can’t shoot or move). Go back to the previous platform (it can’t jump) and shoot it from there; leg shots trip it and then you finish it in melee. Across: 3 large vases. A zombie on the next bridge (instant melee kill). Second Whopper at the end of the next bridge: handgun, a Remote Bomb in front of the bridge and the rifle, using the space behind you. Drop to the next platform and get the rifle out before boosting Helena.
Split: the pillars. Boost Helena onto a platform; it collapses and you’re separated.
- Leon (P1), rifle out: kill the 4 zombies attacking Helena on the pillar below and the distant Shrieker, and cover her climb (a Whopper and zombies). Zombies, some with dynamite, also spawn on the ledges above and behind Leon: watch your back.
- Helena (P2): climb the fallen pillar, cross the platforms (large vase) and face a horde with several Bloodshots and a Whopper (you can run past). Serpent Emblem #11: when you reach the platform with a rope bridge attached, before crossing that bridge, turn around and look at the rock structure behind you: it’s on it (Gamer Guides). Another landmark (IGN): count 4 rope bridges; after the 4th, turn 90° right: the emblem is on a rock column. It unlocks the file The Catacombs. Turn the crank and lower the bridge for Leon.
- If nobody broke it: after the boulder push (below), Leon crosses the gap, the planks, the fallen pillar and more planks the way Helena came; at the end look ahead and right, at a distant column. With the rifle zoom you can see it and break it.
The boulder and the collapse. Push the boulder together. A few zombies and a Bloodshot; then more Bloodshots (aim at the heart when it’s exposed). Small vase on a box by the lit torch. Kill everything (there are spitters) and turn both cranks at once at the far end of the walkway to lower the last bridge. Cutscene and the collapse run: ignore the enemies, keep right to avoid the Whopper, jump the gaps and push the block at the end together.
3-4 Underground Water Channel
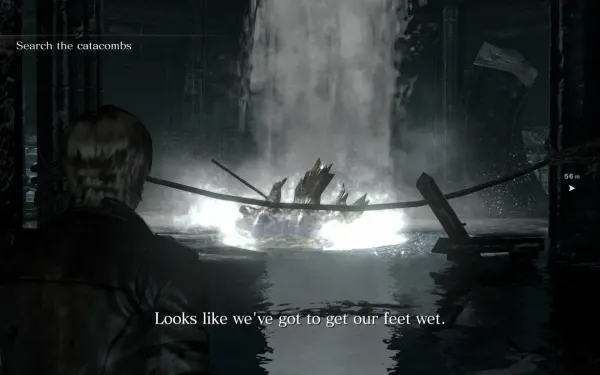
The swim. Surface for air through the openings in the ceiling (follow the bubbles; the route guide, L button, works underwater). Follow the stairs down until the ceiling collapses, then turn left. The flooded passage holds 2 pieces of 500 SP (Rook (Bronze)): one part-way along the swim and one just before the grate, by the fence on the left (Gamer Guides and the Famitsu map; IGN’s 4,000-5,000 figure isn’t confirmed). In a chamber of corpses, the floating bodies grab you: fail the QTE and you can drown. Surface again. Swim right through the roots, turn left and open the grate together.
First Brzak encounter. A cutscene with QTEs that differ for Leon and Helena. The most quoted sequence: action + reload together (B + Y on Switch), then mash action (B), then waggle the stick, and finally ZR. Always press the button shown on screen. On Amateur these life-and-death QTEs complete themselves.
Split: the escape. Each player has a different job here, and if either of you fails it’s game over:
- Leon (P1) swims along the torches to a gate Helena has to raise: mash B (swim) to outrun the Brzak. Near the end a zombie grabs him: waggle the stick.
- Helena (P2), on the rope bridges and the dry path, shoots the orange tongue or gland in the Brzak’s mouth every time it closes in on Leon. Have your gun reloaded before each stretch.
- By difficulty: on Amateur the Brzak is slower (single guide, unconfirmed); on Professional QTE timers are shorter and mashing fills more slowly, so Leon has to mash nonstop.
Loot and Serpent Emblem #12. On Leon’s side, 2 large vases. Helena’s path has 2 × 7.62mm NATO Ammo (one by the emblem and one on the rock ledge between the bridges; one guide says 5.56mm NATO, the official map marks 7.62mm) and about 4 vases. In a stone-block tunnel between two rope bridges, inside a broken barrel or basket in a group of barrels in the corner, is Serpent Emblem #12: Helena breaks it before rescuing Leon. Otherwise Leon climbs the ladder to Helena’s path, crosses the bridges and walks back for it before kicking the final door. It unlocks the file Deborah Harper. Kick the door together and the paths merge.
Boss — Brzak
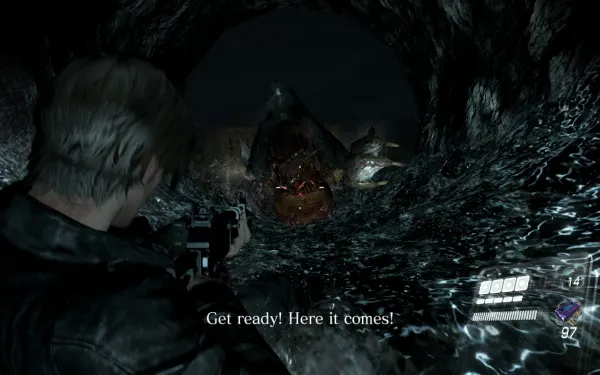
A tunnel of rapids past a waterfall. It can’t be killed by gunfire: normal damage doesn’t wear it down and the kill is scripted. Don’t spend ammo on anything but its tongue.
- The current sweeps you both down the waterfall. Grab the 9mm Ammo that appears.
- When it advances, shoot the orange tongue again and again to drive it back. If it reaches you, it devours you (instant death). Any gun with a good rate of fire works: Wing Shooter, Picador or the Assault Rifle RN.
- When it makes its bite lunge, dodge with the 2-button QTE shown on screen. You’ll have to do it at least once; on Professional and No Hope the window is shorter.
- Reload in the gaps. In co-op, alternate: one shoots while the other reloads.
- The final blow: explosive barrels roll down the tunnel, the game goes into slow motion and asks you to shoot the barrel above the Brzak. Do it when it’s close.
- Reward: the end of the chapter, the achievement Get on the Plane, the copper medal Defeated the B.O.W. lurking in the water (Capcom places it at 3-4) and the Silencer - Copper dog tag template.
Don’t leave without:
- Serpent Emblem #9 (the rotunda, before the levers), #10 (the island sarcophagus), #11 (the rock behind you before Helena’s rope bridge) and #12 (broken barrel on Helena’s path); all four unlock the Derek C. Simmons figures.
- The Assault Rifle RN (3-1 coffin or 3-3 pillar), and wait for a save before you quit the game.
- The 2,000 SP (3-1 corridor) and 5,000 SP (Helena’s path in 3-2) coffins and the two 500 SP pieces underwater.
- Medals: the ring (3-1), the flames stopped without Helena (3-1), the cave exit (3-2) and the Brzak (3-4).
- Between chapters: spend your SP on Firearm and Defense; chapter 4 opens with a boss in an airplane cockpit.