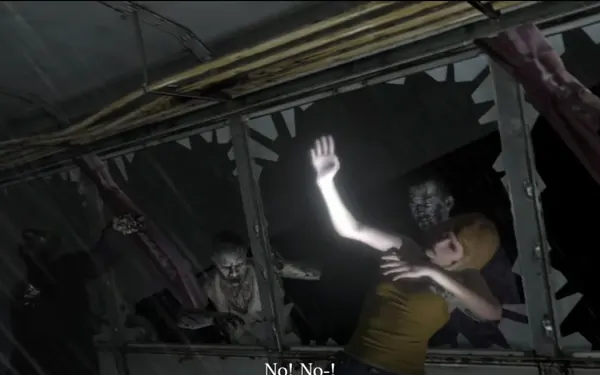
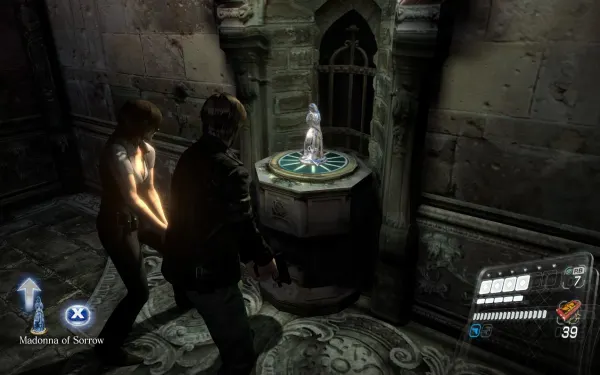
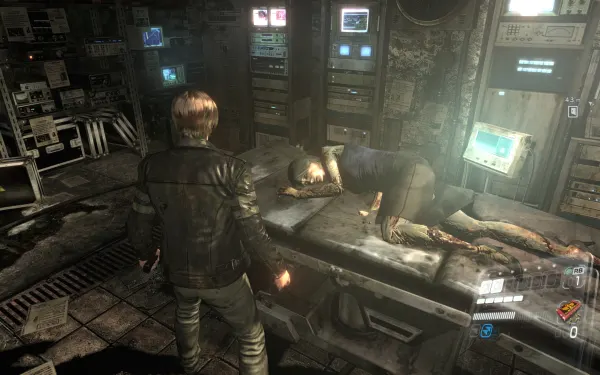
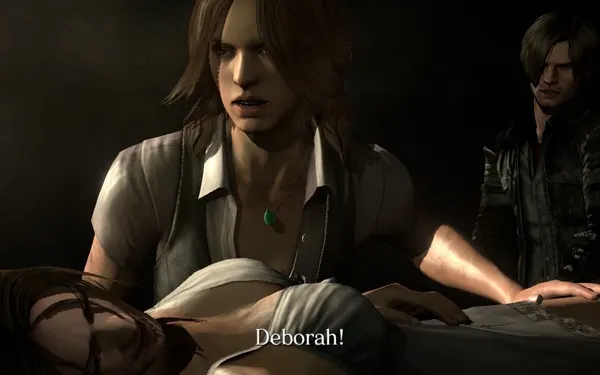
Leon and Helena survive the bus going over the edge outside Tall Oaks and cross a forest cemetery at night to the cathedral, where Helena has promised to tell him the truth about the attack on the President. This is Leon’s longest chapter: the cemetery with its dogs and lightning, the cathedral puzzles (Madonnas, statues, laser mirrors and bells), the Lepotitsa, an underground lab with cell codes and levers, the caves where they find Deborah, Helena’s sister, and the fight against her with Ada Wong. In local co-op, P1 is Leon and P2 is Helena; you split up in the hedge maze, in the mirror rooms, in the lever puzzle, during Deborah’s escort and at the primitive altar, where Leon goes with Ada and Helena goes alone.
Chapter order: 2-1 The Bus → 2-2 Forest Cemetery (Serpent Emblem #5, 5,000 SP sarcophagus, the dog with the Cemetery Key, the hedge-maze split, the siege outside the cathedral) → 2-3 Cathedral (Serpent Emblem #6, red Madonnas, statue rooms, laser rooms, Madonna of Sorrow, Semi-Auto Sniper Rifle, five bells, Madonna of Grief) → Lepotitsa (Underground Keycard, 4,000 SP chest) → 2-4 Underground Lab (cell codes, 5,000 SP chest, Serpent Emblem #7, lever puzzle, hangar) → 2-5 Primitive Altar Entrance (Serpent Emblem #8, Deborah escort, Ada) → 2-6 Primitive Altar / 2-7 Altar Corridor (Deborah Harper with Ada, mine cart, finale).
Before you start:
- Skills (there’s no shop). Between chapters, in the skill menu, the minimum is Defense Lv1 (3,200 Skill Points, SP) and Zombie Hunter Lv1 (3,000 SP; unlocked by killing 30 zombies). With SP to spare, Item Drop Increase (3,500) or save for Firearm Lv1 (12,000). Lone Wolf (100 SP) is a single-player skill (it targets the AI partner): don’t buy it for local co-op.
- Ammo. Save shotgun shells for Shriekers and Bloodshots, and Incendiary Grenade and Remote Bomb for the cathedral siege and the Lepotitsa: killing it fast is what earns I Prefer Them Alive.
- New weapon. The Semi-Auto Sniper Rifle turns up halfway through the cathedral. Each player gets their own, but container loot exists once for the pair in split screen, so share it out.
- Fixed SP: three chests in this chapter, a 5,000 sarcophagus in the cemetery, a 4,000 chest under the altar and a 5,000 one in the lab. Their spots are marked below.
- Missables: I Prefer Them Alive is decided in the Lepotitsa fight (get ready before placing the blue Madonnas), and the medal for the enemies outside the cathedral only counts if you kill them all before going in.
- Rank: the A grade in each category is accuracy ≥70%, ≤2 deaths, under 80 minutes and ≥80 kills (Gamer Guides’ table). All four at A gives an S rank; three at A is already an A rank.
- Saving: there are no typewriters; the game saves at each checkpoint (2-1 to 2-7), and an emblem counts the moment you break it.
Difficulty: what changes in this chapter
- Amateur: the story QTEs (ducking the mine-cart beams, Helena’s QTE when Deborah straddles her, the Lepotitsa’s Tongue Shove) are done for you and mash meters fill faster. The Lepotitsa dies sooner, which makes I Prefer Them Alive easier. Action Button Assist: Auto automates the same QTEs on any difficulty.
- Normal: the Lepotitsa’s grey gas knocks you down for about 1.5 health blocks.
- Veteran: enemies attack more often, get up sooner, are harder to stun and grab you more often; you’ll feel it most with the cemetery dogs and the Bloodshots of the siege.
- Professional: at least 2 blocks per hit, enemies don’t drop Green Herbs (the fixed herbs on this page are all you’ll get) and boxes give SP only.
- No Hope: at least 2.5 blocks per hit, failing a QTE leaves you Dying, skills are disabled and the SP enemies drop are doubled.
2-1 The Bus
You start on the floor of a bus full of zombies, with 9mm Ammo right next to you. Don’t waste bullets: shoot only the ones about to grab you and wait for the bus to tip. Cutscene: it goes over the cliff.
2-2 Forest Cemetery: the climb
- You start with an empty physical-combat gauge; stand still to refill it.
- Follow the stone path and avoid the mud pits: slip in and a zombie comes for you (there’s a ladder to climb out). Keep left.
- Each lightning strike stuns you briefly and raises a group of zombies, so keep a quick shot (ZL + ZR) ready.
- Serpent Emblem #5: where the path starts to climb, on the back of a small obelisk among small graves. Landmark: a sign with an arrow pointing right by a lamp post and a worn “Tall Oaks Cemetery” sign; go round the right of them and loop left behind the first tree. It unlocks the file Ingrid Hunnigan.
- 5,000 SP sarcophagus: on that same slope, in the small fenced area nearby, there’s a sarcophagus. Lift the lid (B) and pick up the chess piece inside, a Queen (Gold) worth 5,000 SP.
Farming trick and achievements. If you linger at the start, zombies arrive every 30–45 seconds for about 30 minutes, dropping items and SP chess pieces: knife them. It’s the best spot for Bob and Weave (3 counters in a row; do about 4 to be safe, and only against plain zombies) and Down, Not Out (kill an enemy while Dying and get up unaided). Solo, buy Lone Wolf so the AI won’t revive you; in co-op, your partner just has to not help.
2-2 The cottage and the Cemetery Key
- Up top, a zombie dog attacks. By the cottage there’s a tomb with a liftable lid (mash B): Green Herb. The gate is locked.
- In the cottage, in a cabinet by the bed: Incendiary Grenade.
- The only other door (the bathroom) opens with both of you: a dog bolts out with the key. Inside: 9mm Ammo.
- Chase the key dog (the red dot on the map and the route guide, L button): it runs down through the cemetery and packs of dogs are now loose. Equip the Shotgun, run at it so it doesn’t wander as much and quick-shot its escorts. Against their leaps, sidestep or counter.
- Kill it and take the Cemetery Key. Go back to the gate by the cottage and open it with your partner: the key opens that gate.
2-2 Split: the hedge maze
Past the gate, Leon (P1) and Helena (P2) take separate paths at the same time and meet up before the cathedral.
- Leon: kill the nearby zombies and turn right. A Shrieker shows up with zombies: shoot its red tumour with the Shotgun. At the next junction go straight: Green Herb in the corner, by a locked door. Take the other path: more zombies and another Shrieker.
- Helena: zombies and about 2 Shriekers as well, plus a concrete coffin with a removable lid holding a Red Herb. If Helena leaves it, Leon can walk back for it.
- Tip: if you can’t kill a Shrieker in 1–2 shots, ignore it and save ammo for the siege.
2-2 Siege outside the cathedral
Unlock the gate together. There are 2 wooden crates and 2 Incendiary Grenades on the benches (one by a tree, one in the far-left corner).
- Knock on the door: the people inside won’t open and the wave begins. First zombies and spitters.
- When the bells ring, Bloodshots (1,000 SP each) and more Shriekers arrive. Group them up and throw incendiaries. Against a Bloodshot, counter the leap or sidestep, and shoot the heart with the Shotgun.
- The doors unlock after a while, but clear the area before opening: a nearby zombie cancels the joint door animation. Leave one or two slow ones at most.
- The enemies are finite but many. Kill them all before going in for the bronze medal Killed all enemies in front of the cathedral; if you’re not after it, don’t stay to farm.
2-3 Cathedral: the ground floor and the red Madonnas
There are survivors inside (one is the father of Marco, of the BSAA). On the ground floor: Green Herb on the right-hand pews, First Aid Spray on the middle pews, 2 wooden barrels in the far-left corner and 2 barrels in the storeroom on the right.
Serpent Emblem #6: at the altar, turn around and look up: it’s in one of the round panes of the stained-glass window above the entrance doors. You can hit it from below, but it’s easier from the 2nd- or 3rd-floor balcony. It unlocks the file Leon and the Raccoon City Incident.
The red Madonnas.
- Examine the altar and take the Madonna of Happiness (red) from the pedestal right of the altar.
- Boost Helena at the broken ladder on the left (A next to your partner): she kicks down a ladder by the entrance and you both climb to the 2nd floor. Barrel in the nearby corner.
- In the 2nd-floor storeroom (left, toward the exit), a chest holds the Madonna of Charity (red). Across the balcony: Green Herb and a barrel in the corner.
- Place one on a red pedestal and read the inscription: you need both. Each player stands at a red pedestal at either end of the 2nd-floor balcony and you place them together. A door opens on the ground floor, on the right.
2-3 The statue rooms
Statues that fire flaming bolts. Your laser sight shows you where they’re aiming.
- Room 1: 2 levers; pulling one raises a statue: sprint to it and press the prompt at its base to shut it off.
- Room 2: 2 levers; the statues escalate from 1 to 2, to 4 and to 6. Run in wide circles and go straight at each statue: bolts miss a sprinting target, and coming in from the side you won’t get the prompt. Slide (sprint, then ZL) or dodge (ZL + direction + B) the bolts. Have tablets ready (R).
2-3 The laser-mirror rooms (split)
Aim your red laser at a reflective plate until it glows; each player lights their own.
- Room 3 (2 barrels): each of you lights a mirror and the doors open. Here you split up.
- At the top of the stairs, aim through the fence down at the plate on the ground floor.
- Next room: the plate is across from you and above, on the ledge on your partner’s side.
- Last room (one zombie): the plate shows in the ceiling mirror; you can also aim at it directly.
- In the room where you regroup, take the Madonna of Sorrow (blue) from its pedestal.
2-3 The Semi-Auto Sniper Rifle and the five bells
Go up the stairs: in the arms of a corpse against the wall is the Semi-Auto Sniper Rifle, with 2 barrels (usually 7.62mm NATO Ammo). If you skip it, it turns up later, in the caves (2-5 Primitive Altar Entrance), by the gate where you find Deborah. Next to it, behind bars, is the Madonna of Grief.
The inscription says to toll five bells: 3 big and 2 small on the towers’ weathercocks. Each keeps ringing once hit, so you don’t have to hit them at the same time.
- Right-hand door: go out and turn left. You see 3 bells: 2 big ones (the second behind the first) and the small one on the weather vane, behind the second.
- Left-hand door: go out and look straight across. You see 2 bells: 1 big one and the small one on the weather vane behind it.
- The small ones need the rifle zoom (click the right stick). In co-op, each player takes a balcony.
The bars drop: take the Madonna of Grief (blue). A door down to the main hall’s 2nd floor opens; on the far side of that walkway are 2 barrels: break them before placing the statues.
2-3 The blue Madonnas
Before placing them (the point of no return for the achievement): break the 2 item boxes on the top level, reload and both of you equip the Semi-Auto Sniper Rifle, with a Remote Bomb or a grenade to hand. The moment you place them the boss starts, and with it the race to save Jenny and Megan. Place them on the blue pedestals at the edge of the 3rd-floor balcony: a secret stair opens behind the altar and the Lepotitsa appears (see “Boss — Lepotitsa” below).
After the Lepotitsa. It drops the Underground Keycard by its corpse. If you saved Jenny and Megan, they sit in front of the altar and one of the pews has a Green Herb + Red Herb. Go down the passage behind the altar: a chest with 4,000 SP on the right before the double doors, and 2 barrels behind the door. Open the double doors together; the keycard opens the security door at the bottom.
2-4 Underground Lab: the cell blocks
The breakables here are blue cabinets (there’s one on the left at the start). Each control panel opens cells with 3-digit codes made of 0, 1 and 2.
Cell block 1.
- 012: 2 zombies (one walker, one grabber).
- 201: 2 blue cabinets with ammo.
- 102: a Shrieker (calls more zombies).
- 210: opens the main gate. Required.
Cell block 2.
- 102: a Shrieker.
- 120: 3 zombies, one of them a Bloodshot.
- 012: 3 zombies; one carries a nitrogen tank: shoot it and they freeze. This cell leads to a back room with the 5,000 SP chest (Queen, Gold), a First Aid Spray, a Green Herb and 2 blue cabinets. Enter 012, kill the nitrogen group and go through to the back room. If 012 doesn’t show that room, try 201.
- 021: opens the gate onward. Required.
2-4 Hall, restrooms and Serpent Emblem #7
After Helena checks the interrogation room, a zombie gets back up in the hall. There’s a lab with a blue cabinet and, round the corner, the first room on the left has 3 blue cabinets (a zombie hides behind two of them).
The restrooms. That hall has a men’s and a women’s restroom, and the guides disagree on which side each one is on (the wiki says the 2nd door on the right; Evil Resource and Gamer Guides say the left). Safe landmarks: one has a zombie sitting on the toilet, and per Gamer Guides the one on the right side of the hall holds a Red Herb in the far-right toilet.
- Serpent Emblem #7 is in the first sink you drain (IGN): the sink facing the door, with the mirror above it. Walk into the first restroom you find and drain that one. It unlocks the file Tall Oaks Cathedral and the Underground Lab.
- Draining the second sink spawns an extra enemy: men’s first and then women’s brings a Shrieker (1,000 SP if you kill it); the other way round, a regular zombie.
- To skip the fight, drain only one sink.
2-4 The tube room and the lever puzzle
The tube room. A lab with operating tables (zombies) and 2 blue cabinets. Kick the next door: the tube room and the chrysalis video (“Happy Birthday, Ada Wong”). Enter 201 on its security panel.
The lever puzzle (only one lever at a time). The room has two levels: walkways with zombies up top, and the B.O.W. storage tanks below. According to the wiki, the lower level has zombie dogs (UNVERIFIED).
- The lever by the map display unlocks the gate in the first room; zombies spawn as you head back.
- On the other side: a blue cabinet and lever 2 (closes the shutter, activates the way on and spawns zombies). Drop through the hole in the floor by the lever and follow the flooded walkway (2 zombies, one crawls out of a vent) to the ladder. Down there, be ready for the dogs: sidestep or counter the leap.
- Upstairs again, more zombies. Shoot the generator box by the lowered platform to electrocute nearby zombies (it recharges; don’t stand next to it). Cross and pull lever 3 on the far side (it lowers the next platform; more zombies, use the box again).
- Split: boost Helena across the gap by the generator box. If you’re Leon: cover her from your side and shoot the generator box on her side when enemies get close to her; at least one zombie comes for you too. If you’re Helena: you’re ambushed by zombies and a Bloodshot (Hydra at point blank; electricity only stuns it, so shoot the heart when it shows). Pull lever 4, lower the last platform, and a second Bloodshot appears. Remote Bomb, grenades or the rifle to finish it.
- Pull the two levers by the door together.
2-4 The hangar
Zombies, a blue cabinet and 2 blue cabinets at the far end of the walkway. A Shrieker spawns and the zombies keep coming: kill the Shrieker by the trash chute and don’t stay to farm. At the end of the walkway, use the partner action (A) to open the hatch and slide down the chute.
2-5 Primitive Altar Entrance: the caves
- A small vase, then a flooded stretch: crawl under two low archways.
- Serpent Emblem #8: past the second archway, on the left, against the cave wall behind a barrier. Smash the tall clay pot on the left to see it. You can’t reach it: shoot it. It unlocks the file Lepotitsa. There’s another large vase here.
- In the open area, a small vase + large vase. Hop the overpass: another small + large at the next walkway entrance, plus a lone zombie.
- At the gate, cutscene: you find Deborah. If you didn’t take the Semi-Auto Sniper Rifle in the cathedral, it’s propped by this gate.
2-5 The Deborah escort (different jobs)
If you’re Helena (P2): you carry Deborah. You can still smash containers and free Leon if he’s grabbed. If you’re Leon (P1): kill everything and push the obstacles and containers.
- Large vase + Green Herb before the first rope bridge. On the bridge, push a zombie into the abyss.
- The room on the right: a zombie and a large vase. On the left, a back-turned zombie (instant kill from behind).
- Large vase before the next bridge. A zombie crawls out of a hole while 2 more cross: kill them at once.
- After the bridge: large vase, another a bit further on, another in the next hall with a zombie at the far end, and 2 large vases at the end. Push the container (Leon alone).
- On the round platform: 2 large vases, 2 zombies that spawn and one more on the walkway.
- Push the next container; at the bottom, cutscene: Ada Wong meets Leon.
2-6 Primitive Altar: the three-way split
This is where Leon’s and Ada’s stories cross (checkpoint 2-7 Altar Corridor, with Ada Chapter 2). Without an online partner, Ada is AI-controlled. Ada gives Leon Simmons’s ring (you’ll use it in Leon Chapter 3).
- Leon + Ada: 2 large vases on the way down, then one more; use the partner command to leap the gap.
- Helena (P2), alone: her route has 2 breakables and a lever. At the end, when Leon reaches a dead end, Helena pulls the lever so he can swing across.
It fails, and the boss begins: follow the first part of “Boss — Deborah Harper” (below) and come back here when she smashes the floor.
The descent after the first phase. When Deborah smashes the floor, the group splits again.
- Leon: 3 large vases, a long way down with zombies, 1 large vase, drop down (pick up what your partners’ kills leave), a lower platform with 2 large vases, leap across, 2 zombies (one armored, 400 SP) and 2 large vases. Turn the crank and work the switches.
- Helena and Ada drop into the mine cart first and cover Leon as he comes down (there are spitters). Helena has about 4 more breakables on her route.
- Then all three ride the cart: the boss’s second part.
Boss — Lepotitsa
The cathedral’s main hall, with three floors of balconies. At first it ignores the players and hunts the survivors, spraying them with blue gas that turns them into zombies (some armed; these zombies drop Incendiary Grenades, which work very well on it).
- Grey gas: shooting its body makes it vent gas that hurts at close range and knocks you down on Normal (about 1.5 health blocks). Its gas on a Dying player kills them.
- Tongue Shove: its grab. It can be countered (ZR just as it lunges). If it catches you it’s a QTE: fail it and you’re Dying, and if you were already in the red, you die.
- Weak point: the worm-like head that pops out when it kneels.
- Before placing the blue Madonnas, reload everything and both of you equip the Semi-Auto Sniper Rifle; the shotgun is risky because of the gas.
- Shoot its legs from range (rifle or Wing Shooter) until it kneels. A Remote Bomb or a grenade makes it kneel at once; incendiaries also do heavy damage.
- While it kneels, run in for the coup de grâce (ZR next to it) or a point-blank shotgun blast to the head. After a Remote Bomb, that coup de grâce kills it outright: it’s the fastest route. Back off as soon as it stands.
- Kill the freshly turned zombies from range and pick up their incendiaries. In co-op, one player shoots the legs (or sets off the Remote Bomb) and the other waits nearby for the coup de grâce.
- If it grabs you, follow the QTE (waggle the stick and press what’s shown). Don’t hug it on low health.
- Reward: the Underground Keycard by its body and, down the passage, the 4,000 SP chest.
I Prefer Them Alive achievement (and the bronze medal Saved one or more survivors in the cathedral): kill the Lepotitsa before it infects the last two women, Jenny and Megan. They always outrun it and only become vulnerable once they reach the altar. A Remote Bomb followed by the coup de grâce is fastest; failing that, explosives + rifle + damage skills. On Amateur it dies sooner. If you fail, replay checkpoint 2-3 Cathedral from Chapter Select.
Boss — Deborah Harper
A two-level chamber around the primitive altar; Deborah leaps between them. Her human body is practically invulnerable: damage goes in through the glowing orange and yellow glands on the tentacles on her back, which shatter with a few handgun shots. Body shots do a little damage, but not much. Attacks:
- Chest-pierce strike: she spins down from above and impales you; waggle the stick to break free, then counter.
- Claw swing: long horizontal reach at ground level.
- Dash attack with claws out.
- 360 spin: she leaps and lands next to you spinning. Move away when she jumps.
- Helena has her own QTE when Deborah straddles her; failing it means heavy damage or death.
Part one: the altar.
- Shoot her a few times to trigger a short cutscene. At her first attack, dodge until the floor gives way.
- Aim for the tentacle glands. When she poses on the upper level with her appendages out, it’s free damage: dual Wing Shooters (Leon) or the Picador (Helena).
- There are 2 explosive barrels: only shoot one when Deborah is right next to it.
- With enough damage she falls on her back with a tentacle out: get close, strike, and follow the prompts (on Switch, B then ZR) to tear off a claw. Destroying 3 tentacles triggers the next cutscene.
- Zombies spawn now and then: they’re weak and drop ammo (shoot their lanterns).
- If you see Helena in her QTE, help her. At the end she smashes the floor and the group splits (the descent is in “2-6 Primitive Altar”).
Part two: the mine cart.
- Lie on your back: hold ZL and dodge backwards (stick back + B). Lying down you’re immune to almost all her attacks and to the tunnel’s 4 beams; standing, you’d have to duck each one with the two buttons shown. Ada can only lie down holding a gun other than the crossbow.
- When she attacks, shotgun her glowing parts from the floor.
- Must do: shoot the TNT drum blocking the track when the cutscene prompts you. Miss it and it’s game over. The other 2 barrels on the track only hurt you.
- Second bout: first shoot a barrel rolling down the track, then empty the shotgun into her. Bronze medal for killing 5 zombies in the cart: Killed 5 zombies while in the minecart.
Finale. The cart crashes. Leon pulls Ada up (partner action). Leon’s platform has 2 × 9mm Ammo and 2 vases; Helena’s has 1 × 9mm Ammo. Quickly: shoot the glowing tip of the tentacle going for Helena before the platform gives way; miss and it’s game over. The Semi-Auto Sniper Rifle is quickest. Deborah falls. Reward: the end of the chapter, the achievement Buried Secrets and the Silencer - Gold dog tag template. This chapter’s copper story medals are Made it to the cathedral, Solved the mysteries of the cathedral and Relieved Deborah of her suffering.
Don’t leave without:
- Serpent Emblem #5 (cemetery obelisk), #6 (stained glass above the entrance), #7 (the first sink you drain in the lab restrooms) and #8 (past the 2nd cave archway, shoot it). All four unlock the Helena Harper figures.
- The three fixed SP chests: 5,000 SP (the sarcophagus in the fenced plot of the cemetery), 4,000 SP (the passage under the altar) and 5,000 SP (the back room of lab cell 012).
- I Prefer Them Alive (Jenny and Megan).
- The Red Herb in the coffin on Helena’s path and the Semi-Auto Sniper Rifle for both of you.
- Medals: every enemy outside the cathedral and 5 zombies in the mine cart.