Leon and Helena reach Tall Oaks (USA, 29 June 2013) after President Benford turns into a zombie, and they have to get out of Ivy University in the middle of the outbreak. The chapter is one long escape, almost all of it against zombies: the campus, the sewers and the subway, the town streets and a siege in a gun shop with survivors. This is where you meet the campaign’s basic enemies (zombies, zombie dogs, the Shrieker, the Bloodshot and the Whopper) and get the Shotgun. In local co-op, P1 is Leon and P2 is Helena; you do almost everything together, with different jobs in the elevator, at the staff-building door, on the subway train and at the alley gate.
Chapter order: Visitors room (Liz’s father, Serpent Emblem #1, First Aid Spray) → elevator with Liz → parking garage → classrooms (herbs, Incendiary Grenade) → garden reception → staff-building alarm (Serpent Emblem #2, Campus Keycard) → metal detector → police car → sewers and subway tunnels (trains, dogs, Serpent Emblem #3) → stopped train → the spitters’ platform → Tall Oaks streets → pub and the family’s house (Backdoor Key, Shotgun) → Shrieker → gate split → second bar (Serpent Emblem #4) → gas station → gun shop: 3 hold-outs, Bloodshot and Whopper → rooftop → bus vs the Whopper.
Before you start:
- Weapons. Leon starts with the Wing Shooter (dual-wield with X while holding ZL) and the Survival Knife, which doesn’t use the physical-combat gauge. Helena carries the Picador and the Hydra; only she picks up the Hydra’s 10-Gauge Shells. Halfway through, both of you get the Shotgun.
- Ammo. Save shotgun shells, Incendiary Grenades and Remote Bombs for the Shrieker, the Bloodshots and the gun-shop Whopper. Ordinary zombies get a shot to the head or legs and a melee blow (melee does extra damage to them).
- Healing. Don’t mix herbs early: Red Herbs are coming, and Green + Red makes 6 tablets instead of 1. Keep the First Aid Spray equipped (D-pad up/down): it restores full health, used next to your partner it heals both of you, and if it was already equipped when you went down you can use it while Dying (you can’t switch items in that state).
- Co-op. All progress, Skill Points (SP) and skill purchases live on player 1’s save. According to one source, an emblem player 2 breaks counts for player 1, and what drops from a crate can only be taken by one of you. Share out with “Give to your Partner” from the Item Slot.
- No shop, no typewriters. The game saves on its own at each checkpoint (1-1 to 1-5) and at several in between; the gun shop is the main one. Skills are bought when the chapter ends.
- SP. This chapter has no fixed SP containers: points come from enemies (armored zombie 400 per one guide, Shrieker 1,000, Whopper 2,500) and from crates.
- Rank: each category is graded on its own, and the A grade is accuracy 70% or better, 2 deaths or fewer, 1:25:00 or less and 80 kills or more (Famitsu’s official guide table). All four at A gives an S rank; three at A is already an A rank.
- You can skip the horde on the police-car street, the rifle-toting zombie soldiers on the Tall Oaks street and the zombies behind fences.
- Missables: the gas-station barrels and loot before you cross the gate to the gun shop, and the medal for the 3 rooftop zombies, earned during the gun-shop siege. Nothing is missable for good: it all replays from Chapter Select.
- There are no Story Intersections here: the first one comes in Leon Chapter 2 (checkpoint 2-7 Altar Corridor, with Ada).
Difficulty: what changes in this chapter
- Amateur: the police-car ignition, the train dodges and the other instant-death QTEs are done for you, and mash meters fill faster. Action Button Assist: Auto does the same on any difficulty.
- Normal: this guide’s baseline.
- Veteran: enemies attack more often, get up sooner, are harder to stun and grab you more often. The dogs and the Bloodshots are where you’ll feel it most.
- Professional: every hit takes at least 2 health blocks, enemies never drop Green Herbs and random boxes only give SP. Ration the fixed herbs listed here: they’re all you’ll get. The zombie dogs in the first tunnel are especially dangerous on the higher difficulties.
- No Hope: at least 2.5 blocks per hit, failing a grab QTE leaves you Dying, skills are disabled (you won’t be able to buy at the end of the chapter) and the SP enemies drop are doubled.
1-1 Campus - Visitors Room (no enemies)
You start in an office after the President cutscene. The door on the right leads to another empty office. Go down the hall to the lobby and through the left doors into the dining hall: you can aim, but not fire.
- Go downstairs, chase the shadow to the back of the kitchen and open the red door together (partner button, A). Inside is Liz’s father, a university professor looking for his daughter.
- Serpent Emblem #1: in that same room, go around the table with the computer to the small janitor’s closet; the emblem is on top of the top shelf. Shoot it (it unlocks the Leon S. Kennedy file).
- Follow the professor back through the kitchen (the rats can be killed: they drop nothing, but they count as kills for the rank), cross the dark dining hall and go through the doors by the stairs.
- While he unlocks the doors, go upstairs: there’s a First Aid Spray by the corpse at the end of the walkway.
- You pass the exit sign (barking outside), help with the beams, and “HELP” written in blood marks the piano room, Liz’s room.
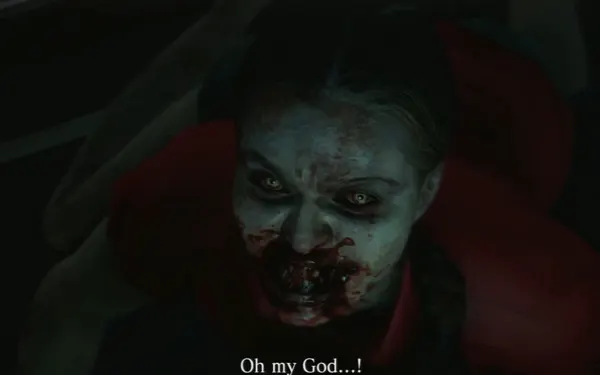
The elevator (different jobs). Liz turns inside the elevator. If you’re Leon: rotate the left stick to shake her off, then shoot her off Helena (one shot kills her). If you’re Helena: shoot her off Leon first, then rotate the stick to break free. The doors open onto a group of zombies: mash melee (ZR) to get out into the parking garage.
Parking garage. Slow zombies: use melee to save ammo. A man collapses by a car in the middle, with 9mm Ammo next to him. The zombie on the right by a shutter has a knife stuck in it: headshot it, then melee it face to face for a special finisher. Leave through the red door at the far right end, the monitor room (cutscene).
1-2 Campus: the classrooms
Before going upstairs, 9mm Ammo by the light, next to some boxes. The windows and plant pots in the upstairs hall break.
- Large lecture room: go right and down; 2 zombies wake up, plus a zombie professor behind the desk. Green Herb at the top of the leftmost stairs. Leave on the right.
- Double-door classroom: a zombie leaps at you as soon as you open them, so melee it straight away. There’s a female zombie behind the lecturer’s desk and another sitting by a chair, playing dead. Loot: 9mm Ammo and Green Herb (at the back).
- Lecture theatre: a zombie with its back to you (instant stealth kill: walk up behind it and press ZR) and one on the floor that rises as you get close (quick shot with ZL + ZR, then melee). Loot: 9mm Ammo and Green Herb.
Side classroom (optional, recommended). It’s the door on the left in the next hallway. As you enter, a Red Herb in the upper-right corner; on the front desk, 2 Incendiary Grenades and 9mm Ammo. 2 zombies rise as you approach. Trick: run past the floor zombie to the left corner and shoot the fire extinguisher beside it. Round the corner of the hallway there are more zombies: headshots from range, melee for the last ones. Open the double doors together.
Garden reception. Hunnigan tells you to reach the gate. The zombie ahead can be set up for a special wine-bottle melee, and so can the catering lady on the left (vault the table to stagger her). 2 × 9mm Ammo by the vending machines. A Red Herb and a Green Herb on the tables left of the gate (one per table), guarded by another catering zombie. The gate needs a keycard: it’s in the staff building.
1-2 Staff building: the alarm and the Campus Keycard
The hallway. Go through the double doors on the left side of the garden: there’s a checkpoint and a short hall with bodies between two sports fields. Take everything before you touch the door: 2 × 9mm Ammo and a Green Herb. During the siege you won’t have time, and what the zombies drop disappears; the fixed pickups are still there when you come back through this hall with the keycard. Note the 2 fire extinguishers (one on the bench, one on the wall).
The siege. Opening the far door together sets off the alarm, and the zombies from the sports fields pour in through the windows until Hunnigan gets the lock open from her end (about 90 seconds).
- Back off to the far end of the hall and shoot the extinguishers when a group is close.
- Throw an Incendiary Grenade if they bunch up. A tablet also refills the physical-combat gauge, so you can keep meleeing.
- When Hunnigan opens it, Leon and Helena rush in and the zombies won’t let them shut the door. If you’re Leon: shoot the 2 zombies in the doorway; there’s a box of 9mm Ammo on the floor, and it stays there if you don’t take it then. If you’re Helena: complete the QTE to hold the door. If you fail, the zombies don’t break in, but Leon still has to kill them. Helena bars the door and there’s a checkpoint.
Offices. This building holds 5 × 9mm Ammo in all: 2 in the hall, 1 on the floor by the door, 1 in the first office drawer and 1 in the drawer by the windows in the second.
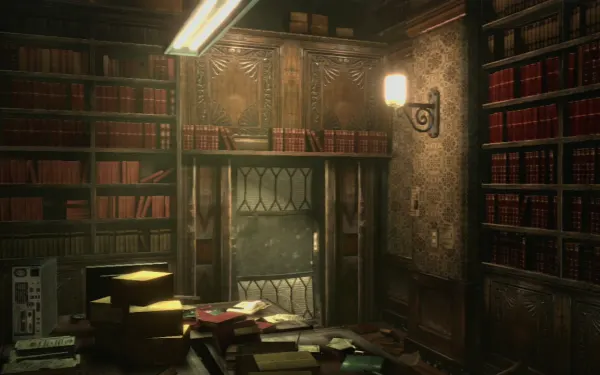
- First office: the drawer of the desk left of the far door has 9mm Ammo. The library room is empty.
- Second office: it has 2 drawers that open. The one by the windows has 9mm Ammo; the one by the body (the right one) has Serpent Emblem #2 (the Leon and Adam file). Break it with a shot or the knife.
- Kick the next door in together. The Campus Keycard is on the shelves in the back room, in the corner with the red light. The floor zombie wakes as you take it: counter it (ZR just as it attacks) or come in from the left and step left.
- On the way back: the girl in the chair in the other room revives, the barred door is now open, and in the hall one zombie comes through the window and two on the floor get up. As you reach the exit, 4 zombies drop from above.
1-2 The gate and the police car
Back in the garden, zombies drop in: melee is enough. Open the gate with the keycard and walk through the metal detector: its alarm draws a horde, and the zombies left behind the gate aren’t worth fighting. Kill only the 3 or so that get in your way. On the street, go right around the corner and sprint, vaulting the barricades, to the police car at the far end. Don’t fight the whole street.
Inside the car. There’s no time limit. Only Leon searches the car; Helena can only move the camera. The glovebox (right) and the wipers (left) are empty: the key is in the sun visor (look up). Then follow the prompts to start it: RT, LT, RT on Xbox, which is ZR, ZL, ZR on Switch; always follow the on-screen icon. The car flips, the horde can’t reach you, and you shouldn’t waste ammo on it. Go down the manhole.
1-3 Sewers and the first tunnel
Sewers. Before the red door, 2 wooden crates and 1 wooden box. In the tunnel go left: on the right, live wires in the water hurt you.
First subway tunnel.
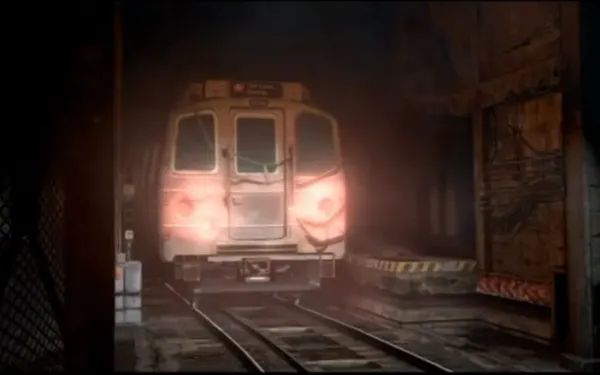
- Zombies in the lit spots. When the train comes, press the two buttons shown together to dodge it (X + A on Xbox, Y + B on Switch); the train also mows down the zombies on the track.
- 3 zombie dogs jump you by the burning barrel: a dog barks once, pauses, barks twice and charges. Dodge sideways (ZL + stick + B) or counter the leap (it kills outright); Helena’s Hydra is the best gun you have here. By the barrel, 2 wooden crates and 1 wooden box.
- More zombies, then the second train (another QTE).
- At the end, electricity blocks the way and the zombies run through it: kick the door on the left together.
Dark stairwell. At the bottom of the second flight there’s a wooden crate and a zombie against the wall that leaps (quick shot). In the next corner, a wooden crate and a wooden box.
1-3 Second tunnel, the stopped train and the platform
Second tunnel. Drop in and turn right straight away: Serpent Emblem #3 is under the front right of the parked train car, at rail level (the Field Operations Support file). If you miss it, you can also spot it when you step out of the train and turn around, under the right side of the car. Further on there’s a group with leapers: stomp them while they’re on the floor. If you have a Remote Bomb, this group is a good target. A third train comes down the other track and can’t be dodged with a QTE: stay on the opposite track.
The stopped train (different jobs). A zombie waits in the corner below the platform. If you’re Leon: inspect the door and boost Helena onto the roof (A). If you’re Helena: drop through the hole in the roof and unlock the door from inside; sprint and jump down the hole and you roll past the zombie waiting below. The first cars are empty. From the green-dress zombie that spits acid onward, stick to quick shot plus melee. Shoot the zombie lurking outside before you hop off, and take the free stomp on the one in front of the train.
The platform.
- 3 wooden crates (they usually hold Remote Bombs).
- The shutter button won’t open it until you free the woman trapped in the train.
- A horde of acid-spitting zombies comes in: an Incendiary Grenade or a Remote Bomb placed by the shutter breaks it up. Watch your back, because 1 or 2 come from behind.
- Once enough spitters are down, two leapers arrive.
- At the top of the stairs: 1 zombie and 2 wooden crates. Open the gate together to get out to the street.
1-4 Tall Oaks streets
The first street. Up the stairs, a stealth kill and 2 wooden crates. Hunnigan calls on the radio.
- The firefighter zombie lunges with his axe at the first player to reach the top and sticks it in the wall: that’s a free hit. You can also shoot his tank from a distance (the blast hurts everything near it), or his arm for a melee prompt.
- A car covered in zombies comes down the street and crashes into a pole and a fire hydrant: in its path, it takes 1 block off you. The zombies around it ignore you unless attacked; melee them.
- A wooden barrel by the container down the street and another in the waste-disposal area on the left.
- Push the car off the trapped man together (partner action). A motorcyclist crashes into the car and the school bus, and 3 zombies climb out of that bus.
- At the end of the road, turn left. Here there are U.S. Special Forces zombies with assault rifles: shoot their legs if they bother you, or ignore them along with the rest of the street. The zombies behind the alley fence can’t be reached.
Walkway and the armored zombies. Corridor, ladder and walkway (ignore the ones below). Jump the gap (the first one across gets a QTE as the zombies try to pull them down), kill one and kick the door together. There’s a checkpoint.
- This area has armored zombies (400 SP each per one guide): the one by the flames can be stealth-killed from behind.
- In the alley, a zombie with its back turned, then a flashlight zombie. 2 wooden barrels by the fence.
- Climb the ladder: a back-turned zombie on the walkway (environmental kill). Push the container together (it lands on a car, the alarm goes off and zombies come), go over the bus and drop down.
- Don’t go straight: an armored vehicle races down an alley further on and crashes; if it catches you it takes nearly 2 blocks. Turn right into the pub.
1-4 Pub, the family’s house and the Shotgun
Pub. A wooden barrel by the counter. In the backyard, a zombie lying on the ground pounces on your partner; wooden barrel by the fence.
The house. The dead family and the TV news (a submarine that disappeared 3 days ago, which ties into Ada’s campaign). The back door is locked: the Backdoor Key is on the bodies on the couch and opens that door. One of the bodies revives, and so does the man lying by the locked door.
The Shotgun. Outside, on the dead riot policeman, is the Shotgun, plus 2 wooden barrels by the fence. Weapons spawn for each character, so both of you pick it up. Don’t shoot the zombies behind the fence. Go through the door: cutscene and the first Shrieker.
1-4 The Shrieker and the gate
Shrieker chase. The Shrieker flees through buildings and a basement with barrels: follow it.
- Its scream lures zombies and does a little damage. Zombies climb the fence; one carries a fire extinguisher (shoot it when it’s in a group). More zombies leap out of the sheds.
- Its weak point is the throat sac when it swells red: one Shotgun blast pops it. A Remote Bomb works too.
- As it dies it lets out a last scream that kills the zombies around it, so it’s best finished in the middle of a group. It’s worth 1,000 SP.
The gate: short split. Inspect the locked gate, go upstairs and boost Helena over.
- If you’re Leon: plant a Remote Bomb before the boost if you have one and hold the top of the stairs. The zombies come up in a line, and there’s an explosive barrel left of the fence. Wing Shooter headshot plus melee saves ammo.
- If you’re Helena: shove the dumpster off the catwalk, then unbar the door.
1-4 Second bar and the gas station
Second bar. Fire outside the windows. A wooden barrel behind the counter. Serpent Emblem #4: walk around the counter; it’s on the counter in the left corner, below a bulletin board and left of the exit double doors (the Zombies file). It can still be broken even after the gas station blows up.
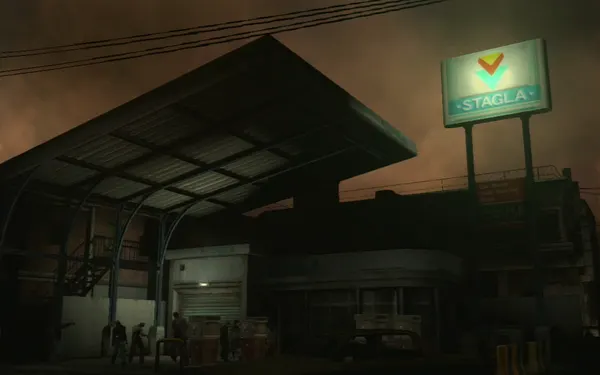
The gas station. There’s a checkpoint as you enter. A couple and a cop on his first day come with you; they can’t die.
- What you can lose here: the guides list no fixed ammo or herbs. The only containers are 2 wooden barrels by the cars blocking the alley, and they’re still there after the explosion. What you do lose is whatever the zombies you kill on the pump forecourt drop, because the crash knocks the pumps over and the explosion closes that area off. Pick that loot up before the van arrives, and break the 2 barrels before you cross the gate: the gun shop starts there.
- Kill the Shrieker before anything else when it appears on top of the truck (Shotgun).
- Don’t stand where the survivors were, in the corner of the gas station: a runaway armored vehicle swerves in and crashes right there, knocking the pumps over (Dying or game over depending on where it hits you).
- Armed U.S. Special Forces zombies come out of the vehicle (an Incendiary Grenade works).
- When the pumps spray gasoline, step back and shoot it (a grenade or Remote Bomb works too). You can ignite it at any time without hurting yourself or your partner; the camera keeps pointing at the spray until you do. The blast kills almost everything: then you collect the drops. Solo, your AI partner won’t ignite it: you have to.
- The cars in the alley move aside. Break the 2 barrels, cross the gate with your partner and follow the cop to the gun shop.
1-5 The gun shop: ground floor and first hold-out
This is a main checkpoint: if you quit, the game resumes here. On the ground floor, on the cashier counter, are a First Aid Spray, 2 × 9mm Ammo and 3 Incendiary Grenades (another source says 2). If you missed the Shotgun, it’s on the shelves by the door.
First hold-out. Hold the windows and, before the Bloodshots arrive, plant your Remote Bombs. Peter, one of the survivors, leaves the group and is killed by a Bloodshot, and another wave with Bloodshots comes in.
- The zombies about to turn into Bloodshots are the ones with glowing pink eyes and red cloth or a red hood; the Bloodshot itself is a skinless creature, faster than the zombies.
- Their leap is the danger: counter as it jumps, shoot it in mid-air or sidestep (it can’t turn in the air).
- Its weak point is the heart in its chest, and the Shotgun is your best tool. When it kneels, melee.
Medal “Killed 3 zombies hiding on the rooftop” (Bronze). The zombies stand on the rooftops, balconies and walkways of the buildings across the street from the gun shop. From the ground floor, look out the window opposite the front counter: there’s one on the roof across the street, and another on a lower walkway of that building also counts. You can shoot them from the ground floor, from the upper floors and from inside the bus. Kill 3. (UNVERIFIED: a single source.)
1-5 Second floor, store room and rooftop
Second floor. In the first room, a Red Herb left of the door next to 9mm Ammo; 12-Gauge Shells in the desk and a Remote Bomb on the sofa. Mix your herbs now.
Second hold-out. The red-eyed zombies can shed their skin into Bloodshots. Put a Remote Bomb in the corner where the two window walls meet. Hold on until the Japanese boy fixes the shutters.
Next room. 2 × 12-Gauge Shells and a Green Herb in the desks. This is where the Whopper bursts through the door (see the boss below, steps 1 to 4).
Store room and rooftop.
- Before the stairs, turn left into the store room: 2 Incendiary Grenades.
- Upstairs, a Remote Bomb left of the roof door.
- On the rooftop, a cutscene (the owner falls). As soon as you have control, plant the Remote Bomb by the fence: a large group with a Bloodshot and a Whopper vaults it. Some zombies carry canisters on their backs: shoot them.
- When the prompt comes up, go down the fire escape and get on the bus.
Boss — Whopper
The gun shop’s giant zombie. It isn’t an official boss, but it’s the chapter’s hardest fight and it shows up at three moments: it breaks down the door of the second-floor room, vaults the rooftop fence and blocks the street in front of the bus. Its body shrugs off damage (it takes half damage) and its weak point is the legs and feet: a hit to a leg stuns it for 5 to 8 seconds. Attacks:
- Arm swing: 1-2 health blocks; dive or slide.
- Bite: it lifts you and bites (3 health blocks). It stretches its arms out first, so back off.
- Ram: 2-3 health blocks. It can’t change direction: sidestep.
- Stomp: executes a Dying player. Get your partner up fast (R next to them to give tablets).
- Second-floor room. It breaks the door down with zombies and, per one guide, a Bloodshot: kill the Bloodshot first. Slip past it back into the previous room.
- Plant a Remote Bomb in the doorway and detonate it as it comes through. Incendiary Grenades almost always stun it.
- With the Shotgun, about 2 blasts per leg drop it; you can also counter the arm swing for a leg sweep. With the Whopper down, finish it off together or give it a point-blank Shotgun blast to the head.
- Co-op roles: one of you shoots the legs while the other clears zombies and watches their partner’s back; never both stand in front of its ram.
- Rooftop: the Whopper vaults the fence with a Bloodshot. Detonate the Remote Bomb you left there, kill the Bloodshot (it’s faster and more dangerous) and repeat the leg plan.
- Bus: from inside you can’t aim at its feet. Empty the Shotgun into its head while the other player deals with the spitters and leapers climbing in through the side windows. When it’s pushed back, the cutscene ends the chapter.
Reward: 2,500 SP for each Whopper you kill. Finishing the chapter gives the Gone to Hell achievement and the Silencer dog-tag template. The chapter’s medals: Copper, “Escaped the zombie-infested campus”, “Made it to the surface” and “Cooperated with survivors to fend off zombies”; Bronze, “Killed 3 zombies hiding on the rooftop” (in the gun shop, see above).
Don’t leave without:
- The 4 Serpent Emblems: #1 janitor’s closet, #2 drawer by the body in the second office, #3 under the car in the second tunnel, #4 second-bar counter. All 4 unlock the Leon S. Kennedy figures, and emblems count the moment you break them: if you missed one, come back from Chapter Select and quit as soon as you have it.
- The Shotgun for both of you (if someone walked past it, there’s a backup on the gun-shop shelves).
- The 2 gas-station barrels and the forecourt loot before you cross the gate.
- The 3 rooftop zombies medal, from the gun shop or the bus.
- Mixed herbs (Green + Red) and the First Aid Spray equipped for chapter 2.
After the chapter (skills): the skill menu opens now, and player 1 runs it (one SP wallet for both). Buy Defense Lv1 (3,200), Item Drop Increase (3,500) and Breakout (2,800), plus Zombie Hunter Lv1 (3,000) as soon as 30 zombie kills unlock it. Then save for Firearm Lv1 (12,000). Buying any skill gives the One Is Better Than None achievement. Skill set for both of you: Firearm, Defense, Zombie Hunter. In split-screen don’t buy Team-Up, Field Medic or Lone Wolf: they only work with the AI partner. On No Hope skills are disabled.