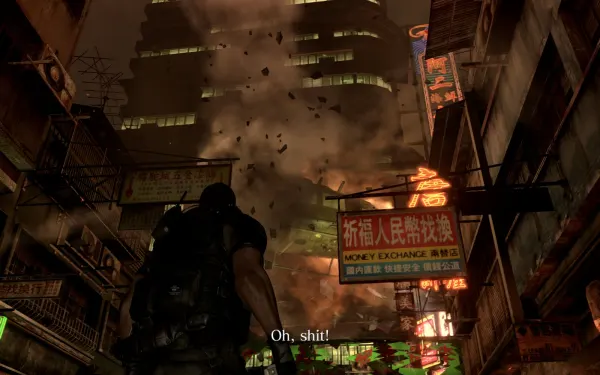
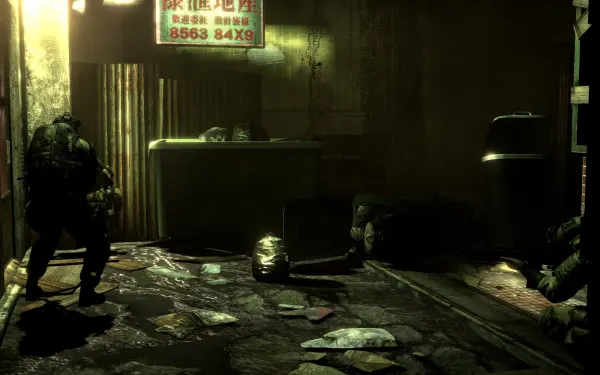
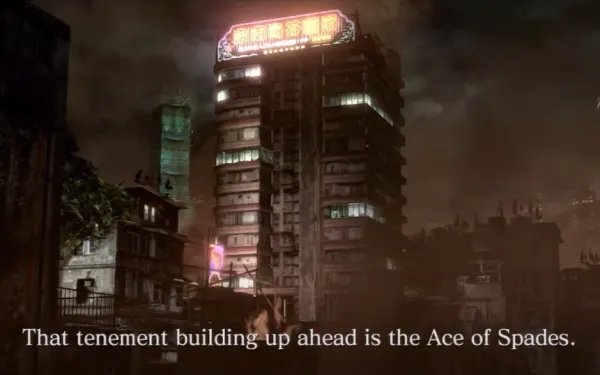
Chris and Piers’s campaign begins. It’s late June 2013 in Waiyip, Lanshiang (China): Chris, back with the BSAA after six months away, arrives with his squad to respond to a bioterror attack. The chapter is a military push fought almost entirely against J’avo, the mutant soldiers who use guns and cover and mutate whichever body part you damage: the main street and its buildings, the back alleys, the rooftops (with a cable where the pair splits up and a long hold-out at the Ace of Spades) and a tenement where you rescue three hostages before it gets bombed. In local co-op, P1 is Chris and P2 is Piers; you do almost everything together, with different jobs on the cable, the partner doors, the stalled elevator and the final jump. There’s no boss: the hard parts are the tenement Noga-Trchanje and the rooftop hold-out.
Chapter order: 1-1 Main Street (building under construction, street cut off by the blast, first J’avo, downed BSAA helicopter, first Ruka-Srp, the pig butcher shop with Serpent Emblem #1) → 1-2 Back Street (alley shoot-out, the partner-door room with Serpent Emblem #2, two Ruka-Srp) → 1-3 Rooftops (metal stairs: Silent Killer and Give a Little Push, long-range Serpent Emblem #3, cable split, red doors, Ace of Spades hold-out until Bravo team arrives) → 1-4 Tenement (3 Noga-Trchanje, hostages on floors 8 and 7, Serpent Emblem #4 and the 2,000 SP chest on floor 6, the elevator and the RPG J’avo, cafeteria, 5,000 SP suitcase, slow-motion last hostage, escape before the bombing).
Before you start:
- Weapons. Chris starts with the Nine-Oh-Nine (9mm, 15 rounds), the Assault Rifle for Special Tactics (5.56mm, 30 rounds, full-auto only) and the Combat Knife: its quick shot (ZL + ZR) is a 2-hit combo that costs no ammo and staggers mutated J’avo. Piers doesn’t get the Nine-Oh-Nine: he carries the MP-AF, a machine pistol (9mm, 30 rounds, single or full-auto; switch with X while holding ZL) and the Anti-Materiel Rifle (12.7mm, 10 rounds, pierces every enemy but not walls, 2 zoom levels and a thermal scope on X while aiming). There’s no new weapon in this chapter.
- Ammo. Both of you use 9mm, and in split-screen whatever comes out of a crate is a single pickup for the pair: share it (5.56mm is Chris’s, 12.7mm is Piers’s). Save Flash Grenades and Hand Grenades for the tenement Noga-Trchanje and the Ace of Spades hold-out.
- Healing. This chapter has almost no fixed healing: the item lists count no herbs (one source mentions a Green Herb and a Red Herb in the butcher shop), so your herbs come from the wooden crates, whose contents are random. The only documented First Aid Spray is the one in the elevator (Chris only, see below).
- Against J’avo, go for the head. Hit an arm or the legs and that part mutates (sickle arm, moth wings, spider legs). Headshot to stagger, melee (ZR), stomp: that’s how you save ammo.
- No shop and no typewriters. RE6 has no manual saves. It saves only at checkpoints with a pin icon (where you return when you die) and at the main checkpoints (where you resume if you quit the game). This chapter’s Chapter Select checkpoints are 1-1 Main Street, 1-2 Back Street, 1-3 Rooftops and 1-4 Tenement. The COMs menu (−) → Return to the latest checkpoint restarts the checkpoint without dying: that’s what you use to repeat the Silent Killer and Give a Little Push push. Wait for “Saving…” to disappear before you quit.
- Skills. If you’re coming from Leon’s campaign, whatever you bought works here; swap Zombie Hunter for J’avo Killer Lv1 (3,000 SP) as soon as it unlocks after 30 J’avo kills.
- Fixed SP: a 2,000 SP chest on floor 6 of the tenement and a 5,000 SP suitcase on the last-hostage floor. Evil Resource lists no other fixed SP pickup in this chapter; the rest comes from enemies and crates.
- S rank (A in all 4 categories): 70% accuracy or better, 2 deaths or fewer, 1:20:00 or less and 70 kills or more (up to two categories at B still give an A). If you’re short on time, you can skip the crates on Piers’s rooftops, but not the 4 Flash Grenades in the upper left corner (see “Piers’s route”).
- Missables: Serpent Emblem #3 before you take the cable, #4, the 2,000 SP chest and the floor 6 crates before you go to the elevator, and Chris’s First Aid Spray in the elevator before you open its doors. Nothing is lost for good: everything can be replayed from Chapter Select.
- There’s no Story Intersection in this chapter.
Difficulty: what changes in this chapter
- Amateur: life-or-death QTEs complete themselves and mash meters fill faster: Chris’s hand-over-hand crawl along the cable, the Noga-Let’s grab and the floor collapse in the escape. Action Button Assist: Auto does the same on any difficulty.
- Normal: this guide’s baseline. According to IGN, with an AI partner the cable goes smoothly, because the AI covers Chris very well.
- Veteran and Professional: the cable takes practice (IGN) and ideally some skills. Heal before you take it. J’avo mutate more often on the higher difficulties, so Piers should use the Anti-Materiel Rifle’s scope on the 4 balcony J’avo before they mutate into flyers. If you’ve already finished all 4 campaigns, Infinite Machine Pistol (for Piers’s MP-AF) helps a lot here. On Professional every hit costs at least 2 blocks, enemies never drop Green Herbs and random crates give only SP: in a chapter with almost no fixed healing, arrive with plenty of herbs and don’t waste the elevator First Aid Spray.
- No Hope: at least 2.5 blocks per hit, skills are disabled, you continue with the health you had at the checkpoint and every SP piece is worth double.
1-1 Main Street: the building under construction
You drop from the helicopter onto the top of a building under construction, with no enemies. There’s 1 crate by the landing spot. Go all the way downstairs: 2 crates behind the covered green container, then the door.
In the street, an explosion cuts off Route 4 and HQ reroutes you to Route 9. Go to the far end of the street, kick in the door on the left and head up: 2 crates immediately on the left, and another by the door of the next room. Out, through the next door and the halls, outside again, round the corner, and kick in the door at the end.
1-1 The first J’avo and the downed helicopter
The first J’avo shows up here. Headshots: J’avo use cover, regenerate and mutate whichever body part you damage.
- You reach the downed BSAA helicopter (an RPG J’avo brings it down). Round the corner to the right, 3 crates.
- Enter the building and kill the J’avo inside (one hides behind a pillar): a good place to practise Chris’s melee.
- In the back alley, the next building has 2 crates. At the next door a J’avo attacks a soldier.
- Down the street, another pops out from behind a box: an easy headshot. Before the next door, 2 crates (one on each side).
The first Ruka-Srp. After the cutscene inside that building, a J’avo mutates a sickle arm. The arm soaks up damage and shooting it triggers more mutation: shoot the head and follow up with melee. Its downward slash hits hard and can put you straight into Dying; in co-op, have one player stagger it from the front while the other goes in for the melee. Go upstairs, through the door and hop down: 1 crate; kick the door.
1-1 The pig butcher shop: Serpent Emblem #1
You reach a butcher shop with hanging pigs (through a door and up the stairs). Landmark: it comes right after the hallway where the glass gets shot out. If you reach the hallway where an explosion slams you into the wall, you’ve gone too far: go back.
- Serpent Emblem #1: on the back shelf, on the left. It unlocks the file Chris Redfield.
- One source mentions a Green Herb and a Red Herb in the same shop: if they’re there, take them.
1-2 Back Street: the alley shoot-out
Street firefight: take cover behind the boxes and lean out only for headshots. The storeroom on the right has 2 crates and there’s another at the far end of the road. The door on the far left has 2 more. When the shoot-out ends, a door slides open and 3 creatures come out: meet them from cover.
Serpent Emblem #2. The room at the end of the alley, whose door you open together (A at the same time by the door). It’s a storeroom that looks empty: the emblem is behind the breakable crates in the corner, by two large bookshelves. Break the crates and shoot it. File: The BSAA. Landmark: it’s the storeroom you reach right after Chris shouts “Take cover! I don’t want to lose anyone!”.
1-2 More Ruka-Srp and the first Noga-Let
Go up into the next building: several J’avo, and a mutated one smashes a BSAA soldier through a door.
- Ruka-Srp: ground it with melee and finish it with the head stomp. 1 crate in that room. A second Ruka-Srp comes from the next room, which has another crate. Tip: Chris’s knife quick shot (ZL + ZR) staggers a mutated J’avo so you can chain the melee.
- Noga-Let (the J’avo that flies on moth wings): a Flash Grenade drops it instantly for a finisher; if you shoot, aim at the dangling human head or the fleshy part of its belly. Its airborne grab is a QTE: fail it and it snaps your neck.
Leave through the double doors.
1-3 Rooftops: the metal stairs (achievements)
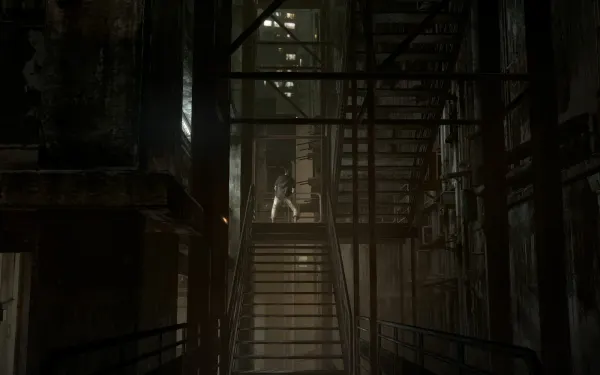
2 crates before you go up. On the metal stairs (about 15 minutes into the chapter), the first J’avo stands with his back to you at the railing. Run up to him without shooting and press ZR at the prompt: you throw him over the railing, and that counts as both a stealth attack and a push off a high place. The other J’avo at the top of the stairs does see you.
These are PlayStation, Xbox and Steam achievements (Switch has no achievements): restart the checkpoint (− → Return to the latest checkpoint) and repeat until Silent Killer (5 stealth attacks) and Give a Little Push (10 enemies knocked off a high place) unlock; each push counts even though you restart. On Switch nothing pops: if you want it as a challenge, keep count yourself and tick it off in the achievements list; if not, move on.
1-3 The rooftops and Serpent Emblem #3
J’avo on the rooftops opposite. Climb the small ladder, jump across, another small ladder and a walkway to the next building: 3 crates before the long ladder. Up top, J’avo on two higher platforms (one at the back, one near). Kill them all and heal up before the cable pole in the far right corner (especially on the higher difficulties).
Serpent Emblem #3 (long range, lost once you take the cable). Before you take the cable, from the highest rooftop in this first area, turn around with your back to the wooden bridge: in the distance there’s a building under construction (one guide describes it covered in blue tarp) and the emblem sits on a post or radio antenna at the very top. Another landmark: move forward a bit on the metal stairs and look right and up. With the Nine-Oh-Nine or the assault rifle it’s very hard. The player on Piers handles it with the Anti-Materiel Rifle’s zoom on the first pass. File: J’avo. Once you split at the cable you can’t come back for it (only through Chapter Select).
1-3 Split: the cable
The cable is a set-up: an explosion drops Chris, who ends up hanging from a pipe.
- Chris (P1): mash the button shown on screen (B) to go hand over hand to the next building.
- Piers (P2): cover Chris with the rifle. Headshot the 4 J’avo on the balcony (and kill any that mutate into flyers); as Chris nears the building, 2 more J’avo appear there. MP-AF up close, rifle at range.
Chris’s route. Once across, kill the leftovers and climb the long ladder: 2 crates immediately on the left. You can shoot J’avo in the distance and one behind a fence. Next ladder; drop down on the left: 2 crates. Jump the gaps between the red plates. Another ladder and drop down: 2 crates (a J’avo attacks). In the far right corner of that roof, 2 more crates. Ladder up: 1 crate. Cross the walkway and drop down to regroup with Piers.
Piers’s route (and going back for the grenades). Piers carries on across his own rooftops covering Chris. Once you’ve regrouped, it’s worth going back onto Piers’s rooftops: 4 crates and 4 Flash Grenades in the upper left corner, a ladder → 3 crates, and the ladder on the right → 2 crates. Those grenades are exactly what you need for the hostage tenement.
1-3 The red doors
Kick the red door together (A), then a short ladder and a walkway. A blast throws you onto the next roof (2 crates in the corner). Kill the 2 J’avo on the building opposite first. Next roof, ladder, walkway (explosive barrel at the end), drop down: 1 crate, and another red door you open together.
1-3 The Ace of Spades hold-out
Waves of J’avo come for a few minutes, until Bravo team (Marco Rose’s) lands.
- Before things get heavy: this roof has 3 crates and 3 Flash Grenades on a low platform to the right. Take them.
- Shoot the red explosive barrels when J’avo bunch up next to them.
- Split: Piers’s Anti-Materiel Rifle pierces several J’avo in a line, so Piers stays high against the ones coming from afar while Chris works the entrances with the assault rifle and the knife.
- Priority always goes to the sniper and rocket-launcher J’avo.
- When Bravo arrives, clean up and open the green doors.
1-4 Tenement: toward the hostages
Kick in the next door; it’s halls with cover. In the far upper-left hall, 2 crates; door and downstairs. First door: 1 crate on a table. Rooms, then a small hall with J’avo: 3 crates, plus 3 more at the far end.
The 3 Noga-Trchanje. Before the door near the corner, have a grenade or a Flash Grenade ready: inside are 3 Noga-Trchanje (spider J’avo that hang from the ceiling, run along walls and move very fast). Aim for the head; their pounce is easy to counter and a single stomp kills them. Don’t let them swarm you: stand back to back. In the small room at the end, before the door: 3 crates.
1-4 The hostages: floors 8 and 7
This first part of the building is 3 floors (8, 7 and 6), and it holds 2 hostages to free (the objective reads “Free both hostages”); the 3rd is the one on the floor below, under the cafeteria.
- After the room with the 3 Noga-Trchanje, the spiders carry the hostages off. Go back after them through the rooms you already cleared (there are more Noga-Trchanje on the way): dash (left stick forward + B) and shoot the spider in the head so it drops the hostage, being careful not to hit the hostage.
- Go up the stairs to floor 8, packed with little shops and enemies: the next hostage is there. Kill the spider carrying them; a Flash Grenade lets you see the spiders coming round corners.
- Go down following the marker to floor 7 and kill the spider carrying the other hostage.
- With both free, go down to floor 6, which has no enemies. The enemies on floors 8 and 7 don’t respawn: clear them and look for ammo and SP at your own pace.
1-4 Floor 6: Serpent Emblem #4 and the 2,000 SP chest
Floor 6 has plenty of items and it’s your last chance at them: before you drop through the hole or go to the double-door elevator at the back, sweep the whole floor.
- Serpent Emblem #4: walk down the central aisle; on the left there’s a butcher shop with hanging ducks and the emblem is behind the counter, on a table at the back. File: J’avo Mutations.
- 2,000 SP chest (King): keep going left past that butcher shop to an alcove with a chest (Evil Resource).
- Crates: the 2 on either side of the huge hole in the floor, 1 loose one at the back and 2 + 2 in two small rooms.
1-4 The elevator and the RPG J’avo
The elevator is at the back of floor 6 (double doors). It stalls:
- Chris boosts Piers up, then Piers hoists Chris (A next to your partner).
- In the shaft, kill the RPG J’avo first: it does heavy damage and can kill you. Chris has the better angle; Piers has to step aside and aim up through the grating.
- Before you open the doors, break the elevator crates: there are 2 (a box and a wooden crate). According to IGN’s table, Chris finds a First Aid Spray in one of them right after the RPG hits the elevator, and you can’t go back to the elevator for it. It’s a single source and doesn’t say whether it’s fixed or a random crate drop, so break them with Chris.
- Open the doors together, take cover and kill 3 J’avo.
1-4 The cafeteria
About 12 J’avo. In this chapter they rarely mutate from headshots, so headshot everything. Use the walls as cover and melee in the narrow walkways; have one player cover each side so they can’t flank you.
Loot: room right of the elevator, 2 crates; far right, 3; far left corner, 2. Door on the far left and downstairs.
1-4 The last-hostage floor and the 5,000 SP suitcase
One guide calls it the 2nd floor (Evil Resource calls it “level 1”). Round the corner, 2 crates, and the same on the other side. The middle section has 2 crates.
5,000 SP suitcase (Queen): against the far back wall, below a Chinese advert with a cook, on the outer part of the room. Take it before you drop down to the hostage area: look around for SP before starting the rescue with your partner, then climb down the ladders into the centre.
1-4 The last hostage (slow motion)
Kill the captors. When a J’avo drops from above, time slows down: shoot him before he kills the woman, and don’t hit her (whoever has the most accurate weapon at that moment takes the shot). The Bronze medal “Rescued a hostage from certain death” most likely comes from this shot (unverified).
1-4 Escape before the bombing
There’s an invisible timer: take too long and you see the two of you buried alive and restart from the checkpoint. Don’t pick anything up: run.
- Climb the ladder in the elevator shaft, behind the area, and a flight of stairs to the next floor (the objective marker shows the way).
- Vault the obstacles toward the 2 J’avo rushing you: as you get close, an explosion kills both of them and barely hurts you, so don’t waste ammo.
- Go right around the pit (counter-clockwise) and dash for the exit.
- The floor collapses. The first to reach the jump usually gets no QTE; the second triggers the collapse and has to follow the QTE (move the stick or press the button shown) to climb up. If you arrive together, you both climb. Pressing dash cancels the jump team action so you can help your partner up. Stay together.
- Jump through the gap in the wall to finish.
In the closing cutscene Chris sees a cocoon and remembers Finn. The chapter’s story medals: “Returned to the fight after 6 months”, “Saved a valuable hostage” and “Escaped from a building being bombed”.
Don’t leave without:
- The 4 Serpent Emblems: #1 on the back shelf of the pig butcher shop, #2 behind the crates in the partner-door storeroom, #3 on the antenna of the building under construction before the cable (with Piers’s rifle) and #4 behind the counter of the duck butcher shop on floor 6, before the floor 6 elevator. All 4 together give the Chris Redfield and Chris Redfield VER.2 figures, and each emblem counts the moment you break it: if one is missing, go back through Chapter Select and quit as soon as you have it.
- The 2,000 SP chest in the alcove on the left past the duck butcher shop (floor 6), together with emblem #4, before the elevator.
- The 5,000 SP suitcase under the cook advert, before you drop down to the last hostage.
- The 4 Flash Grenades on Piers’s rooftops and the 3 on the Ace of Spades roof.
- The First Aid Spray in the elevator crates (Chris), before you open its doors.
After the chapter (skills): the Rescue the Hostages achievement and the Hand Grenade - Gold dog tag template. IGN recommends Firearm first (Lv1 12,000 SP, +10% firearm damage). Then J’avo Killer Lv1 (3,000) if you’ve killed 30 J’avo, plus Defense Lv1 (3,200), Breakout (2,800) and Item Drop Increase (3,500) if you don’t have them from Leon’s campaign. The skill set the guides suggest for both of you in this campaign: Firearm, Defense, J’avo Killer. Skills you buy work in every campaign; in split-screen don’t buy Lone Wolf, Field Medic or Team-Up.