This is a flashback: Edonia, in Eastern Europe, on 24 December 2012, six months before chapter 1. Chris and Piers fight through a civil war alongside Finn Macauley, a rookie on the squad who is AI-controlled and can’t die. The chapter pushes through a ruined city behind a BSAA APC: the street and the first Ogroman (a giant you can drive off or kill), the rail yard, a bridge where the pair splits up and has to take out a tank, the intersection with Jake and Sherry in front of City Hall (3 anti-aircraft guns and 2 Ogroman) and City Hall itself, with the first Napad and Strelats. This is where you get the Assault Shotgun. In local co-op, P1 is Chris and P2 is Piers: the achievement at the start and Serpent Emblem #6 belong to Piers, and on the bridge each of you has your own route.
Chapter order: 2-1 City in Eastern Europe (window snipers: Bring the Heat, advance with the APC, machine-gun tower, walkway) → Ogroman in the street → the red-door room (Assault Shotgun) → alleys and the truck → rail yard with Finn (Serpent Emblem #5) → 2-2 The Bridge (split: Chris crawls to Finn, Piers blows up the tank, Piers’s Serpent Emblem #6, container, paratroopers, covering Finn) → 2-3 In Front of City Hall (intersection with Jake and Sherry: 3 anti-aircraft guns, 2 Ogroman, underground passage) → 2-4 City Hall (Serpent Emblem #7 under the stairs, back-up Assault Shotgun, 3 Napad, “Ada” and Serpent Emblem #8, 3 Strelats, escape).
Before you start:
- Kit. You carry the same kit as chapter 1 (Chris: Nine-Oh-Nine, assault rifle and knife; Piers: MP-AF and Anti-Materiel Rifle). Finn Macauley comes along: AI-controlled and invincible.
- New weapon: the Assault Shotgun (12-gauge, 7 shells) for both of you. The first chance is the red-door room after the first Ogroman, and if you skip it you get it again in City Hall. Field weapons spawn for both players.
- Ammo. Save the shotgun shells and your Hand Grenades for the City Hall Napad, and Piers’s 12.7mm for the Ogroman, the tank and the snipers.
- New enemy: here J’avo grow shield arms (Ruka-Bedem): the shield bounces bullets, so melee to the face and then the finisher, or flank it.
- Co-op: the chapter splits at the bridge; decide beforehand who plays Piers, because Serpent Emblem #6 and the Bring the Heat achievement are his.
- No shop and no typewriters. There are no manual saves. The main checkpoints, the ones Chapter Select offers, are 2-1 City in Eastern Europe, 2-2 The Bridge, 2-3 In Front of City Hall and 2-4 City Hall. Dying sends you back to the last pin checkpoint, and − → Return to the latest checkpoint lets you retry the Bring the Heat shot without dying.
- Skills. J’avo Killer still pays off, since nearly every enemy is a J’avo, and Breakout shortens grabs.
- S rank (A in all 4 categories): 70% accuracy or better, 2 deaths or fewer, 1:30:00 or less and 70 kills or more. The B bands are 60-69.9%, 3-5 deaths, 1:30:01-1:50:00 and 60-69 kills; up to two categories at B still give an A.
- Chrysalid achievement: enemies that hatch from chrysalids (Napad, Strelats) count toward B.O.W.s Are Ugly (100 in total); breaking the chrysalid before it hatches doesn’t count.
- Missables: Serpent Emblem #5 while you cover Finn in the rail yard (gone the moment he blows the car), #6 on Piers’s bridge route, and the 4,000 SP from each Ogroman if you let the APC or the airstrike deal with them.
Difficulty: what changes in this chapter
- Amateur: life-or-death QTEs complete themselves and mash meters fill faster, including the one for boarding the Ogroman. According to the wiki, the board-and-stab method has to be repeated from Normal up, so on Amateur a single boarding per Ogroman is probably enough (unverified).
- Normal: this guide’s baseline. Plan on 2 or 3 boardings per Ogroman; its swipe costs 2 blocks.
- Veteran and Professional: enemies hit harder than on Normal. On Professional (per the wiki) J’avo mutate more often (more shields) and get up sooner, and every hit costs at least 2 blocks, so a Napad’s charge will almost always leave you Dying; enemies never drop Green Herbs and random crates give only SP: save the fixed herbs from the bridge, the underground passage and City Hall.
- No Hope: at least 2.5 blocks per hit, skills disabled, you continue with the health you had at the checkpoint and every SP piece is worth double (an Ogroman gives 8,000).
2-1 City in Eastern Europe: Piers’s achievement
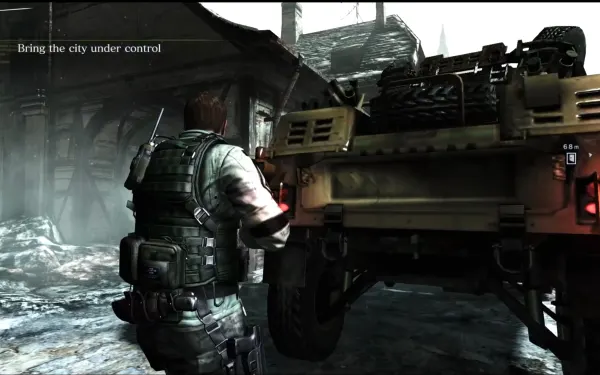
You start crawling out of the overturned vehicle, behind the Humvee. Bring the Heat (Piers only): before advancing, run back as far as you can, aim the Anti-Materiel Rifle, switch on the thermal scope (X while holding ZL) and headshot one of the snipers in the far windows, 50 m or more away. If you miss, restart the checkpoint and try again. Chris stays in cover meanwhile.
2-1 The street advance
- Take cover at the back of the Humvee and peek right: 2 J’avo (go for the head; hit their arms and they mutate into shields).
- Move left to the pillars (1 crate). A truck crashes in from the left and drops 3 J’avo.
- Ahead is an elevated walkway over the road and, on the right, a tower with a mounted machine gun. From the left pillars you can enter an enclosed stone room with 1 crate; J’avo run in here, so meet them with melee.
- The APC and the Humvee move up. There’s a sniper in a window, upper left (a job for Piers).
- 5 or 6 J’avo come out of the tower onto the walkway, and one may have a rocket launcher on the tower: kill him first. A J’avo always stands up behind the sandbags.
- The stairs on the left go up to the walkway, with about 3 J’avo round the top corner: a good spot for a Hand Grenade. Red Herb by the wall at the top of the stairs (only one guide lists it). In the beaten-up room, 3 crates.
The footbridge and the Ogroman. On the footbridge over the street there’s a red partner door. When you try it, a cutscene: the Ogroman appears. It can’t hurt you on the walkway, so don’t waste ammo. It throws a vehicle that wrecks the walkway behind you (it can’t hit you) and Chris and Piers jump down into the street. See Boss — Ogroman (the street).
2-1 The red-door room: Assault Shotgun
After the Ogroman, before following the APC, go back through the now-open gates, climb the stairs to the walkway and open the red door where the Ogroman first appeared with Piers (A, both of you). Inside: Assault Shotgun, First Aid Spray and 1 crate. The shotgun spawns for both players.
2-1 The alleys
Follow the APC through the gate. There are J’avo on both sides of the narrow street: a covered area on the right (quick shot + melee), J’avo up high on the left and one in the window at the end. 1 crate in the room on the right. The next gate is a checkpoint.
Next ambush: a J’avo on top of the APC and 2 dropping down at the right corner. The building on the right holds 2 snipers and 2 crates, with J’avo dug in left and right. The stairs on the left give you height over the snipers, and you can crawl under the blown-out wall by the staircase to flank them: have Piers pin them from the stairs while Chris flanks. At the end of the street a truck with 4 J’avo screeches in from the left: have a Hand Grenade ready. The APC stops on a mine: clear everything, truck team included.
2-1 The rail yard: Serpent Emblem #5
Finn blows the fence and you drop in. He needs about 2 minutes to blow up the train car blocking the way, and you cover him.
- Enemies: J’avo come from the right, including 2 rocket-launcher J’avo: one on top of the middle train car (kill him right away) and one behind sandbags at the far end. They stop spawning after a few minutes.
- Loot: immediately on the left, a ladder goes up onto a train car: 2 crates and the best sniping spot for Piers. On the ground, the cut-out car on the left has 1 crate, and you can enter the middle car: 2 crates.
- Serpent Emblem #5 (missable on this pass): while you cover Finn, fight your way into the J’avo side (the right) to the far-right corner: the emblem is visible through the barred windows of the shack at the back, under the rocket-launcher J’avo. You can’t reach it from the ledge next to Finn. File: Piers Nivans. The moment Finn blows the car, the section ends and the emblem is left for Chapter Select. Split: Piers covers from the car on the left while Chris pushes down the right side to the shack.
2-2 The Bridge: before the split
After the blast, go downstairs: Green Herb on some barrels to the right and 2 crates. Restock here: the next section is played apart. At the destroyed walkway, Chris boosts Piers (A) and throws him across the gap.
2-2 Chris’s route (P1)
- Walk onto the bridge: it collapses and Chris has to crawl to Finn along the FAR LEFT side; anywhere else he falls off and you die. Tap B (dash) for bursts of faster crawling.
- Finn treats a wounded soldier and you cover him: take cover behind the truck. Turret on the right: kill the gunner as soon as you can.
- Move forward to draw the tank out, so Piers can shoot the fuel tanker behind it.
- There’s a sniper ahead: kill him or rush the ladder at the end of the bridge (left side, past the tank).
- On the upper bridge, 2 crates. At the top, lower the ladder for Piers and take the crate. Drop down: 4 crates.
2-2 Piers’s route (P2) and Serpent Emblem #6
- Follow the soldier into the building. Below are 2 bunkers (3 J’avo, then 2): they’re grouped, so grenades.
- 1 crate, then up to the overwatch: 2 crates. Snipe the turret gunners and, when the tank inches forward, a single shot on the red fuel dump / tanker destroys the tank and most of the enemies on the bridge.
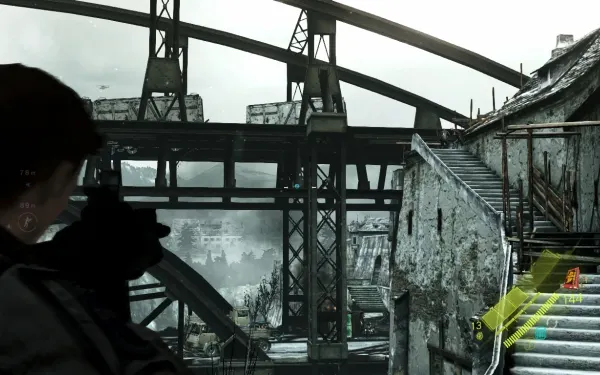
- Serpent Emblem #6: after blowing up the tank, follow the concrete path and look at the beams under the bridge, next to the first support column: out the far right window, against the upper support beams. File: Ogroman. Sources disagree on whether Chris can hit it too (three guides say it’s Piers only; another says Chris can after climbing the ladder; another, with a grenade shot from opposite where Finn is tending the soldier): let the player on Piers break it. According to one source, in split-screen an emblem broken by player 2 also counts for player 1 (unverified on Switch).
- Climb the stairs (2 crates at the top), cross the bridge through the train car and drop down at the red-and-white striped area: 3 crates. Wait for Chris’s ladder.
2-2 The container and the paratroopers
Back together, return to the upper bridge and push the white container out of the way (A, both of you). Now you hold the position: J’avo parachute onto the bridge; kill one in mid-air for the Bronze medal “Killed a paratrooper enemy in mid-air” (Piers’s rifle is the easiest way). Wait for Finn and cover him while he sets the explosives: stay in cover and save ammo. When his bar fills, the section ends (medals “Provided cover while Finn set the bombs” and “Gained control over the bridge”).
2-3 In Front of City Hall: intersection with Jake and Sherry
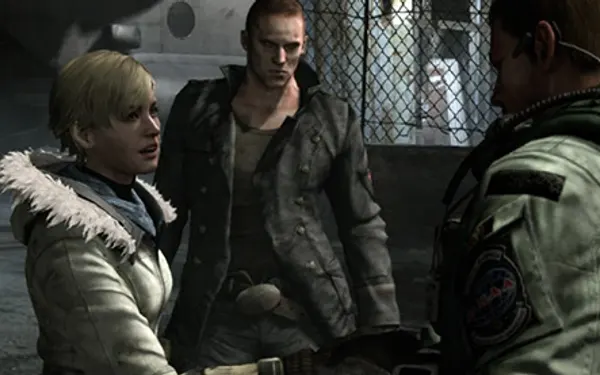
This is a Story Intersection: the section is the same as Jake’s chapter 1 (1-4). Offline, the other pair is AI-controlled; on Switch, intersections have their own menu and the host picks which one to join. The route guide (L) doesn’t work here: stay close to the BSAA team. Objective: Finn destroys 3 anti-aircraft guns while you deal with 2 Ogroman. There are no emblems here. See Boss — Ogroman ×2 (in front of City Hall).
Gun 1. In the building right behind you at the start (2nd floor). 2 crates in the nearby room, 2 by the stairs and 2 in the room with the destroyed back wall. That building has a room where J’avo drop in at both ends and the Ogroman can’t reach you: a good spot to farm SP and items, and the best moment to kill the first Ogroman, since there are few enemies.
Gun 2. Go down the street and round the corner. Finn blasts the door of the centre building (on your left). Take cover on the right, kill the J’avo, 1 crate, and go upstairs. Defend Finn: J’avo spawn from the rubble on the roof at 2 spots (take one each). Once the gun is destroyed, J’avo snipers appear (with laser sights: the red line warns you) and the second Ogroman arrives.
2-3 Gun 3: the underground passage
- Go downstairs and drop through the hole on the ground floor into the passage. 1 crate on the left and a Green Herb on the right.
- At the junction, 2 crates on the right; in the other passage, 2 more. At the next corner, a Red Herb and 3 crates.
- There’s a hole in the wall and 1 crate at the end of the corridor, but from here on the Ogroman kicks out the ceiling grating and tries to grab you: don’t stand under the openings.
- IGN says opening the passage doors earns extra medals, but this chapter’s medal list has no door medal: don’t waste time on them.
- Go through the hole and follow the tunnel to the end (ignore the first ladder). Shoot the turret gunner, break 2 crates and kick down the ladder by the corner.
- Hop off the building on the left to the third gun and distract the Ogroman while Finn sets the charges. A hole in the road by gun 3 drops into an unexplored stretch of tunnel with 1 crate.
Once all 3 guns are down, the BSAA airstrike comes in and the section ends (medal “Neutralized 3 anti-aircraft guns”).
2-4 City Hall: the lobby and Serpent Emblem #7
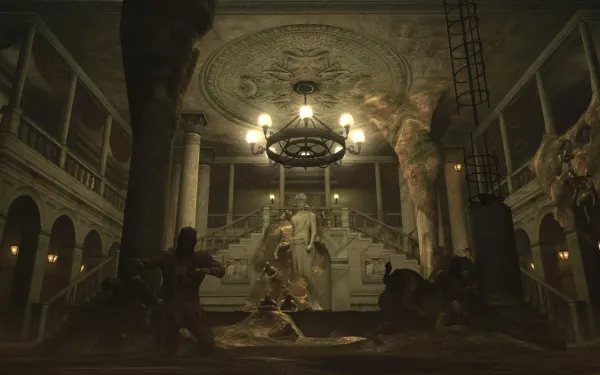
The lobby is a warped version of the Spencer mansion hall: 1 crate on the main floor, by the counter. Before going upstairs, go to the corridor behind/under the central stairs (the room full of chrysalids): Serpent Emblem #7 is on the wall, between two paintings. File: The C-Virus. Take it before following Finn upstairs.
2-4 The radio room: back-up Assault Shotgun
Go up through the door Finn points at. In the hall you see a mysterious figure and a J’avo bursts out of a door. In that room: 2 crates, Assault Shotgun, 9mm Ammo and 2 × 12-Gauge Shells. This is the shotgun’s back-up location if you didn’t take it at the footbridge (one guide lists it in both places). In the restroom, 1 crate.
2-4 The first Napads
Drop down into the next hall: the chrysalids hatch 3 Napad (armoured, slow, very strong and extremely tough). 12-Gauge Shells on a bench and 3 crates.
- Weak point: the flesh on its back, under the armour.
- Tactic: when it stands still after a charge, drop a Hand Grenade at its feet to blast the armour off and empty the Assault Shotgun (or Chris’s assault rifle) into the exposed flesh. Once stripped and staggered, melee does big damage.
- Attacks: its charge costs 4 blocks and knocks you down, and it chains into a pummel that leaves you Dying: it has a visible wind-up, so sidestep at the last moment. Its normal smash costs 2 or 3 blocks, and if you’re behind it you get a backhand.
- Co-op: have one player keep it busy from the front while the other gets behind it: meleeing its back during its smash stuns it, and you can repeat that.
- Reward: each Napad drops 1,500 SP.
2-4 Toward “Ada” and Serpent Emblem #8
Next door: 3 crates; round the corner into the adjacent room, with J’avo. In the room on the right: Red Herb, 12-Gauge Shells and 1 crate. In the next room, a cutscene: a woman who looks like Ada Wong appears (she’s actually Carla Radames).
Serpent Emblem #8. In that same room, instead of heading straight for the door, check the partitioned half-room on the right, behind white curtains: the emblem is on top of a metal locker in the corner, next to a Green Herb. File: Napad.
2-4 The Strelats
Follow her: hall (1 crate), the next door and straight to the 2nd floor, without fighting the Napads. On the walkway there are 3 Strelats: lizards that climb walls and fire spike volleys at range (their neck fins steam just before); up close they spit a toxic gas that drains health fast.
- Take cover and close in: shotgun up close, Nine-Oh-Nine or MP-AF at range. Chase it when it runs so it can’t fire.
- It shrugs off bullets but is very weak to melee: slide into it (dash, then ZL) and, once one is weakened, its special finisher appears: ZR, B, ZR. A full Nine-Oh-Nine magazine at point blank usually does it.
- Each one drops 1,000 SP. 2 crates. You can only move on once all 3 are dead.
Past the next door, 1 crate, then drop down to the long hall.
2-4 The escape
- The remaining BSAA soldiers in the lobby are attacked by 4 or more Napads. You don’t have to fight: regroup upstairs and open the red door. Climb the nearby ladder: 1 crate at the top.
- The final maze: sources disagree on how many enemies it holds. IGN counts at least 2 Napads, one as you drop down and another that comes in through this section’s entrance, behind you, plus 3 or 4 Strelats; another guide counts 1 Napad and 2 Strelats. Watch your back: have one player face the rear while the other advances.
- The door on the right by the red light leads upstairs: 2 crates, and 2 more at the back of the area.
- Run or fight: you can run to the final door (the chapter ends the moment you use it) or kill everything for SP (1,500 per Napad, 1,000 per Strelat): a grenade and a burst into the flesh for the Napads. Go downstairs, open the door and the cutscene ends the chapter.
Boss — Ogroman (the street)
An Edonian giant that stalks you down the street while J’avo spawn in pairs from the walkway and the scaffolding (a good source of items). Weak points: the red growth on the back of its neck (the main one) and its open mouth; its crotch works from street level too, but it spills bile and isn’t recommended. Attacks: a striding swipe (2 blocks on Normal; it kills J’avo too), a stomp (minor damage, but it staggers you: never stand under its feet), a grab if you’re close (it squeezes you and drains health: shoot its face to break free, which is faster than wiggling the stick) and a head-height punch with a long wind-up. You have two ways out: survive about 5 minutes until the APC arrives and drives it off, or kill it, which gives 4,000 SP and items. Kill it.
- Get high. Once you jump down into the street, the L-shaped stairwell to the right of where you landed is safe: the Ogroman can’t hit you through the wall and J’avo have to come at you single file. That building has 3 crates.
- Shoot the back of its neck (or the mouth). Piers with the Anti-Materiel Rifle; Chris with the assault rifle.
- When it staggers, it drops to its knees and rests a hand on the edge of the building. From the 2nd floor, press ZR next to its arm to jump on, then mash the QTE button (B) to rip out a spine and stab it into the growth. It usually takes 2 or 3 tries, and the timer gets more forgiving each time. If you fail, it grabs you: shoot its face.
- Repeat. One guide says 2 boardings kill it, another that it normally takes 3: on Normal, plan for 2 or 3. On Amateur one is probably enough (unverified). Keep shooting until it bubbles and dissolves.
- Shortcut: lure it to the ladder on the building at the end of the street (on the left), under the electrical wire. When the wire shocks it, shoot the red part (on a first run you don’t have the shotgun yet: Piers with the Anti-Materiel Rifle, Chris with the assault rifle), jump on, do the QTE and repeat twice more.
- Co-op split: one player keeps hitting it from above while the other clears the J’avo; whoever is closest to its arm when it kneels does the QTE, and the other keeps shooting the growth.
- Its remains are poisonous and drain health: wait for them to disappear before collecting its drop.
Reward: 4,000 SP and the Bronze medal “Defeated the giant B.O.W. through its weakspot”. Afterwards, go back to the red-door room for the Assault Shotgun.
Boss — Ogroman ×2 (in front of City Hall)
Same attacks, same method, but there are two and they’re spread across the guns.
- First Ogroman (gun 1): from the gun-1 building, where it can’t reach you, shoot its face and the growth on its back until it staggers; jump on, rip out the spine and stab it in. Two or three times and it dies: 4,000 SP.
- Second Ogroman (after gun 2): it has no exposed growth and can’t be killed until you rip the mechanical device off its back (its regeneration spine) on the first boarding. To drop it to its knees, shoot its mouth or lure it into the power lines: the shock lets you jump on. After that, same as the first.
- In the underground passage it harasses you from above: don’t stand under the openings in the ceiling.
- Gun 3: since there are more snipers, it’s usually better to drop into the pit and distract it there while Finn sets the charges.
- Finale: the airstrike after the third gun kills any Ogroman whose growth is exposed, but gives no SP; you have to board the one that still has its device at least once. If you want the 4,000 SP from each, kill them yourself before the third gun.
Don’t leave without:
- The 4 Serpent Emblems: #5 in the shack in the far-right corner of the rail yard (gone the moment Finn blows the car), #6 on the beams under the bridge (Piers’s route), #7 on the wall between two paintings under the lobby stairs, and #8 on top of the locker behind the white curtains. All 4 together give the Piers Nivans and Piers Nivans VER.2 figures.
- The Assault Shotgun (the red door on the footbridge or, failing that, the radio room) and the First Aid Spray in the red-door room.
- The 4,000 SP from each Ogroman you kill yourself (the APC and the airstrike give nothing).
- Whatever Hand Grenades and shotgun shells you have left, for the Napads in chapter 3.
After the chapter (skills): the Tragedy in Europe achievement and the Hand Grenade - Copper dog tag template. IGN’s target for this pair is Firearm Lv3 (75,000 SP): with it, one shotgun blast at mid or short range stuns a Napad and a second point-blank to the head kills it. While you save up, get Item Drop Increase (3,500), Critical Hit Lv1 (3,500), Rock Steady Lv1 (3,500) and Eagle Eye (3,000, extra scope zoom: useful for Piers). If you’re short on SP, IGN suggests replaying chapter 1 to earn more.