You’re back in Lanshiang on 30 June 2013, right after chapter 1, on the trail of “Ada” (actually Carla Radames), the woman Chris blames for the death of his squad. The chapter is long and varied: the Poisawan district with web-spitting J’avo, a gunship you bring down with the Grenade Launcher alongside Jake and Sherry, the hunt for the Iluzija (an invisible snake) through a tenement block, the Gnezdo Marco turns into, the stilt houses with a second helicopter, the race against Leon and Helena at the medical center and a car chase. It has two Story Intersections and more fixed SP than any other chapter in the campaign. In local co-op, P1 is Chris and P2 is Piers: you split before the Iluzija and at the hack, and swap seats during the chase.
Chapter order: 3-1 Tenement - Poisawan Entrance (playground slides, Serpent Emblem #9 in the dead end, blood trail, Glava-Sluz) → 3-2 Poisawan Courtyard (intersection with Jake and Sherry: the construction pit, the Noga-Skakanje, Grenade Launcher, helicopter 1 on the rooftops) → 3-3 Poisawan Inner Area (Serpent Emblem #10 on the bunk bed, split, Iluzija across 3 rooms, 10,000 SP suitcase, electrocution, Marco’s Gnezdo, Marco’s C4 Explosive) → 3-4 Stilt Housing Area (boats, 2 Napad, fleeing the helicopter, helicopter 2 at the floating restaurant, Serpent Emblem #11, 4,000 SP suitcase) → 3-5 Medical Research Center (intersection with Leon and Helena: lasers, race to the elevator, hack, up to 14,000 SP) → 3-6 Main Thoroughfare (chase: Serpent Emblem #12 on the double-decker bus, Chris at the wheel at the end).
Before you start:
- Kit. You carry your chapter 2 kit: Chris with the Nine-Oh-Nine, Assault Rifle for Special Tactics, Combat Knife and Assault Shotgun; Piers with the MP-AF, Anti-Materiel Rifle and Assault Shotgun.
- New weapon: the Grenade Launcher (6 rounds, for both). It’s mandatory: you get it just before the first helicopter. Each helicopter goes down to about 6 40mm Explosive Rounds on Normal, so don’t spend 40mm rounds on J’avo before both helicopters are done. Load every round into the gun as soon as you pick it up: the magazine doesn’t take inventory slots.
- Ammo. Save 12-gauge shells for the Iluzija and the Gnezdo, and a Hand Grenade or two for the 2 Napads on the boats.
- Skills. Breakout (2,800 SP) shortens the Iluzija’s grabs and the Glava-Sluz webs; J’avo Killer is still the best skill for the chapter.
- Options: if your sight’s laser blends into the background, change its colour before the Iluzija: it’s how you find it.
- Co-op: the chapter splits twice (before the Iluzija and at the hack) and in the chase the two of you swap seats; decide who plays Chris, because he has the best angle on Serpent Emblem #12.
- No shop and no typewriters. There are no manual saves. The resume and Chapter Select checkpoints are 3-1 Tenement - Poisawan Entrance, 3-2 Poisawan Courtyard, 3-3 Poisawan Inner Area, 3-4 Stilt Housing Area, 3-5 Medical Research Center and 3-6 Main Thoroughfare. For the 3-5 farm, wait for “Saving…” to disappear after the “Ada” cutscene before you quit.
- S rank (A in all 4 categories): 70% accuracy or better, 2 deaths or fewer, 1:25:00 or less and 55 kills or more. The B bands are 60-69.9%, 3-4 deaths, 1:25:01-1:45:00 and 40-54 kills; up to two categories at B still give an A.
- Missables: Serpent Emblem #11 before you jump off the floating restaurant, #12 at the car-park roadblock, the 10,000 SP suitcase before you climb the ladder in the Iluzija’s 3rd room, and the race and hack prizes (2 × 2,000 SP + a First Aid Spray, and 14,000 SP), which only appear if you beat Leon and Helena.
Difficulty: what changes in this chapter
- Amateur: life-or-death QTEs complete themselves and mash meters fill faster. That matters a lot here: the Iluzija’s constrict is instant death if you fail its QTE, and the Gnezdo swarm’s grab also lets go sooner. Action Button Assist: Auto does the same on any difficulty.
- Normal: this guide’s baseline. The “about 6 40mm Explosive Rounds” per helicopter is IGN’s figure for Normal.
- Veteran and Professional: enemies hit harder than on Normal. Per the wiki, on Professional they react faster and get up sooner, and mash QTEs (the Iluzija’s grab, the Glava-Sluz webs) fill more slowly. IGN gives no helicopter round count outside Normal: pick up every round from the crates and spend none outside the helicopters. On Professional every hit costs at least 2 blocks, enemies never drop Green Herbs and random crates give only SP, so don’t count on crates for 40mm rounds: the fixed ones are the 2 in the shack. Save the fixed herbs from the restaurant and the Iluzija pit.
- No Hope: at least 2.5 blocks per hit, skills disabled (no Breakout against the Iluzija), you continue with the health you had at the checkpoint, ranged enemies aim much better (the boat sniper and the car-park shooters) and every SP piece is worth double.
3-1 Tenement - Poisawan Entrance: the playground
Go through the destroyed building and down the street to the playground. You can ride the slides (faster, and they have their own sound): that earns the bronze medal “Slid down the slide”. Leave the playground through the big gate.
Serpent Emblem #9. Coming out of the playground gate, don’t follow the blood trail yet: go to the end of the street on the left, the dead end by the red gate, past a barricade. The emblem is on a pile of boxes in the corner. File: Finn Macauley. Take it before you climb the ladder.
3-1 The blood trail
- Follow the blood. Far right: Green Herb and 3 crates.
- Climb the ladder and kick the door across the corridor: 2 J’avo.
- There are 2 more ladders and 2 mutated J’avo spawn: hit them once and follow up with a shotgun blast to the head.
- Up top: 2 crates and the red door.
3-1 The Glava-Sluz
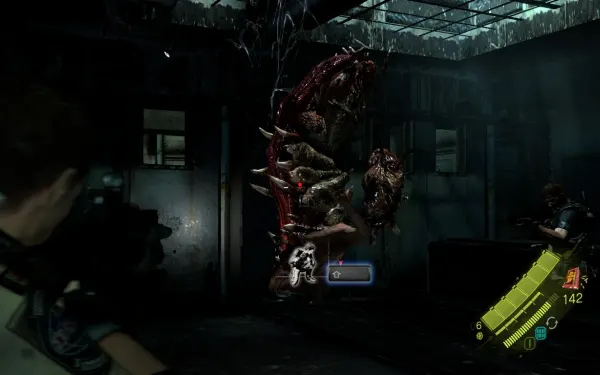
Past the red door wait the Glava-Sluz, J’avo whose head has mutated into an orb that spits sticky webbing and pins you in place (you can still shoot). It’s the mutation another guide calls the “2nd head”.
- Weak point: the head orb, from behind (the nape). The orb rises while it spits, so circle it and shoot it there; a few handgun rounds do it.
- If your partner gets stuck, walk up and press A to free them.
- More spitters wait in the next room.
- In the last J’avo room (after the very tall ladder): a First Aid Spray on a large box, plus 2 crates.
Open the next door together (A, both of you) to start the scene.
3-2 Poisawan Courtyard: intersection with Jake and Sherry
This is a Story Intersection: this section is the same as Jake’s chapter 4 (4-2). Offline, the other pair is AI-controlled; on Switch the intersections have their own menu and the host picks which one to join. Jake and Sherry are down in the construction pit while a helicopter attacks them; you cover them from above (they only really need help if they are human players).
- Where to stand: the lowest floor, under a building’s overhang, where the helicopter can’t reach you.
- Loot: left path, 2 crates and 3 more further down. Right path, 1 crate. Drop one level: 2 crates.
The Noga-Skakanje. Noga-Skakanje spawn (J’avo with grasshopper legs). Their weak point is the sac on the lower abdomen: 1 or 2 shots drop one. You can also slide into it (dash with stick forward + B, then ZL) to trip it and stomp its head. Watch its back kick: it can take about half your health, but it can be countered. Kill enough hoppers, then shoot the J’avo on the helicopter: cutscene.
3-2 The Grenade Launcher and helicopter 1
- Double doors, up the stairs and a ladder: 5 crates on the roof.
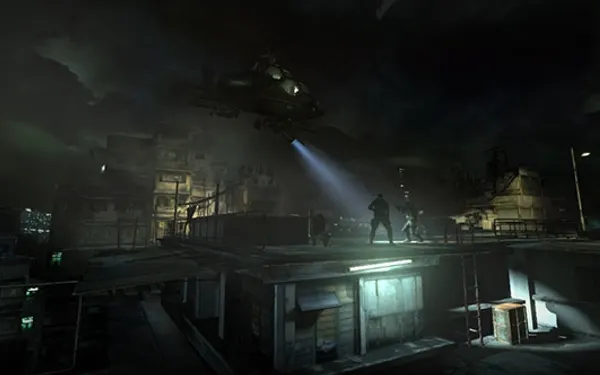
- In the next building, kick the door. The helicopter returns with rockets: get to safety.
- Straight ahead, in a shack, is the Grenade Launcher, with 2 × 40mm Explosive Rounds and a First Aid Spray (the spray is in a dead soldier’s hand, in an alcove). If you run past the shack when the attack starts, go back for it after the cutscene: you need it for this fight. Weapons in the field spawn for both players.
- Climb the ladder to a platform; the ladder at the back of the platform leads to 5 more crates (break them: they drop 40mm rounds).
- The fight: see Boss — Attack Chopper (the rooftops). Finishing it earns the medal “Shot down the helicopter”. Break any crates left and, on a replay, also take the ammo off the dead soldier.
3-3 Poisawan Inner Area: the tenement and Serpent Emblem #10
Go down the hall into an apartment. Small room right of the entrance: 1 crate. Kitchen: 1 crate.
Serpent Emblem #10. On entering, go left to the mahjong table and through to the bedroom past it. In the next room, the one with the TV showing static, the emblem is on the lower bunk bed. File: Chris’ Amnesia. It comes before the split, so either player can break it.
3-3 Toward the split
- Carry on to the hall overlooking Poisawan, go downstairs and kick the door: cutscene.
- Before following the blood trail, the other end of the corridor has 1 crate. Inspect the dead BSAA operative.
- Downstairs, kick the door: 2 crates.
- In the next room don’t bother shooting: the B.O.W. takes the soldiers no matter what.
- Through the next door, slide down the rope at the far end of the walkway.
- Move the debris together (A, both of you): cutscene, and the pair splits.
Chris’s route (P1). Through the 1st floor: 2 crates on the right, a room on the left with Reid (a team member) and 1 crate, and another crate behind the stairs. Go up to rejoin Piers.
Piers’s route (P2). Through the 3rd floor: about 5 breakables and no fixed item. Nothing to miss here.
3-3 The Iluzija hunt and the 10,000 SP suitcase
Back together, kick the door, drop through the hole in the next room and open the double doors. The Iluzija fight begins: see Boss — Iluzija. The 2nd room of the hunt has 4 crates, and the 3rd has 4 × 12-Gauge Shells.
The 10,000 SP suitcase (easy to miss). In the 3rd room, when the snake flees again, before you climb the ladder go through the ventilation shaft in the corner. It leads to a side room with 1 crate; the room next to it has 2 Green Herbs in the cabinets, 1 crate and a suitcase with 10,000 SP, the only one of that value in the whole game. Go back to the big room and through the door: cutscene and the Iluzija finale with Marco.
3-3 After the Iluzija: the Gnezdo and Marco’s C4
Marco hoists you up. Red Herb. Avoid the live wire, carry on down the hall and through the doors: cutscene. Carla ambushes Marco and the Gnezdo appears: see Boss — Gnezdo (Marco). There are 5 crates around. Pick up Marco’s C4 Explosive (key item) from what’s left and blow open the locked doors of that room with it: cutscene, then downstairs.
3-4 Stilt Housing Area: the boats and the Napads
- Drop down: 2 crates. Jump onto the boat and across to the dock.
- A J’avo sniper targets you: take cover behind the railing (the handgun reaches him too). On the boats behind you: 4 crates.
- More boats and more hoppers: kill the closest one, take cover and let Piers snipe. Enemies here are finite, so clearing the area works; fall back when a chrysalid opens.
- One J’avo turns into a Napad (on the left): a Hand Grenade at its feet to strip the armour, then a full magazine into the flesh on its back. On the next boat to the left, 2 crates.
- The sniper ahead becomes a Napad too: a grenade or the Grenade Launcher, then hit the flesh. Each Napad drops 1,500 SP.
- On the next platform, 3 crates. On the last boats, 3 crates; kick the door.
Fleeing the helicopter. After the cutscene, run across the boats without stopping to fight (a Napad and 2 hoppers can all be avoided; stopping here is suicide) to the floating restaurant, the red pagoda-shaped building. Climb the ladder to the 1st floor.
3-4 The floating restaurant: helicopter 2 and Serpent Emblem #11
The fight: see Boss — Attack Chopper (the floating restaurant). The restaurant’s 1st room has a Red Herb and 2 large vases; the 2nd has a Green Herb and 3 large vases (one source counts 2 Green Herbs here). The crates give plenty of 40mm rounds: if you have spares at the end, spend them on J’avo for skill points before you leave.
Serpent Emblem #11 (missable this pass). During the helicopter fight, look left across the water from the restaurant (one guide sees it from the upper floor, the one you reach by the ladder; Evil Resource, from the bottom): the emblem sits on top of a scaffold / a greenish hut across the bay (the guides describe it both ways, but all put it there). Shoot it from range: Piers’s Anti-Materiel Rifle is the easiest. File: Bosawan. Once you jump off the floating restaurant the map reloads and the emblem is left for Chapter Select.
After the restaurant. The helicopter crashes into the boat. Jump off. The J’avo drop in all at once: one well-placed grenade (and you can knock them into the water). 4,000 SP suitcase behind the barrels (by Ada’s jet-ski, before the ladder). Climb the ladder: 3 crates. Enter the hangar.
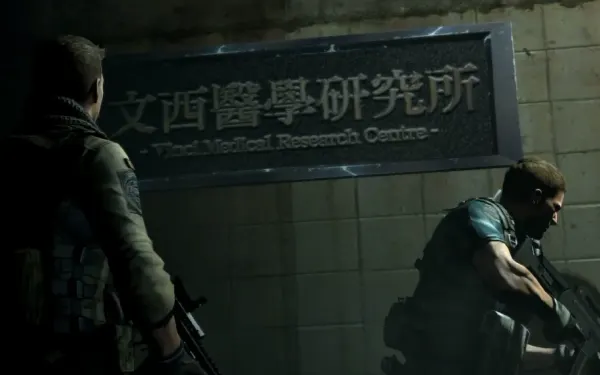
3-5 Medical Research Center: intersection with Leon and Helena
This is the same section as Leon’s chapter 4 (4-4), seen from the other side; offline, Leon and Helena are AI.
Laser corridor. Dash (stick forward + B) and slide with ZL under the beams; the gap is in the middle, on the left or on the right. At the end, smash the conductors / panels by the door to switch the lasers off, then take the elevator.
The race to the elevator. It’s a race against Leon and Helena, and there’s a prize:
- If you get there first, you enter room “01”: at the back is a smaller room with 2 chests of 2,000 SP each, a First Aid Spray right next to one of the chests and 3 crates. Bronze medal “Beat Leon and Helena in the race”.
- If they get there first, you go up another way: 5 crates and room “00”.
- Either room has 3 crates.
3-5 The hack (split)
Even if you don’t take the stairs, Chris and Piers always end up locked in the mine room.
- Break or open the red box on the door panel to start the hack.
- Piers (P2) stays at the console. The hack only progresses while he isn’t being hit: every hit he takes sets it back.
- Chris (P1) handles the moving mines: shoot them or set them off by running near them, always away from Piers. With the shotgun it’s easier to knock them aside or pop them before they get close. They go off with a ~1-second delay, so keep moving.
- It’s done when every light on the panel is green. Run to the end of the room.
The 14,000 SP (missable this pass). If you open the door before Leon and Helena, the next room holds 3 suitcases: 5,000 + 5,000 + 4,000 = 14,000 SP. If they win, you get nothing. In split-screen player 2 has no SP of their own: what they pick up probably goes to player 1’s pool (unconfirmed on Switch), so to be safe have player 1 open them.
SP farming. From Chapter Select, checkpoint 3-5: lasers, elevator, hack, the 3 suitcases, chase “Ada” to the next cutscene, wait for “Saving…” to disappear, quit and repeat. About 6 or 7 minutes per loop.
The scene with Leon. Drop onto the catwalk and chase “Ada”: cutscene (Chris and Leon aim at each other; Ada gets away).
3-6 Main Thoroughfare: the chase
Part 1: Piers drives and Chris mans the mounted gun (it doesn’t overheat). Chris only has to hose down enemies and trucks. Piers drives: he has to be fast so he doesn’t lose Carla’s trail, but not reckless, or the vehicle gets destroyed. Boost on the straights and dodge the barriers in the curves.
The car-park roadblock. In the multi-level car park the car stops at a J’avo roadblock with rocket launchers: kill those first. There Piers fires the Anti-Materiel Rifle, which has infinite ammo on this stretch, while Chris stays on the mounted gun.
Serpent Emblem #12. At that roadblock, on the double-decker bus parked behind the J’avo, in the middle window / upper deck. Shoot it before you wipe out the J’avo group. Chris, on the gun, has the best angle and a 2nd chance right after the roadblock. File: Iluzija.
Part 2: Chris takes the wheel and Piers the gun. Controls (derived from the PS3/360 ones): left stick steers, ZR accelerates, ZL brakes and B is the turbo boost. Boost on the straights and ease off in the curves. A gap of 60 to 80 units on the counter is a “close” chase; if you can see Carla’s car, you’re doing very well. Lose her and it’s “Mission Failed”, back to the checkpoint. Reach the dock and the chapter ends.
Boss — Attack Chopper (the rooftops)
A gunship that strafes the rooftops and keeps dropping Noga-Skakanje until you drive it off. It isn’t a gunfight: it’s a job for the Grenade Launcher.
- Load explosives. Put the 2 rounds from the shack and every round from the platform crates into the Grenade Launcher.
- Fire when it holds still. When it hovers to drop troops it’s an easy target. On Normal, about 6 40mm Explosive Rounds anywhere on the hull do it.
- Kill the hoppers between shots (hit the sac, or slide into them) so they don’t knock you around at a bad moment.
- Co-op split: one player carries the Grenade Launcher and the other clears the Noga-Skakanje with the rifle; if the grenadier runs dry, the other breaks crates and gives them what turns up (split-screen lets you give items: X, pick the item and the give icon).
- Reward: the medal “Shot down the helicopter” and the way into the tenement.
Boss — Iluzija
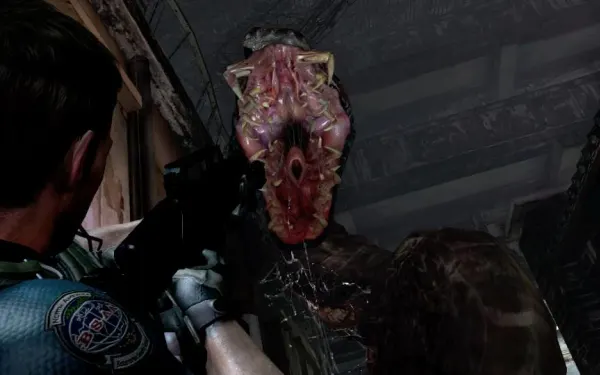
A giant invisible snake that hunts you through 3 rooms of the tenement and then in a circular pit. It attacks through walls, from the ceiling and up through the floor. Weak point: the inside of its mouth, when it opens to bite. Attacks: Constrict (wraps around you; it’s a QTE, and failing it means a bite to the head: instant death) and grab and throw (the camera swings to it first as a warning; fail the QTE and it flings you around the room for moderate damage).
- Find it. It shows as a ripple in the air; your laser bends when it crosses it, so sweep the room with your sight. Just before it lunges it shimmers and rears its head back with its mouth open: that’s your moment.
- Shoot the mouth. The Assault Shotgun or Chris’s assault rifle into the mouth, and dodge sideways (ZL + stick + B) when it charges. If it grabs you, finish the QTE in time (move the left stick); Breakout shortens it.
- Room 1: damage it until it escapes down a shaft. Follow it; it grabs you again: shoot it and keep chasing.
- Room 2: break free, smash the 4 crates and repeat the method. It moves on again.
- Room 3: the cabinets are fake cover: it hits you through them. Grab the 4 × 12-Gauge Shells and use the shotgun. When it flees, don’t climb the ladder yet: the 10,000 SP suitcase is behind the corner vent.
- The pit. Here it drops its camouflage, but its skin hardens and weapons barely hurt it: you have to electrocute it. Climb either ladder to the upper platform (2 Green Herbs by the switch). Throw the switch: the cable slips out on the other side and Marco plugs it back in.
- Pull the lever again just as the Iluzija slides over the pool of water right below the switch: the first pull blows the fuse, the second kills it.
- Co-op split: one player stays at the lever and the other lures the snake to the pool from below. Nobody should be standing in the water when the lever drops. Very occasionally the snake climbs onto your ledge: keep an eye on it.
Reward: the way forward (Marco hoists you up to the exit) and, probably here, the medal “Avenged your fallen comrades” (the sources don’t say at which exact moment it’s awarded).
Boss — Gnezdo (Marco)
Marco turns into a chrysalid and a Gnezdo hatches from him: a swarm of insects around a queen. Killing the queen is the only way to finish it. If the swarm catches you it drains your health fast, and you have to waggle the stick to break free.
- Scatter the swarm. A shotgun blast (or a 40mm Explosive Round, or a grenade) breaks it open and reveals the queen, the large insect that flies apart from the body.
- Empty the shotgun into the queen from medium range: that’s the main method. This chapter’s crates and shack only give fixed 40mm Explosive Rounds; if a crate happened to give you 40mm Acid Rounds, use them here: they’re especially effective against the Gnezdo.
- Don’t get surrounded: back off or slide past the swarm. It can split off a second, human-shaped swarm as a decoy: ignore it and look for the queen.
- Co-op split: one player scatters the swarm with the shotgun and the other finishes the queen with the rifle from range.
- Reward: this Gnezdo drops no SP. What matters is Marco’s C4 Explosive, which opens the room’s locked doors.
Boss — Attack Chopper (the floating restaurant)
The second helicopter fires explosive rounds that hurt a lot while you’re on the floating restaurant.
- Take cover inside. Between shots, duck into the restaurant’s rooms (that’s where the Red Herb and the Green Herb are).
- Make every round count. Lean out, wait for it to hold still and hit it with the Grenade Launcher: about 6 40mm Explosive Rounds on Normal. Break the vases and crates: they give more rounds.
- Use it for the emblem: from the restaurant, look left across the water and break Serpent Emblem #11 before you jump.
- Co-op split: one player shoots the helicopter and the other watches the J’avo climbing up and breaks the emblem with the Anti-Materiel Rifle.
- Reward: the helicopter crashes into the boat and opens the way to the dock (and to the 4,000 SP suitcase).
Don’t leave without:
- The 4 Serpent Emblems: #9 on the pile of boxes in the dead end by the playground, #10 on the lower bunk of the room with the static TV, #11 on the scaffold across the water from the floating restaurant (gone once you jump off the restaurant) and #12 on the double-decker bus at the car-park roadblock. All 4 give the Ogroman figure.
- The 10,000 SP suitcase behind the corner vent (Iluzija room 3) and the 4,000 SP one behind the dock barrels.
- At the medical center, if you beat Leon and Helena: the 2 chests of 2,000 SP and the First Aid Spray in room “01”, and the 14,000 SP after the hack.
- The Grenade Launcher with whatever rounds you have left, plus the First Aid Spray from the shack and the one in the last Glava-Sluz room.
After the chapter (skills): the After Her! achievement and the Hand Grenade - Green dog tag template. This chapter gives 14,000 fixed SP in suitcases (10,000 + 4,000) and up to 18,000 more at the medical center if you beat Leon and Helena (up to 32,000 in all), so it’s a good moment for Firearm Lv2 (29,000) or to save toward Lv3. The guides recommend buying and equipping Lock-On (Lv1: 2,800 SP) before chapter 4, for the snipers at its start. If you’re short of SP, the checkpoint 3-5 farm is the fastest in the campaign.