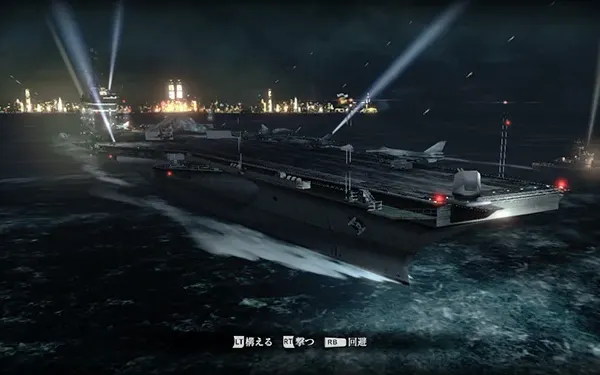
Chris (P1) and Piers (P2) make it aboard Neo-Umbrella’s aircraft carrier on 30 June 2013, on the trail of “Ada”, who is really Carla Radames. The chapter has four very different legs: a hangar full of snipers and mutating J’avo where a missile has to be used as a battering ram, a chase across the ship’s bridge, a hunt for three passcodes on the lower decks while the Rasklapanje stalk you, and a finale at the controls of the VTOL: Chris flies and shoots, and Piers drops onto the deck to stop a missile launch while an Ogroman shows up. In co-op there are three splits and two things only one of you can do: Serpent Emblem #16 belongs to Piers and Chris flies the VTOL for the Flying Ace achievement.
Chapter order: 4-1 Aircraft Carrier - Rear Hangar (opening QTE, Semi-Auto Sniper Rifle, balcony snipers, Serpent Emblem #13 in the helicopter, the catwalk and the red pipe, the missile against the bulkhead door, the gate with the Napad and the Mesets, out on deck with Serpent Emblem #14 and the stairs lever, the hangar fighter jet) → 4-2 Aircraft Carrier - Bridge (showers, shooting range with 2,000 SP, Gnezdo, valve, 5,000 SP, Serpent Emblem #15, “Ada”) → 4-3 Aircraft Carrier - Forward Hangar (3-passcode panel, Rasklapanje, kitchen and cafeteria, 2,000 SP + First Aid Spray, Passcode C, Passcode B in the cell, 5,000 SP, the slow-motion Rasklapanje) → 4-4 Airspace over Aircraft Carrier (VTOL: AA guns and 3 helicopters, Flying Ace; Piers on deck: 2 containers, Serpent Emblem #16, console and crane; the Ogroman and the missile).
Before you start
Loadout: you arrive with everything from before: Chris with the Nine-Oh-Nine, Assault Rifle for Special Tactics, Combat Knife, Assault Shotgun and Grenade Launcher; Piers with the MP-AF, Anti-Materiel Rifle, Assault Shotgun and Grenade Launcher. The new weapon is the Semi-Auto Sniper Rifle (7.62mm NATO, 5 rounds) in the first room: very useful for Chris, redundant for Piers, who already has his rifle. Ammo: save 40mm Explosive Rounds for the Napads, the Mesets and the hangar jet; 40mm Acid Rounds for the Gnezdo and the Glava-Begunats; and 12-Gauge Shells for the Rasklapanje (the shotgun splits them in half). Flash Grenades do nothing to a Rasklapanje, but they kill the Mesets instantly.
Skills (there’s no shop): they’re bought with Skill Points (SP) between chapters. Gamer Guides recommends Lock-On Lv1 (2,800 SP) for the opening snipers, and Eagle Eye (3,000) for whoever plays Piers.
Co-op: there are 3 short splits: the hangar pipe (Chris below with a Napad, Piers above with the snipers), the Passcode B cell (Chris locked in, Piers outside) and the deck (Chris in the VTOL, Piers below). Decide beforehand who plays whom: Serpent Emblem #16 belongs to Piers and Chris flies the VTOL (the Flying Ace achievement). There’s no 4-player intersection; Ada crosses this same ship in her chapter 4.
What slips away without warning: Serpent Emblem #14 can only be seen from outside, before you drop back into the hangar; the “Cleared the stage without opening the one-way doors” medal is lost as soon as you use a door with the “Unlock” prompt in 4-3; Serpent Emblem #16 is on Piers’s timed deck run; and Flying Ace is lost to a single hit on the VTOL (restart the checkpoint, see below).
Saving: RE6 has no typewriter and no manual save: it only saves at checkpoints (a save icon appears). Every sub-area (4-1 to 4-4) is a Chapter Select entry point, and 4-4 starts at a checkpoint in the VTOL cockpit. To retry without dying, use the COMS menu (−) → “Return to the latest checkpoint”: that’s how you redo the Flying Ace flight, the 3-minute missile run and Piers’s emblem #16. Missed emblems come back through Chapter Select at 4-1 or 4-4 (an emblem counts as soon as you break it).
Difficulty: on Amateur most life-or-death QTEs complete themselves and mash meters fill faster (the opening QTE, the red pipe, the container charges). On Professional every hit takes at least 2 blocks, a failed Rasklapanje grab usually leaves you Dying, enemies never drop Green Herbs and boxes only give SP: arrive with herbs and ammo to spare. On No Hope there are no skills (no Lock-On or Eagle Eye), SP are worth double and you respawn with the health you had at the checkpoint. A rank: 70% accuracy or better, 2 deaths or fewer, 1:15:00 or less and 55 kills or more.
4-1 Rear Hangar: the start and the Semi-Auto Sniper Rifle
The opening QTE. Right at the start a J’avo jumps Piers. As Chris, shoot it in the head immediately while Piers does his QTE. According to IGN, in co-op both players have to pass their part or it restarts.
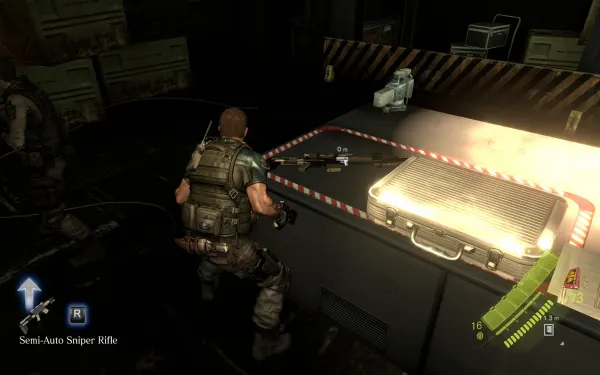
The room on the left. In the small room to the left of the start, on the table, lies the Semi-Auto Sniper Rifle; the suitcase next to it holds 3 × 7.62mm NATO Ammo. There’s a critter in the room: kill it. At the back, on the workbench, 1 crate. Field weapons spawn for both players, but only one of you takes the suitcase ammo: share it out.
4-1 The snipers and the hangar floor
The balconies. Go upstairs (1 crate) to the control room. On the far balconies there are 3 or 4 J’avo snipers spread over 3 nests. Stand at the catwalk railing: their red laser sights give them away, and Piers’s thermal scope (X while holding ZL) marks them even better. The fastest way is to shoot the red barrel next to each one. Gamepressure prefers dropping to the floor below and picking them off from there with the rifle. At the end of the walkway, 1 crate and 2 more crates.
The hangar floor. Go down the ladder and kick the other ladder down. Enemies spawn when you reach the floor:
- Telo-Eksplozija: J’avo that mutate their torso into an explosive ball. When they kneel they’re about to blow, so back off; shooting their legs makes them kneel and explode where they stand. Gamepressure’s trick: step close for a second to set one off, then run; its blast kills the J’avo around it.
- Glava-Smech: J’avo with crab-like mandibles that grab you and tear you apart. Don’t let them get close, and shoot their mouth to make them close it.
Serpent Emblem #13. In the middle of the hangar sits the big twin-rotor helicopter. The emblem is inside the cockpit, between the pilots’ seats. The helicopter also has 2 crates. File: Chris’ File. (IGN numbers this emblem 2nd in the chapter and the boat one 1st; the other guides do the opposite. If you get all 4 it doesn’t matter.)
The stairs going up. Push on towards the back of the hangar and a cutscene shows Carla getting away: a J’avo SpecOps raises the stairs she took the case up and blocks your way. Another wave of enemies arrives: fall back and kill them one at a time. Gamer Guides flags one more sniper on the left side of the far catwalk, near the red light: drop him before moving on.
4-1 The catwalk and the pipe (split)
Take the far-left stairs and the ladder at the end of that walkway up to the upper catwalk. In the middle of the catwalk enemies spawn below: clear them from above. Then, at the gap in the middle, Chris boosts Piers (A) over and you split up. A cutscene shows that the missile in the bay can be used as a battering ram against the bulkhead door at the far end.
- Chris: gets a lot of enemies, eventually a Napad. Hand Grenades on packed groups and 40mm Explosive Rounds on the Napad. Then grab the red pipe and move along it hanging, mashing B, while Piers covers you. During the crossing a new wave of J’avo snipers shoots at you from the walkway opposite.
- Piers: kill those snipers and the J’avo and the Napad on his side before Chris goes onto the pipe. The gap between the balconies is a good choke point: jumping J’avo can’t attack mid-jump.
- Neither side has any pickups: don’t waste time searching.
Napad: drops a silver Rook worth 1,500 SP. There are at least three in 4-1.
4-1 The missile against the bulkhead door
Once you’re back together at the missile, kill every enemy before touching the crank, including another Napad. Then:
- One player examines the crank on the side of the missile (Action button; B on Switch) and turns the left stick to swing the missile until it faces the bulkhead door on the far wall (pointing down). They have to keep holding the crank.
- The other goes to the open panel on the missile’s side and hotwires it: a precision QTE where you press the prompted button each time the gauge needle passes a green zone.
- The missile fires and destroys the bulkhead door. In single player the AI does the hotwiring: you aim with the crank.
The guides say Chris rewires and Piers fires, but either player can take either post.
4-1 The gate: Napad and Mesets
After the blast, go down the ladder and wait before dropping to the floor: more enemies spawn, and you have a good vantage point from there.
- A new sniper turns into a Napad.
- As you near the gate, a J’avo turns into a Mesets, a giant bird: its dive can’t be countered, so bring it down first. The Grenade Launcher drops it fast, and a Flash Grenade kills it instantly. It drops a bronze Rook worth 500 SP.
- Kick the small door to the left of the gate: it’s a control room with an enemy that also becomes a Napad.
- Behind the fence on the left, 1 crate in the cabinets.
If you’re short on ammo, Gamepressure says you can run for the marked door: once you’re through, they stop chasing you. If you’re going for an A rank (55 kills), it pays to fight here. Go through the double doors: you come out on deck.
4-1 Outside: Serpent Emblem #14 and the lever
Serpent Emblem #14 (one of the hardest). As soon as you’re out, facing the open sea, look for the patrol boat with 2 searchlights and scope it with a sniper rifle (Chris’s Semi-Auto Sniper Rifle or Piers’s Anti-Materiel Rifle). The guides disagree on where it is: IGN and GameWith put it on the radio mast of the lit boat; the wiki mentions 2 patrol boats and puts it at the top of the right-hand one; Evil Resource and Gamer Guides, on a smaller boat behind it, further out to sea. Check both at full zoom. File: Chris and Leon. You have until you drop back into the hangar.
The lever booth. Gamepressure sums it up as “keep heading right”:
- Climb the stairs (2 crates).
- Drop down and cross to the other side.
- Climb all the way up: 1 crate plus 1 more, and a ladder.
- At the end of the walkway is the control booth: open the doors and pull the lever. The lever lowers the stairs the J’avo raised.
- Kick the ladder down and drop back into the hangar. From here you can’t go back for emblem #14.
4-1 Back in the hangar: the fighter jet
When you’re back, new enemies spawn and a J’avo climbs into the parked fighter (a vertical take-off jet) and strafes you.
- Killing it: get out of its line of fire by going to the upper floors and shoot the pilot through the open cockpit with the sniper rifle, or get to its side and land 2 good 40mm Explosive Rounds. Sprint from cover to cover; the best cover is the door between the two halves of the bay.
- Dodging it: Gamepressure says you don’t have to fight: run straight for the marked door, dodging its missiles.
The end of the hangar. In the control room at the far end, lure the enemies inside and use grenades; another bird (a Mesets) appears. Head to the far right side, through the red door, up the stairs, past the bulkhead door the missile destroyed, and kick or open the red door at the end: cutscene with Carla.
4-2 Bridge: the elevator and the showers
This whole section is following “Ada” through the ship.
The elevator. Around the corner there’s a Flash Grenade in a cabinet. Call the elevator and ride up. The next room fills with J’avo: grenades, or fight from the first room, which works as a choke point. Spider J’avo (Noga-Trchanje) come in too: they crawl on walls and ceiling, but one stomp kills them. Shotgun or rifle.
The showers. In the showers there’s a J’avo taking a shower. Green Herb at the far end. In the next room, 9mm Ammo in a cabinet and 40mm Acid Rounds on the right (switch the grenade launcher’s ammo type with X while holding ZL).
4-2 The shooting range and the Glava-Begunats
Up the stairs: 3 J’avo. Before the door, at the end of the outside walkway, 12-Gauge Shells. Next comes an improvised shooting range: in the second part of the room, a suitcase with 2,000 SP on top of a container.
The Glava-Begunats. Split-headed J’avo rush in berserk: acid rounds from range, or wait for their charge and counter with ZR, which kills them. According to Gamepressure, when the game orders you to kill them all, one jumps in through the window and the rest come from behind: go back to the previous room and throw a grenade at them.
The window hall. Enemies smash through the windows: the shotgun is best. Green Herb in the corner.
The storage room. Upstairs, a J’avo has his back to you in the room on the left: sneak up behind him and take him out silently (ZR when the prompt shows). That storage room has 1 crate plus 4 more. At the end, double doors.
4-2 The Gnezdo
3 spider J’avo attack; there’s a Hand Grenade in the cabinet immediately to your left. Move on to the control room. In the adjoining room on the right a Gnezdo appears, an insect swarm: if it catches you it drains a lot of health.
- Fighting it: scatter the swarm with the shotgun or a grenade and kill the queen (the big insect in the middle): a few shotgun blasts, or a single 40mm Acid Round kills her as soon as she’s exposed. She drops a silver Queen worth 2,500 SP.
- Skipping it: Gamepressure says you don’t have to fight: jump through the window and run upstairs. You lose the 2,500 SP and a kill.
Upstairs past the window, 2 crates. Double doors.
4-2 The valve: 5,000 SP and Serpent Emblem #15
2 J’avo and 2 crates on the left. In the next control room with a red valve at the back, kill the J’avo that spawn first (some jump in through the windows on the left). Then Piers turns the valve while Chris defends him from the spiders that come in. The valve brings down a ladder: climb it and you’ll find a suitcase with 5,000 SP immediately to the right.
Serpent Emblem #15. At the top of that ladder there’s a staircase: the emblem is underneath it, among the baggage, visible through the gaps between the steps. File: Neo-Umbrella.
“Ada”. Go all the way up and take the last ladder: Green Herb, 2 × 9mm Ammo and 2 crates. Along the way you’ll see locked (“Lock”) doors that open by themselves after an ambush. The door at the end leads to the cutscene with Carla and an elevator going down.
4-3 Forward Hangar: the panel and Passcode A
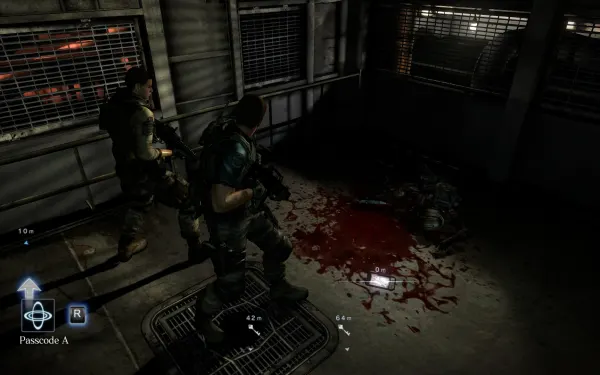
At the intersection, go left first: 1 crate. Inspect the door’s panel (it has 3 lights): it needs 3 passcodes, and you have to check it for the first one to appear. There’s 1 crate around the corner. Passcode A lies next to the dead Neo-Umbrella J’avo, near the panel. All 3 codes sit next to corpses because Ada copied them for Chris.
Passcode order: the guides collect them in different orders (Gamer Guides, C then B; Gamepressure and GameWith, B then C). Either works. Use the route guide (L) if you get lost.
4-3 The Rasklapanje and the kitchen
The first two. Behind the next door wait 2 Rasklapanje: they fall apart and every piece keeps attacking (see Boss — Rasklapanje). They get back up after about 2 minutes, so knock them down and explore fast. The walkway on the right is blocked by steam.
The kitchen on fire. Take the door on the right, just before the steaming walkway: the doors shut and a 3rd Rasklapanje appears (2 shots of 40mm Explosive Rounds). 2 crates. You’re locked in with it until the sprinklers kick in, so finish off every part of it. The microwave: stand next to it, grab a Rasklapanje hand with the melee button when the prompt appears and toss it in: the hand is destroyed for good. When the shutters open, kick the door together.
4-3 The cafeteria and the one-way doors medal
The cafeteria. Defeat everyone. The tables on the left side have several wooden crates. There are 3 exits.
Warning before you leave the cafeteria: the “Cleared the stage without opening the one-way doors” medal (Bronze). You earn it by collecting all 3 passcodes without ever using the “Unlock” prompt on the doors that open from one side only. According to a GameFAQs answer and Neoseeker’s walkthrough (unverified in-game), those doors are just past the cafeteria’s 3 exits: the right one leads to a one-way door on the left; the one straight ahead, to another around the corner, also on the left; and the left one is the real route, but past it you have to turn left, because the door ahead is one-way. The route below (Gamer Guides’) uses “Unlock” twice: on a first run follow it; if you’re after the medal, don’t press “Unlock” on any door and loop back through the cafeteria even if it takes longer.
The route. Ignore the door on the right (it leads to a steam-blocked walkway and a door locked from the other side). Open the door immediately to the left and unlock the door behind it (breaks the medal). Go through and turn left.
4-3 The first cabin (2,000 SP)
Along the hallway, take the first door on the right: a dark luxury cabin with a suitcase with 2,000 SP on the table and a First Aid Spray on the restroom sink. Don’t linger: the Rasklapanje come back. Go back into the hallway and keep going the same way.
4-3 Passcode C
At the intersection, go right, past the blue vending machines, round the corner and unlock the door (breaks the medal). Go straight down the stairs to a flooded walkway on the lower level, follow it and climb the little steps. There are small chambers (crew bunk rooms) on each side:
- 2nd on the right (mandatory): Passcode C and 1 crate. The crate is on the back lower bunk, to the right, and the code lies on the floor under the hanging dead J’avo (Neoseeker).
- 1st on the left (optional): 40mm Acid Rounds, but entering spawns another Rasklapanje.
4-3 Passcode B: the cell (split)
Go back through the flooded walkway, turn left and enter the room on the left, second chamber (GameWith mentions a door marked “Z” and a “Lock” door the two of you open). As you open the door, a Rasklapanje drags Chris inside the examination room with the cell, and Chris is locked in alone with it, whole and freshly healed.
- Chris: move away at once to dodge the follow-up grab. Shotgun at point-blank range, hands first.
- Piers: shoot through the bars with the rifle.
- The passcode: there’s a wooden crate on the table to the left, and Passcode B lies on the floor by that table, in a corner of the room (Evil Resource, Neoseeker, Gamepressure). It’s a floor pickup: you don’t have to kill the Rasklapanje for it to drop. Grab it and leave.
4-3 The 5,000 SP cabin (optional)
From the large room (2 crates), take the lower-left exit and the hallway: the luxury cabin on the right has a suitcase with 5,000 SP, and the restroom holds 40mm Explosive Rounds and a Hand Grenade. Trivia: if you down a Rasklapanje nearby, you can pick up one of its hands and flush it down the toilet.
4-3 Opening the door and the Rasklapanje in the vent
With all 3 passcodes, go back to the panel and use it three times, once per passcode. Another Rasklapanje appears: kill it or run. 2 crates and double doors.
The slow-motion Rasklapanje. Reload before you go through the double doors. On the walkway a Rasklapanje bursts out of an air vent and time slows down: shoot its flying parts starting from the left and working right. Hit every one before normal speed returns and you kill it for good (it falls into the smelting furnace and counts as a kill); miss and it grabs you. 1 crate in the next room and the exit towards the jet.
4-4 Airspace over Aircraft Carrier
You start at a checkpoint in the VTOL cockpit. Chris flies it with Piers behind him; later Piers drops onto the deck. See Boss — The VTOL and the Ogroman. There are no pickups on the deck.
Boss — Rasklapanje
A leech-like mutant that comes apart into torso, legs and 2 hands, and every piece keeps attacking on its own. It can’t be killed for good: the parasite flees and rebuilds itself. Attacks: grab (QTE; failing it means death), stomp if you’re on the ground, thrown hand that sticks to your face (you can still shoot and move slowly; your partner can shoot it off), sidestep with a grab; the legs kick and charge with an acid aura (shoot to interrupt it); the torso swings its arms and, with no hands left, bounces into you.
- Hands first, before they re-attach. Then legs and torso. The Assault Shotgun splits it in half; with 40mm Explosive Rounds, one shot splits it and another finishes the upper half, which is the part that moves.
- Surprisingly, the handgun works well on the loose parts. Gamer Guides says not to waste Acid Rounds because it resists them; the wiki says acid and fire expose the parasite. Use Explosive rounds and the shotgun.
- Flash Grenades do nothing to it.
- The last part you kill drops 3,000 SP. The hands are destroyed for good with the ship’s props: the microwave (the kitchen one), boiling water and toilet.
- If you’re short on ammo: stun and run. It gets back up after about 2 minutes.
- In co-op: one of you deals with the hands going after the other; if a hand latches onto your partner’s face, shoot it off. In the Passcode B cell, Chris fights it alone and Piers shoots through the bars.
- The one from the vent (end of 4-3): reload beforehand and shoot its parts from left to right before the slow motion runs out.
Boss — The VTOL and the Ogroman
VTOL controls (Switch): Chris aims the cannon with ZL and fires with ZR; he rolls with the health-tablet button (Xbox RB, PS3 R2, PS4 R1, Switch R), not L, which is the route guide on Switch. Piers runs the missiles: ZL to zoom, ZR to fire and the right stick to look.
Phase 1: the AA guns. The carrier’s anti-aircraft guns are marked (green squares on Chris’s screen, red squares on Piers’s). Famitsu’s map marks 7 AA guns plus the control tower. 3 helicopters fire rockets at you.
- Chris flies and destroys them with the cannon. When the red incoming-missile icon appears at the bottom, roll with R to dodge it (IGN: “use the health tab button to dodge missiles”).
- Piers controls the missiles. Hold the reticle until the lock-on completes and only then fire: an early launch is a wasted shot.
- Helicopters: down all 3 with the cannon for the silver medal “Destroyed 3 helicopters with the VTOL’s barrel gun”. Don’t get too close: crashing into them also causes damage.
- Flying Ace (achievement): fly the VTOL without taking a scratch. Watch the VTOL’s health in the bottom right: if it glows red you were hit, so restart the checkpoint at once (COMS with −, “Return to the latest checkpoint”); dying and choosing Continue doesn’t work. Keep your distance from the helicopters and the AA guns and, afterwards, protect Piers. On platforms with achievements (PlayStation, Xbox and Steam) it unlocks when the chapter’s final cutscene starts; Switch has no achievements. PowerPyx says you have to play as Chris; according to PlayStationTrophies and XboxAchievements, in co-op both players get it.
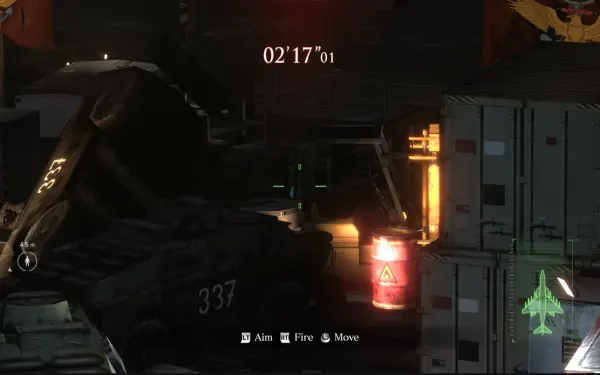
Phase 2: Piers on deck (timed). You have about 4 minutes to stop the missile launch; reaching the missile in 3 minutes or less gives the bronze medal “Reached the missile in 3 minutes or less”. If you run out of time or miss the emblem, restart the checkpoint.
- Piers: the path is blocked by containers. At the 1st one, press the action button and do the timed button QTE (1, then 2, then 3). J’avo come out of a manhole south of him.
- Chris: cover him from the VTOL; the cannon has infinite ammo.
- Serpent Emblem #16 (Piers): after blowing the 1st container, vault the row of boxes, head towards the stern, slide over the girders (dash, then ZL) and turn right. It’s inside a truck tire, near the 2nd obstacle. Break it before moving on. File: From the Files of Neo-Umbrella. According to the wiki and IGN’s emblem page, Chris can hit it from the jet at a specific angle (moving right and shooting at something blue visible through a crack); IGN’s walkthrough, on the other hand, says it’s impossible as Chris. Have the Piers player break it. According to the wiki, in split-screen an emblem broken by player 2 also counts for player 1 (unconfirmed on Switch).
- 2nd container: the same QTE, plus a sniper. Chris: shoot the J’avo snipers on the balconies of the building to the left. According to IGN, the AI Chris can’t hit that sniper: a player has to.
- Piers: crawl under a pipe, jump into a trailer and do the launch console QTE (4 buttons). Then run to the crane, climb it, run to the end and jump back into the VTOL.
The Ogroman. An Ogroman climbs out of the carrier.
- Chris keeps firing at it: any body part makes it stagger and stalls it while Piers gets back to the jet. Gamepressure recommends the head.
- Chris keeps shooting it until it moves a little. When the indicator says so, Piers shoots the missile behind it with his missiles, as in phase 1: ZL to aim, hold the reticle until the lock-on completes and ZR to fire. According to IGN, only Piers can finish the warhead; according to the wiki, Piers kills the Ogroman with a missile.
- Don’t panic if the missile launches: according to GameWith, it launches no matter what and it isn’t a failure. The final cutscenes follow.
Don’t leave without:
- The 4 Serpent Emblems: #13 in the twin-rotor helicopter’s cockpit, #14 on the searchlight boat or the boat behind it (before you drop back into the hangar), #15 under the stairs after the valve and #16 in the tire on the deck (Piers, during the timed run). All 4 give the Gnezdo figure.
- The 4 suitcases: 2,000 SP in the shooting range, 5,000 SP after the valve, 2,000 SP in the first cabin and 5,000 SP in the lower-left cabin (14,000 SP in total).
- The Semi-Auto Sniper Rifle in the first room.
- The medals: the 3 helicopters with the cannon, the missile in 3 minutes or less and, if you’re going for it, the one-way doors.
- Flying Ace (Chris flies the VTOL): if the VTOL took a hit, restart the 4-4 checkpoint before you finish.
After the chapter (skills): the There’s Always Hope achievement and the Virus Shot dog tag template. If you’ve reached Firearm Lv2 (29,000 SP), the goal is still Firearm Lv3 (75,000). For chapter 5, which ends with Haos, buy Defense Lv1 (3,200) if you don’t have it yet and Breakout (2,800), which shortens grabs. Quick Reload (10,000) helps Chris against Haos’s cocoon, which has to be broken with a full magazine.