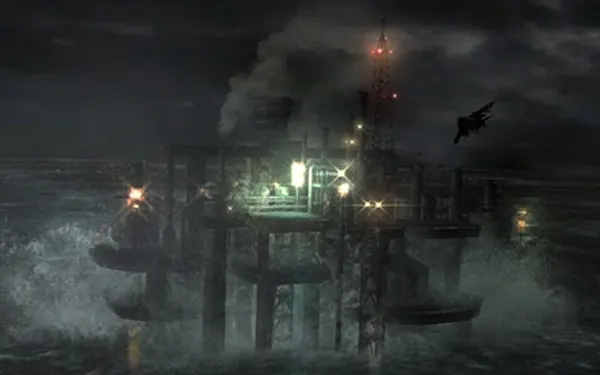
The end of Chris’s campaign. Chris (P1) and Piers (P2) ride down from an oil rig into Neo-Umbrella’s underwater facility on 1 July 2013 to rescue Jake and Sherry. The chapter opens with a split (Chris through the ventilation ducts, Piers fighting in the Cargo Bay to stop the fans), moves on to a siege in a circular chamber, crosses paths with Jake and Sherry in the room where Haos is born and ends with a long escape: the collapsing wall, the first fight with Haos, the tunnel chase, Piers’s injection and the final fight, in which Piers can no longer use weapons or items. There are no new weapons and no fixed SP suitcases.
Chapter order: 5-1 Underwater Facility (the green button, split: Chris through the ducts with Serpent Emblem #17, Piers on the fan levers and the gatling guns; elevator; command centre with Serpent Emblem #18; metal box with 40mm; the rocket-launcher J’avo; the circular chamber with Napad, Gnezdo and snipers) → 5-2 Underwater Facility - Lower Levels (intersection with Jake and Sherry: 4 levers, the 2 lifts, Haos is born) → 5-3 Underwater Facility - Upper Levels (the wall escape: 2 boosts and the slide; Haos, phase 1 in the circular chamber) → 5-4 Emergency Escape Route (tunnel chase, Piers holds the blast door, Serpent Emblem #19; Piers injects the virus; Haos, final form; the valve, the 3 barricades and Serpent Emblem #20; the pod).
Before you start
Ammo: there are no new weapons and no fixed SP suitcases: all the ammo and herbs come from crates and enemies, so don’t waste anything from the very start. What you’ll need most at the end: Flash Grenades (they stun Haos instantly), 40mm Acid Rounds and 12-Gauge Shells (they stun it too, and the shotgun breaks its cocoon). 40mm Explosive Rounds are good for Haos’s face during the escape and for its hand in the tunnel.
Skills (there’s no shop): between chapters, Defense, Breakout (shortens the Gnezdo’s grabs) and Firearm. Quick Reload helps you break Haos’s cocoon with a full magazine.
Co-op: one split at the start (Chris in the ducts, Piers in the Cargo Bay) and a 4-player intersection in 5-2. In the final fight Piers can’t use weapons, herbs or items: before the tunnel chase, have Piers hand Chris the herbs, grenades and ammo he can spare (items can be given in split-screen) in case he can’t use his inventory later. Whoever plays Chris gets the hang-on QTEs and the finishing blow; whoever plays Piers gets the fan levers, the gatling medal, holding the blast door and breaking the barricades.
What slips away without warning: the “Killed 3 enemies armed with gatling guns” medal can only be done as Piers in the Cargo Bay, before you pull the 2nd lever; Serpent Emblem #19 is lost as soon as you go through the co-op door after the last blast door; and Serpent Emblem #20, as soon as you get past the 3rd barricade.
Saving: RE6 has no typewriter and no manual save: it only saves at checkpoints (a save icon appears). Every sub-area (5-1 to 5-4) is a Chapter Select entry point. 5-4 Emergency Escape Route starts at the tunnel chase: replay it to recover emblems #19 and #20 without redoing Haos phase 1. To retry a stretch without dying, use the COMS menu (−) → “Return to the latest checkpoint”.
Difficulty: on Amateur most life-or-death QTEs complete themselves and mash meters fill faster (hanging on to the platform, holding the blast door, the finishing blow); it’s also the best difficulty for the gatling medal. On the higher difficulties, failing the slide during the escape is game over (Gamer Guides). On Professional every hit takes at least 2 blocks, enemies never drop Green Herbs and boxes only give SP: the ammo for the final fight comes almost entirely from the room’s crates and the slime balls. On No Hope there are no skills, SP are worth double and you respawn with the health you had at the checkpoint. A rank: 70% accuracy or better, 3 deaths or fewer, 1:20:00 or less and 40 kills or more.
5-1 The entrance: the green button and the split
- As soon as the opening cutscene ends, go to the green button on the wall and press it: a short cutscene of the chamber where Jake and Sherry are held plays (IGN describes it as “shutting off the switch”). If you can’t see it, hold L: the route guide marks the objective.
- Open the door: another cutscene.
- Crawl through the low tunnel under the gate: there are 3 crates on the other side.
- At the big gap, Chris boosts Piers (A) over and you split up.
5-1 Chris: the ducts (Serpent Emblem #17)
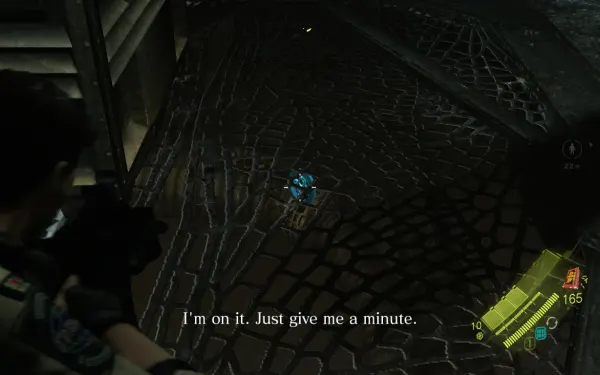
Chris goes down the ladder and crawls through the ventilation ducts, under 2 sets of spinning fan blades that Piers has to stop. There are hardly any enemies. Wait for the first blades to stop and go through.
Serpent Emblem #17. When Piers stops the 1st fan, stand by it and look up: the emblem is high up in the duct, behind the fan (IGN: top right; Gamer Guides: slightly to the left). If Chris can’t see it, Piers can shoot it through a floor grate. File: Piers’ File.
The room under the floor has 2 crates: 1 by a support pillar on the far side and 1 more nearby. Wait for the second blades to stop.
Piers’s elevator. At the end of the duct, drop down the narrower shaft on the right to a walkway. Crouch behind the boxes on your right and silently take out the first guard as he walks past (ZR when the prompt shows). Kill the other one, pull the lever (it restores power) and call the elevator with the red button to bring Piers over.
5-1 Piers: the Cargo Bay, the levers and the gatling guns
Piers lands on the upper level of the Cargo Bay and has to pull lever A and lever B to stop Chris’s fans A and B.
- Lever A (1st fan): directly to the right of where Piers lands after the boost.
- Lever B (2nd fan): further along the same side of the room, around the middle. Follow the marker.
- The enemies: when Piers lands, Neo-Umbrella J’avo pour in: 2 run to the 2 gatling-gun turrets on the right side of the upper Cargo Bay, 1 rocket-launcher J’avo steps out on the catwalk overhead and 1 sniper takes cover behind the pillar straight ahead. Kill the rocket launcher first. The room has 3 crates. The enemies are nearly infinite: once you have both levers, throw a Flash Grenade and head for the elevator.
The “Killed 3 enemies armed with gatling guns” medal (Bronze). It’s done here, as Piers. Pull lever A so Chris can move on, but don’t pull lever B yet: while Chris waits, the J’avo keep respawning. Both turrets face away from where the J’avo come in, so lure them into the stretch in front of the guns, run behind a turret and kill 3 J’avo with it (GameFAQs and Neoseeker). It isn’t confirmed whether killing the J’avo who man the turrets also counts: if the medal doesn’t pop, kill those too. The rocket-launcher J’avo keep respawning on the upper walkway, so it’s easier on Amateur. Then pull lever B.
5-1 The elevator and the command centre (Serpent Emblem #18)
When Chris calls the elevator, Piers rides down on it. If Piers is pinned down, go up and help him: kill the rocket-launcher J’avo on the upper floor first. Once the area is clear, go down and open the heavy metal door by the elevator together.
The command centre. Behind the door is a room where a dozen J’avo SpecOps pour in. Use grenades on groups of 3 or more, let them come to you and use the sliding door as a choke point.
Serpent Emblem #18. It’s in this room, in the upper-right corner, on a support where the wall meets the ceiling, near the tunnel the enemies come out of. To find it: stand facing the 2 supply cabinets by the closed door with the red light and turn 90° to the left. Gamer Guides describes it next to a vent in the upper-right wall. File: Chris and Albert.
5-1 The metal box and the rocket-launcher J’avo
1 crate. In the next hall, check the left side and go through the door: 2 crates and, in the corner, a metal box with 40mm Nitrogen Rounds and 40mm Acid Rounds (Gamepressure places it at the end of the corridor before the rocket-launcher room: if you skipped it, go back for it before moving on).
The 2 rocket-launcher J’avo. The next room has 2 J’avo with rocket launchers and 1 crate. Wait behind the wall until they fire, then step out and shoot them while they reload. Their launchers can’t be picked up. At the end, pull the elevator lever and go down one level to the circular chamber.
5-1 The circular chamber: holding out
There are 2 crates on the upper ring. Go to the marked door (GameWith: the levers beside the doors) and try to open it: a countdown starts, twice in a row, and you have to survive until it ends. Chrysalids arrive 2 at a time on the conveyor belts, and out of them come Napad, a Gnezdo and snipers.
- Save ammo: use the ladders between the lower floor and the upper ring to play hide-and-seek, and only kill the snipers and whatever blocks your way.
- Snipers: go upstairs to kill them, but don’t stay up there. If you see a red laser on you, move.
- Napad: a Hand Grenade at its feet when it stands still after a charge, and the shotgun on the exposed flesh on its back. It drops a silver Rook worth 1,500 SP.
- Gnezdo: scatter the swarm with the shotgun or a grenade and kill the queen; a single 40mm Acid Round kills her as soon as she’s exposed. It drops a silver Queen worth 2,500 SP. If it catches you, waggle the stick to break free.
- The exit: when the 2nd countdown ends, open the doors as a pair. Only do it when your partner is close and there aren’t too many enemies around. Cutscene.
- The ones that come out of chrysalids count toward the B.O.W.s Are Ugly achievement (breaking a chrysalid before it opens doesn’t count).
5-2 Lower Levels: intersection with Jake and Sherry
This is a Story Intersection: this section is the same as Jake’s chapter 5 (5-2). Offline, the AI controls the other pair; on Switch the intersections have their own menu and the host picks which one to join. There are no emblems in this room. Watch the Haos machine on the monitor and press the green button on the control panel, which powers the 2 lifts. Items: 2 crates plus 2 more.
The 4 levers and the lifts. Pull all 4 levers at the same time, one per character. The lifts rise: Chris and Piers on one, Jake and Sherry on the other. On the way up, J’avo drop onto your platform 2 at a time and doors open on the sides with J’avo carrying rifles and rocket launchers. Split the work: one player deals with the ones that land on the lift (melee, to save ammo) and the other shoots the gunmen on the sides, rocket launchers first. If you get overwhelmed, Flash Grenade. Killing more enemies than Jake and Sherry gives the bronze medal “Killed more enemies than Jake and Sherry (1)”. You don’t have to protect the other team.
Swapping partners. According to a Steam guide, if you pull the lever next to a character from the other campaign you ride up on their lift. The dialogue changes with the pairing (the wiki, IGN, Gamer Guides): with Chris and Jake, Chris promises to tell him about his father; with Chris and Sherry, she asks how he knows Jake’s father is Wesker, while Jake and Piers bicker. Nothing changes gameplay-wise. It isn’t confirmed whether either player can trigger it or only one (whoever plays Chris or whoever plays Piers).
Haos is born. At the top, cutscene: Haos breaks out of its cocoon. Jake and Sherry go a different way.
5-3 Upper Levels: the wall escape
As soon as the cutscene ends, climb the wall and run counter-clockwise holding the run button.
- First boost: Chris boosts Piers up (A); once he’s up, Piers uses the partner action (A) to pull Chris up. Be quick.
- Haos attacks (the camera changes): shoot it in the head with whatever does the most damage to stun it; the Grenade Launcher works very well. Otherwise it smashes the platform.
- The slide under the low obstacle: run and slide at once (run and ZL), and get up right away. Use the shadow on the floor to judge the distance. If you start crawling, you’ll almost certainly die; on the higher difficulties, failing here is game over.
- Second boost: stun Haos again. Chris boosts Piers and then hangs on when Haos shakes the platform: mash the Action button (Xbox A, Switch B) while Piers stuns Haos one last time. You both escape on the elevator.
5-3 Haos, phase 1
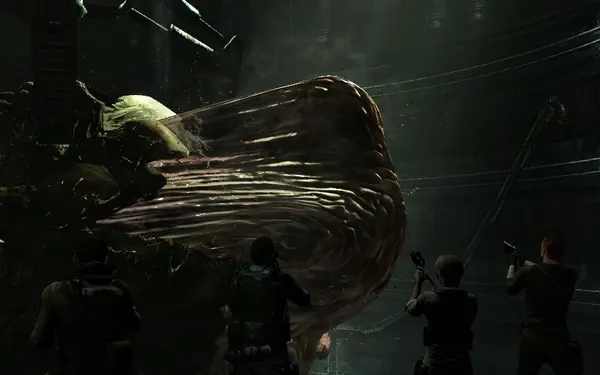
You reach a circular chamber where only the top of Haos shows. Grab the outer-ring crates first. See Boss — Haos (phase 1, the circular chamber). Afterwards, past the doors, there are 40mm Acid Rounds and 12-Gauge Shells on the floor.
5-4 Emergency Escape Route: the tunnel chase (Serpent Emblem #19)
Haos attacks from behind.
- Crawl under the door (press B while crawling to go faster).
- In each cabin, when Haos reaches in with its hand, shoot its palm once or twice: according to IGN, a single 40mm Explosive Round holds it off. Then slide under the shutter (run and ZL).
- Wait a moment at each blast door. If the blast door closes on you or you’re too slow, you die. In the second half it chases you directly and, if it catches you, it’s game over.
- The last blast door: Piers mashes B to hold it open while Chris climbs up.
Serpent Emblem #19. Right after Piers holds the blast door, don’t use the co-op door yet. Turn around: the emblem is on the floor, to the left of the blast door Chris climbed through, in the small airlock. Either player can break it. File: Underwater Facility. It’s lost for this pass as soon as you go through the co-op door (replay 5-4 from Chapter Select to get it back).
5-4 Piers’s injection
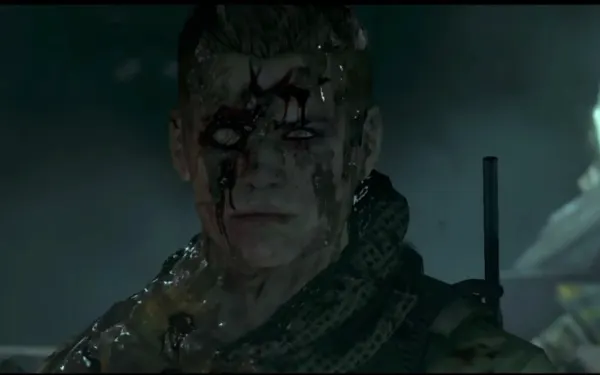
Second leg of the tunnel: slide under the first gate and run to the exit (the camera changes once). In the cutscenes, Haos throws Piers and crushes his arm. Piers (player or AI) crawls to the syringe and injects himself: his arm mutates and fires electricity. As Chris you don’t have to do anything.
Before the fight there are 4 crates plus 3 more: break them all. Press the switch / pressure panel to start the final fight. See Boss — Haos (final form).
5-4 The final escape (Serpent Emblem #20)
- After Haos, search the area, turn the valve and open the door for Piers. An announcement plays over the speakers: the facility starts to collapse, and the camera sweep already shows emblem #20 off to the right.
- Piers’s arm blasts the organic mucus barricades: he has to get close, charge and fire (it’s short-range). It’s timed: don’t fight the enemies hatching from the chrysalids; Chris covers Piers. There are 3 barricades.
- Serpent Emblem #20. After the 2nd barricade, when you reach the 3rd, go to the right side of the platform and look down to the right: the emblem sits above a red light, on the pipes and machinery. It’s best for Chris to break it with the sniper rifle; Piers can do it with a short charged shot and a good angle. File: Haos. It’s lost for this pass as soon as you get past the 3rd barricade.
- The ending. When Piers breaks the 3rd, run for the door: final cutscenes, Piers puts Chris in the escape pod. Story medals “Escaped from the giant B.O.W.” and “Said farewell to your partner”.
SP farm: the circular chamber (unverified)
Once you’ve finished the chapter: select Chris’s 5-1 (Amateur is fine), reach the circular chamber in 3 or 4 minutes and kill the up to 10 B.O.W.s that come out of the chrysalids (each Napad drops 1,500 SP and each Gnezdo 2,500, per the wiki’s drop table). Go through the next door, skip the cutscene, wait for the save icon to appear and go back to Chapter Select. A Russian guide mentions about 20,000 SP per 8-to-10-minute loop, and it adds to B.O.W.s Are Ugly as well; no other source confirms it. The farms GameWith recommends are different: Leon 4-4 or Chris 3-5 (about 14,000 SP in 6 or 7 minutes) and Jake 4-3 (7,000 SP in under a minute). Careful: Chapter Select resets accuracy, deaths, kills and time, so don’t do it on a run where you’re going for a rank.
Boss — Haos (phase 1, the circular chamber)
A huge B.O.W., like a giant Rasklapanje, of which you only see the top half. It tries to crush you with its arms. It goes down fairly fast. Patch 1.03 adjusted the difficulty of this fight; the Switch version came later.
- Ammo first: there are crates around the outer ring; going counter-clockwise, 2, 3, 1, 1, 2 and 3. IGN advises grabbing them first, because beating Haos kicks you out of the room.
- Keep your distance: the red indicator reading 30 m or more is a good sign. Its arms reach very far. Circle the outer ring.
- Aim at the head and face, which take more damage. Bursts from the assault rifle or MP-AF, then the rifles; the Semi-Auto Sniper Rifle with the unzoomed scope speeds the fight up a lot. Explosives work. The shotgun at range is useless.
- Arm raised → slam: roll or slide to the side.
- Hand sweep over a wide area: it nearly kills you. Roll or slide toward the edge of the platform.
- In co-op: split up around the ring so it only chases one of you while the other hits its head.
Boss — Haos (final form)
Piers now can’t use weapons, herbs or items: he only fires electricity from his arm (a normal shot, more accurate, or a charged shot, which stuns and deals damage). Each shot costs him health, which regenerates on its own. Chris uses his normal weapons. Haos’s attacks: a swipe, an arm sweep (long reach), a grab that crushes you between its fingers = instant death, tentacles that extend and reach around corners, a tentacle thrust that knocks you down, a tentacle drag (it pulls you underneath: it shows its organs but leaves you exposed), green slime balls it spits 4 or 5 at a time (they grow on the floor and explode: shoot them), balls stuck to the ceiling that drop when you walk under them, a body slam from the floor or a platform (huge damage) and, once wounded, its lower half breaks off and slides very fast to claw you, exploding a few seconds later.
- The weak points: the 2 orange growths on its sides, on the lower back. At this stage, damage anywhere else does nothing. Stun it first: a Flash Grenade stuns it instantly; a few 40mm Acid Rounds, 12-Gauge Shells or Piers’s shots also work. Then run behind it and pop a growth. You usually only have time for one per stun: stun it again for the 2nd.
- The exploding organ: with both growths popped, a large organ comes out of its lower chest. It explodes on contact: shoot it from a distance and stay away.
- The cocoon: Haos crystallises into a cocoon. Have the shotgun (or the assault rifle) with a full magazine and break it before it regenerates; if you don’t attack it while it’s in the cocoon, it regenerates fully. You can hit it before the game gives you the hint.
- The heart: Haos falls on its back. Run in and press ZR next to it: a special attack slashes one of its 3 orange hearts. When Piers shouts that it’s your chance, go.
- Repeat: Haos climbs onto a high platform and covers itself again; it can’t be damaged up there. When it comes down, repeat steps 1 to 4. 3 hearts in total.
- The 3rd heart: cutscene. Chris is left dying while Piers struggles with Haos. Crawl Chris to the boss, press the partner action (Xbox B, Switch A) and rotate the left stick fast. Both players’ QTEs have to succeed.
- Ammo: there are crates around the room and the slime balls sometimes drop ammo.
- Tips: it’s slow, so run circles around the room and hide behind the containers; don’t stand in front of it. In co-op, have Piers stun it with charged shots while Chris gets behind it for the growths.
Don’t leave without:
- The 4 Serpent Emblems: #17 high up in the duct by the 1st fan, #18 in the upper-right corner of the command centre, #19 on the airlock floor (before going through the co-op door) and #20 above the red light by the 3rd barricade (before getting past it). All 4 give the Chris & Leon figure, and all 20 of Chris’s campaign give the Haos figure.
- The 40mm metal box before the rocket-launcher room.
- The medals: the 3 gatling kills (Piers, Cargo Bay) and more kills than Jake and Sherry on the lifts.
- If you missed #19 or #20, replay 5-4 Emergency Escape Route from Chapter Select.
After the chapter: the Duty Calls achievement and the Virus Shot-Gold dog tag template. With one campaign cleared you have 8 skill sets instead of 1: build one for each situation (for example, Firearm + Defense + J’avo Killer for Jake’s campaign). The “New Purpose” epilogue plays after any chapter 5 once you’ve finished all 4 campaigns. The infinite-ammo skills can only be bought with all 4 campaigns finished; to collect SP, use the Leon 4-4, Chris 3-5 or Jake 4-3 farms.