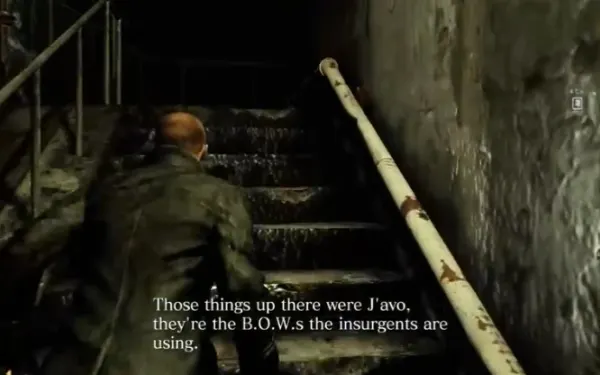
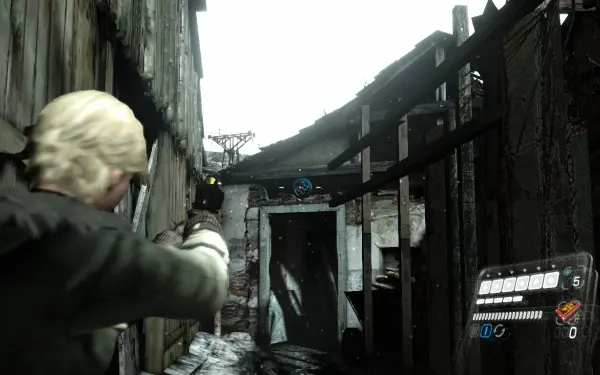
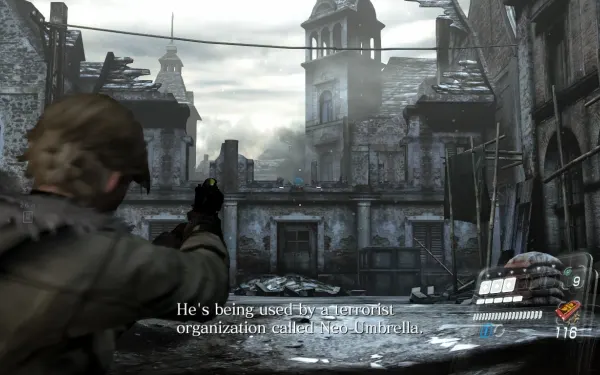
Jake and Sherry’s campaign begins. It’s 24 December 2012 in Edonia, an Eastern European country in the middle of a civil war: Jake Muller, a mercenary who fights for money, comes up out of the sewers with Sherry Birkin, a US government agent sent to find him because his blood is immune to the C-Virus. The chapter is an almost non-stop escape: first from an attack helicopter and the J’avo (mutant soldiers who use guns and mutate whichever body part you damage), then from the Ustanak, the B.O.W. that will hunt them through the whole campaign. There’s a fight with it in a warehouse, a Story Intersection with Chris and Piers in front of City Hall (2 Ogroman and 3 anti-aircraft guns) and a final round inside two Chinook helicopters. In local co-op, P1 is Jake and P2 is Sherry: they do almost everything together, but the pair splits twice in 1-1 and Sherry has a room of her own in 1-2.
Chapter order: 1-1 The Sewer (ladder and door as a pair, the strafing helicopter, Serpent Emblem #1 above a doorway, the house where the floor gives way, the pole gap, Serpent Emblem #2 on the bridge beam, split: Sherry up top, Jake on the collapsing catwalk and the helicopter ledge, the run to the red gate) → 1-2 Water Channel (first Ustanak chase, Jake’s leap, the toilets: Serpent Emblem #3 and Sherry’s 2,000 SP chest, storage rooms, the briefcase with the Remote Bomb, Elephant Killer, the kicked-down ladders, Ustanak in the warehouse) → 1-3 Underground Passage (mannequins, 2,000 SP box, Serpent Emblem #4 as you come out into the square) → 1-4 In Front of City Hall (intersection with Chris and Piers: 3 anti-aircraft guns and 2 Ogroman) → 1-5 Inside the Helicopter (Ustanak on the Chinook, the jump to the other helicopter, the turret against 3 helicopters, the red canister and the parachute).
Before you start:
- Weapons. Jake starts with the Nine-Oh-Nine (9mm, 15 rounds) and Hand-to-Hand: equip it as a weapon, aim (ZL) and attack (ZR) for a 2-hit combo plus an elbow that costs no combat gauge; hold ZR to lock on and release to charge in with a palm strike. It’s the best ammo saver in the game. Sherry carries the Triple Shot (9mm, 20 rounds, single shot or 3-round burst; switch with X while holding ZL, and single shot wastes less) and the Stun Rod: hold ZL + ZR to charge it.
- Ammo. Both use 9mm, so share it out. The new weapon is the Elephant Killer (.500 S&W Magnum, 5 rounds): it’s in the Ustanak’s warehouse and each player gets their own. It auto-equips when you pick it up: switch back to your usual gun and save the .500 ammo for the Ustanak. The only fixed explosives before the boss are in the briefcase in the collapsed area (1 Remote Bomb and 2 Flash Grenades).
- Co-op. Player 1 plays Jake and player 2 plays Sherry. Sherry has Serpent Emblem #3 and a 2,000 SP chest in a room only she can climb into, and the High Voltage achievement is hers alone; Jake does the pole swings and the QTEs in the chase and the helicopter. In split-screen, whatever comes out of a crate (random contents) goes to one player only: weapons found in the field spawn for both, and according to one source an emblem broken by player 2 also counts for player 1 (unverified on Switch).
- No shop and no typewriters. RE6 saves on its own. There are two kinds of point: the save point (SAVE), where you resume if you quit, and the checkpoint (pin icon), where you go back to if you die. Per the Famitsu Official Complete Guide maps, this chapter’s save points are at the start of each stage: the sewer stairs (1-1), right after the Ustanak cutscene that starts the chase (1-2), where you land after the warehouse fight (1-3), in front of City Hall (1-4) and in the first Chinook (1-5). Each section below says where the checkpoints are. Only quit once “Saving…” has gone.
- Skills. If you already have SP from other campaigns, Breakout (2,800) shortens the Ustanak’s grabs, Defense Lv1 (3,200) is cheap, J’avo Killer (3,000, unlocked after killing 30 J’avo) pays off through the whole Jake campaign and Melee Lv1 (10,000) boosts Hand-to-Hand and the Stun Rod. Don’t buy Lone Wolf, Field Medic or Team-Up: they only work with an AI partner.
- Fixed SP: Sherry’s 2,000 SP chest (1-2), the 2,000 SP box by the passage ladder (1-3) and 4,000 SP for each Ogroman you kill yourself (1-4).
- A rank: 70% accuracy or better, 2 deaths or fewer and 40 kills or more; Gamer Guides leaves the A time blank, but B starts at 60 minutes: aim for under 60 minutes.
- Missables and points of no return: Serpent Emblem #2 has to be broken before you help Sherry across the bridge, and the Elephant Killer is best picked up before you open the warehouse’s green doors (if not, you get a second chance in 1-3). Opening those doors starts the fight and you don’t go back to 1-2. The parachute at the end is an instant-death QTE. Nothing is lost for good: everything can be replayed from Chapter Select.
Difficulty: what changes in this chapter
- Amateur: the “life and death” QTEs complete themselves (the leap in the chase, the jump between Chinooks, the parachute) and mash QTEs fill faster. According to one guide you also deal double damage: that’s why High Voltage is easier here, since one Stun Rod charge usually kills. Against the Ogroman, a single boarding may be enough. Action Button Assist: Auto does the QTEs for you on any difficulty.
- Normal: this guide’s baseline. Each Ogroman needs several boardings: plan for three.
- Veteran: you take more damage than on Normal and deal a little less (a single source puts it at 93% of Normal damage). Same tactics, with more care around the Ustanak’s charge.
- Professional: a clean hit takes at least 2 blocks, mash QTEs fill more slowly and damaged blocks recover more slowly. Enemies rarely drop items and never drop Green Herbs, and random crates only give SP. In practice the Ustanak’s charge almost always leaves you Dying, and what you have is the fixed stuff: the briefcase with the Remote Bomb and the 2 Flash Grenades, the herbs, and the Chinook’s 2 × 9mm Ammo and First Aid Spray. Don’t waste them.
- No Hope: skills are disabled, every SP piece is worth double and, if you die, you continue with the health you had when you passed the checkpoint. Pass checkpoints at full health.
1-1 The Sewer: the way out and the helicopter
You start at the foot of the sewer stairs (save point). Go up the stairs, climb the ladder and, at the far end of the hall, kick the door together (A). Outside, an attack helicopter strafes the street: stay on the left to avoid the bullets and follow the road down round the corner. The J’avo here are busy with the helicopter, which shoots at them too: kill them while they’re distracted, with headshots, because they barely move.
The enemies in 1-1. The official guide lists three types plus the helicopter:
- J’avo: a headshot to stagger them, a melee hit (ZR) and a stomp. If you hit their arms or legs, that part mutates.
- Telo-Krljusht: the J’avo that grows a scaled torso. The scales stop bullets: aim for the head or the legs, or use explosives.
- Noga-Let: the J’avo with moth wings for legs. It has a shrieking dash (if it crashes into a wall it stuns itself: coup de grâce) and an airborne grab that can be countered; if you fail that grab’s QTE, it kills you. Counter it and finish it with a stomp. Flash Grenades stun it.
1-1 Serpent Emblem #1 and the house with the sinking floor
Serpent Emblem #1. Once outside, follow the path to the dead end (the first left turn, toward the RPG soldiers): on the left, the emblem sits above the doorway of the dilapidated old building. Look up and shoot it. File: Jake Muller. The first checkpoint is here.
The house with the sinking floor. Go through a second building and hop out of the back window. At the end, drop down, hide behind the shack, then dash up and to the left toward the green house. The floor gives way and you fall: 9mm Ammo on a chair. Climb out of the window, go up the steps, go right, drop down and kick the door together (checkpoint). After the cutscene, the helicopter fires a rocket. There are 2 crates.
1-1 The ledge and the pole gap
The ledge. Outside, a Green Herb by the edge. If you slip, wiggle the left stick side to side or let your partner pull you up. The J’avo ahead has his back to you: stealth melee from behind (ZR). Headshot the second one: he usually falls off the edge. More J’avo arrive, and some mutate into flying Noga-Let (tactic above). There’s a building ahead.
The pole gap. Round the corner there’s a gap: only Jake swings across on the pole. Sherry takes the broken ladder a little to the right (Jake boosts her, A). There are 2 crates, and then the walkway collapses behind you. Climb the ladder.
1-1 Serpent Emblem #2 and the ladders
Serpent Emblem #2. Where Jake swings on the horizontal bars, keep going to the highest level. Before the wooden bridge, on the right, the emblem is stuck to the bridge’s damaged vertical beam (a metal scaffold). Shoot it before you help Sherry across. File: Soldiers of Fortune.
The ladders and the machine-gun J’avo. On the other side of the walkway, kick the ladder down so your partner can follow. You slip on the next walkway too: wiggle the stick. Kick the door together (checkpoint) and round the corner: J’avo that mutate into Telo-Krljusht (scales on the torso: head or legs). Take cover behind the metal plate and watch out for the machine-gun J’avo up high: kill it before you move into the open.
1-1 Split: Sherry up top, Jake on the catwalk
Jake boosts Sherry up to the upper ledge (checkpoint) and each goes their own way:
- Sherry (player 2): climbs to the ledge and kicks a pole down for Jake. Go down the hallway: 2 J’avo wait round the corner, and there are 2 crates. If you wait, more J’avo come: a good spot to charge the Stun Rod (see High Voltage below).
- Jake (player 1): use the pole Sherry kicked down to swing across. The walkway breaks: dash along the catwalk, do the QTE and wiggle the stick to get to safety. Then the helicopter chases you along a narrow ledge with several QTEs: just run, don’t shoot.
- Regroup: go back upstairs; there are 2 crates by the burning barrel.
1-1 The run to the red gate
Kick the door together after the regroup (the last checkpoint in 1-1) and go left. Sherry has a plan: run to the far end together and get through the gate. Enemies come from every side here: don’t stop to fight, keep moving. The red gate leads to the cutscenes: Sherry asks Jake for his blood and the Ustanak shows up. Copper story medal: “Made a promise with your partner”.
High Voltage (Sherry only). The achievement asks for 10 kills with the Stun Rod’s charged attack: hold ZL + ZR and release for the charged hit. PowerPyx puts it at the checkpoint right after the cutscene where Sherry asks for Jake’s blood, but here that cutscene leads straight into the chase. The safe bet is Sherry’s route in the 1-1 split: if you wait, more J’avo come. Kill them with charged hits and, if you don’t reach 10, press − and pick Return to the latest checkpoint to replay the group. On Amateur one charge usually kills; on Normal it sometimes isn’t enough. The start of chapter 3 is another good chance.
1-2 Water Channel: the first chase
1-2 starts (save point) as soon as the cutscene ends: hold dash (B while moving the left stick) and run from the Ustanak down the long corridor. Here the camera faces you, so push the stick down and, when the camera changes, up. If you jog, it catches you and you die. The ground runs out and you jump: Jake presses the on-screen button as soon as the prompt appears to leap and save Sherry (she just waits). Jake crashes through a window with another QTE; Sherry has none. Keep your finger ready: a miss is death.
1-2 The toilets: Serpent Emblem #3 and Sherry’s room
Inside the building, ignore the Ustanak at the window: it can’t be hurt there. Down the hall, the men’s toilets on the left (checkpoint by the toilets): 1 J’avo (knock it down) and a Green Herb in the corner.
- Jake boosts Sherry through the big hole in the toilet ceiling (A).
- Sherry (player 2): upstairs, turn around: Serpent Emblem #3 is in the corner. File: Bio-Organic Weapons (B.O.W.s). That upper room also holds 2 crates, a Red Herb and a chest with 2,000 SP: all of it is Sherry’s.
- If you play Jake alone, several guides say you can break the emblem by throwing a Flash Grenade into the south-west corner (facing from the entrance; from below, the side opposite the broken ladder where you boosted Sherry, to the right of the hole). Jake gets no hand grenades, and there’s no fixed Flash Grenade before these toilets: you’ll only have one if a crate dropped it (the briefcase’s 2 come later). Another source says it’s Sherry-only; in co-op it doesn’t matter: let her break it.
The bronze medal “Discovered the hidden storage room” may be around here (it’s unclear whether it’s this room or the storage room down the ladder).
1-2 The storage rooms and the briefcase
The storage rooms. The hall on the right holds only 1 crate inside a cabinet. The red door has 1 crate and a ladder down to a second storage room: 1 J’avo, 3 crates and 9mm Ammo. Go back and open the other door with your partner.
The briefcase in the collapsed area. Almost everything has fallen in: at the end of the walkway, jump down. There’s 1 crate nearby and, in a cabinet in the other corner, a briefcase with 1 Remote Bomb and 2 Flash Grenades. Save the Remote Bomb for the warehouse. Kick the door of the large warehouse together (checkpoint at that door).
1-2 The large warehouse: explore before the fight
The entrance. As soon as you break the door down, 3 J’avo drop in by rope. Shoot the explosive barrel to their left and you kill all three at once. It’s the one barrel worth spending before the boss: plenty are left for the Ustanak (Gamer Guides counts 6 on the ground and 5 on the high walkway). Don’t shoot any other. If you miss, melee, or cover and headshots.
The exit is the green double doors at the far end: don’t open them yet. First, go over everything:
- The toilet by the green doors: 2 crates. In the small room opposite, 1 crate on some barrels (there’s a container in the middle you can walk around).
- The central stairs: go up, leap the gap, leap the second gap and kick the ladder down: it’ll be an escape route. There are J’avo in the room on the right.
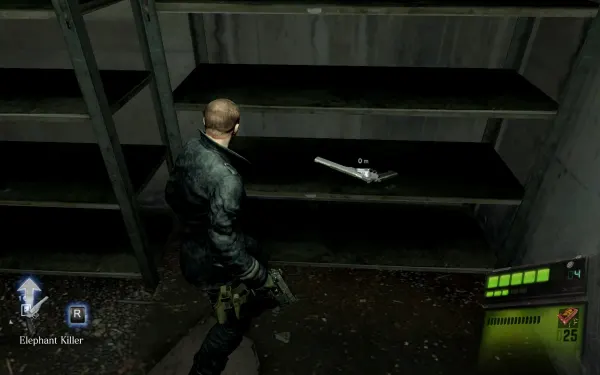
- Elephant Killer: in a cabinet in the 2nd-floor storage room, the one with the red barrels, reached through a hole in the wall. Each player takes their own. It auto-equips: switch back to the handgun so you don’t waste .500 ammo. There’s 1 crate in that room. If you wait, up to 3 J’avo drop in by the explosive barrel, one at a time. Leap the gap: 1 crate.
- The second ladder: run to the end of the walkway, kick that ladder down too and drop down. On the right, J’avo slide down ropes one at a time: easy melee kills for ammo and SP.
With both ladders down, open the green doors together: cutscene, the Ustanak drops in and blocks the exit. See Boss — Ustanak (warehouse). It ends crushed under the rubble (copper medal “Escaped from a collapsing building”).
1-3 Underground Passage: the mannequins
You fall onto a new path (save point at the start of 1-3): 2 crates. In the next room, 1 crate and a Green Herb in a cabinet. Down the hall, 1 crate with a Red Herb hidden behind it: mix them if the Ustanak roughed you up. The passage is full of mannequins, which do nothing. If you didn’t get the Elephant Killer, it’s on the metal shelves in the mannequin room (it only appears if you don’t have it). By the ladder there’s a metal box with 2,000 SP. Climb the ladder and go out.
1-3 Serpent Emblem #4 and the square
Serpent Emblem #4. As you come out into daylight (a small square), stop in the doorway and look straight ahead: the emblem is high on the wall of the ruined building opposite, above a doorway across the square. The handgun will do. File: Ustanak. With all 4 from this chapter you get the Jake Muller and Jake Muller VER.2 figures.
Next, 2 J’avo guard the chain-link gate round the corner: kill them and open it together. Cutscene with the BSAA: Chris, Piers and Finn.
1-4 In Front of City Hall: intersection with Chris and Piers
This is a Story Intersection: the same section as Chris’s chapter 2 (2-3). Offline, the other pair is AI, and it’s AI in local split-screen too. You start in the square (save point). The route guide (L) doesn’t work here: stay close to the BSAA team. Finn (AI, invincible) destroys 3 anti-aircraft guns while you deal with 2 Ogroman. No emblems here. See Boss — Ogroman ×2 (in front of City Hall).
The square’s layout (official guide). It matters for both Ogroman fights:
- 3 power lines: one crosses the north street that runs from the square to the gun 2 building (the central building), one crosses the eastern side street and the third is at the gap between the square and the gun 3 building (west). They’re the ones you need for the second Ogroman.
- 2 J’avo gun turrets: one in the north walkway building (with 2 wooden crates next to it) and one at the end of the underground passage (the gunner you’re told to kill, below). The north walkway only opens once the Ogroman throws a vehicle and breaks the fence.
- Checkpoints: after each gun is destroyed and one inside the underground passage.
1-4 Gun 1: the building behind you
In the building right behind you at the start (2nd floor). 2 crates in the room next door, 2 by the stairs and 2 in the room with the blown-out back wall. There’s a room there where J’avo drop in at both ends and the Ogroman can’t reach you: a good SP farm and the best moment to kill the first one. When Finn blows it, checkpoint, and Finn opens the door to the next building.
1-4 Gun 2: the central building
Go down the street and round the corner. Finn blows the door of the central building (on your left). Take cover on the right, kill the J’avo, 1 crate, and go up. Defend Finn: J’avo come out of the rubble on the roof at 2 spots. When it’s destroyed (checkpoint), J’avo snipers with laser sights appear and the second Ogroman arrives: lead it under one of the 3 power lines (see the layout above).
1-4 Gun 3: the underground passage
Go down and drop through the hole on the ground floor into the underground passage. 1 crate on the left and a Green Herb on the right. At the junction, 2 crates on the right; in the other passage, 2 more. At the next corner, a Red Herb and 3 crates. From here on the Ogroman rips the ceiling grating out and tries to grab you: don’t stand under the openings.
Go through the hole in the wall and follow the tunnel to the end (ignore the first ladder; there’s a checkpoint on the way). Kill the turret gunner, break 2 crates and kick down the ladder in the corner. Hop off the building on the left to the third gun and keep the Ogroman busy while Finn sets the charges. A hole in the road by gun 3 drops into a stretch of tunnel with 1 crate.
With the 3 guns down (checkpoint), the BSAA airstrike comes in (copper medal “Teamed up with the BSAA in the square”).
1-5 Inside the Helicopter: the two Chinooks
The first Chinook (save point at the start of 1-5). By the cockpit, right behind the pilots’ seats: 2 × 9mm Ammo and a First Aid Spray. The Ustanak clings to the helicopter and tears through the walls at 6 doors. See Boss — Ustanak (helicopter): after several attacks you’re told to jump to the other Chinook through the door by the BSAA operative; Jake has a QTE after the jump and Sherry doesn’t.
The second Chinook (checkpoint after the jump). If you missed the first one’s supplies, there’s a backup in the same spot, at the front by the cockpit: the 2 × 9mm Ammo appear if you restart from the checkpoint without having taken them, and the First Aid Spray only if you didn’t take it in the first helicopter. Switch to the handgun and reload it: you’ll need it at the end. From the turret at the back (checkpoint) you shoot down the 3 helicopters the Ustanak rides, and the chapter ends with the parachute.
Boss — Ustanak (warehouse)
The large warehouse has a high walkway running all the way round, with the central stairs and the 2 ladders you kicked down. Explosive barrels: 6 on the ground and several more on the high walkway (Gamer Guides counts 5 up there), more than enough. Weak point: the head. The metal arm takes less damage. Flash Grenades do nothing to it. Jake’s Hand-to-Hand combos stagger it on every hit and interrupt its attacks. Attacks: the charge (from mid or long range with line of sight: it slams you into the wall and almost certainly leaves you Dying; it crouches first and can turn mid-charge, so dodge at the last moment), the claw grab (the arm device opens as a tell: up close, step to the side or crouch with B while holding ZL; there’s a long-range version that drags you in), a short-range kick that stuns you, a one-arm punch (easy to dodge) and a strong, short-range two-arm smash downward.
- Loop. It usually follows you upstairs unless your partner really provokes it below. Use the walkway loop: central stairs → leap the gaps → perimeter → kicked-down ladders → back up. Agree on it so you both lead it the same way.
- Barrels. Shoot a barrel just before the Ustanak passes it: once it’s past, its body blocks your line of fire. Its main attack is the charge: lead it along paths lined with barrels and use the pauses between charges to reposition.
- Remote Bomb. It works best on the high walkway. One source says about 4 are enough on Normal; you have 1 from the briefcase, so make up the rest of the damage with barrels and bullets.
- Bullets. The Elephant Killer to the head is your best weapon; between reloads, the Nine-Oh-Nine and the Triple Shot also help. Don’t waste bullets on the arm.
- If it grabs you: wiggle the left stick side to side, or have your partner hit the Ustanak (A near it) to free you. Breakout speeds this up.
- The rope J’avo are distractions and an ammo source: melee them only if the Ustanak isn’t winding up a charge.
- Finish: with enough damage, the cutscene leaves it crushed under the rubble.
By difficulty: on Professional and No Hope the charge is a near-certain Dying and the J’avo hardly drop ammo: don’t fight on the ground, stay on the upper loop and split the barrels between you.
Reward: the copper medal “Escaped from a collapsing building” and the way on to 1-3 Underground Passage.
Boss — Ogroman ×2 (in front of City Hall)
The same Ogroman as in Chris’s campaign. Weak points: the face/open mouth and the red growth on its back. Attacks: a swipe as it strides in (2 blocks on Normal), a stomp, a grab if you’re close (shoot its face to break free) and a head-height punch with a big wind-up. Fight from second floors: when it staggers it rests a hand on the edge of the building and you can jump on.
- First Ogroman (gun 1): from the gun 1 building, where it can’t reach you, shoot its face and the growth until it staggers. Press ZR by its arm to climb on and mash B in the QTE to rip out a spine and stab it into the growth. Repeat until it dies: on Amateur one boarding may be enough, but on Normal or harder you need several (one source says two, another three), so plan for three. It drops 4,000 SP; don’t touch the remains it dissolves into, they drain health.
- Second Ogroman (after gun 2): it’s the one that fled from the bridge in Chris’s campaign. Its growth isn’t exposed and it can’t die until you rip out the regeneration device on its back on the first boarding. Lead it under one of the 3 power lines (the north street toward gun 2, the eastern side street or the gap toward the gun 3 building): the shock stuns it and lets you climb on. After that, same as the first one.
- In the underground passage it harasses you from the ceiling: don’t stand under the openings.
- Gun 3: as the snipers multiply, it’s usually better to drop into the pit in the street and keep it busy there while Finn sets the charges.
- Finish: the airstrike after the third gun kills both, except one that still has its device: you have to board that one at least once. The 4,000 SP are for killing it yourself first.
Reward: 4,000 SP for each Ogroman you kill and the bronze medal “Defeated the giant B.O.W. through its weakspot”.
Boss — Ustanak (helicopter)
Inside the first Chinook: the Ustanak breaks through the wall at 6 doors. Then the second Chinook’s turret against 3 enemy helicopters, and a finale in the cabin.
- Chinook 1. Take the First Aid Spray and the 2 × 9mm Ammo by the cockpit. The Ustanak’s next entry point shows as a red icon on screen: move away from that spot before it bursts in. Shoot it with the handgun (the Elephant Killer works too, and on later runs the sniper rifle). You don’t need to spend much ammo: the section moves on after a set number of attacks.
- Grenades. Once it’s hurt, it also throws grenades: watch where they land and get clear.
- The jump. When the helicopter catches fire, jump to the other Chinook through the door by the BSAA operative. Jake has a QTE after the jump. Switch to the handgun and reload it. If you missed the spray or the ammo, look at the front of the second Chinook.
- Turret (ZR to fire). Shoot the 3 helicopters the Ustanak rides: shooting it does nothing. Shoot down the incoming missiles. The turret overheats: fire in bursts. Hold dash (B) to duck its attacks.
- Finale. The Ustanak rams a helicopter into yours and hangs on while you slide down the cabin. Shoot the red gas canister next to it (it looks like a fire extinguisher) to knock it off.
- Parachute. As soon as the prompt appears, press B to grab the parachute. If you miss it, you die (on Amateur or with Action Button Assist: Auto it’s automatic).
Reward: end of Jake’s chapter 1: the Money Talks achievement and the Virus Shot - Copper dog tag template.
Don’t leave without:
- The 4 Serpent Emblems: #1 above the doorway of the ruined building in the dead-end alley, #2 on the wooden bridge’s beam after Jake’s bars (before you help Sherry), #3 upstairs in the toilets (Sherry breaks it, and she also gets the 2,000 SP chest and the Red Herb) and #4 high on the building opposite as you come out into the square. All 4 give the Jake Muller and Jake Muller VER.2 figures.
- The Elephant Killer (2nd-floor storage room in the warehouse or, failing that, the mannequin room), with whatever .500 ammo you didn’t spend.
- The fixed SP: Sherry’s 2,000 SP chest, the 2,000 SP box by the passage ladder and the 4,000 SP for each Ogroman you kill yourself.
- For High Voltage, any Stun Rod charged kills you still need (Sherry’s 1-1 route replays from its checkpoint).
- Any emblem can be collected again from Chapter Select.