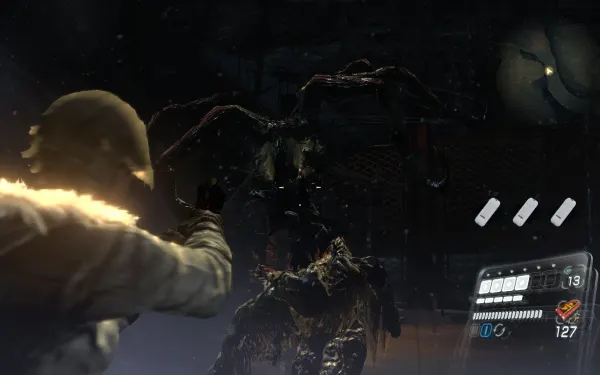
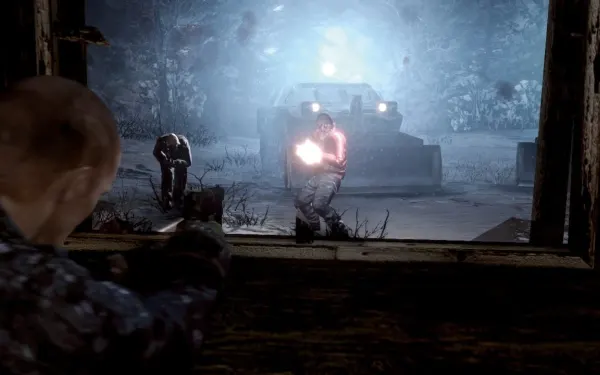
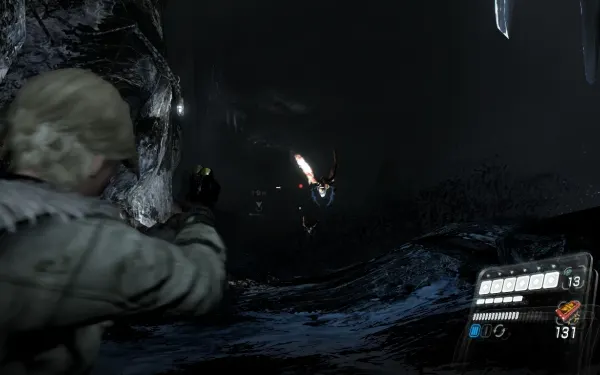
Jake and Sherry are still on the run through Edonia, between 24 and 25 December 2012. The Chinook from the previous chapter went down in the snowy mountains and Sherry’s data was lost in the snow: the chapter opens with the hunt for the 3 FOS Memory Devices along a mountain path full of J’avo snipers and Mesets (mutant birds), carries on with the siege of a cabin and a snowmobile run ahead of an avalanche, and ends in an ice cave where the Ustanak hunts with its Oko, blind creatures that see by ultrasound. You don’t fight in the cave: it’s stealth, and if the Ustanak catches you, it’s over. In local co-op, P1 is Jake and P2 is Sherry; the pair stays together for almost the whole chapter and only splits the roles in the cave (Jake boosts Sherry, who takes the Mine Keycard).
Chapter order: 2-1 Mountain Path (Sniper Rifle, the first Mesets on the rope bridge, FOS Memory Device B, the herb tunnel, the snipers’ slope, the sawmill: Serpent Emblem #5 and FOS Memory Device A, the wooden bridge, Serpent Emblem #6 on the radio tower, the cabin with 4,000 SP and FOS Memory Device C) → 2-2 Snow-Covered Mountain (the shelter: cabin siege; avalanche on the snowmobile, Serpent Emblem #7 on the last jumps, the ice tunnel, the breaking ground) → 2-3 Cave (Ustanak and Oko: stealth, the ice wall with 4,000 SP, the 2,000 SP box, the 5,000 SP box, the maze of 5 Oko, Serpent Emblem #8 on the water tank, the slide, the Mine Keycard, 4 heavy doors, the drill).
Before you start:
- The weather. The chapter is almost all outdoors in a blizzard that comes and goes: sometimes you can’t see a thing, but the J’avo snipers don’t miss because of the snow. On the mountain path the enemies never run out: move from cover to cover rather than fighting in the open.
- Weapons. The new weapon is the Sniper Rifle (7.62mm, 6 rounds, 2 zoom levels), for both of you, right at the start; if you skip it, it’s propped against the wall of the shelter cabin. Use it on the snipers and for Serpent Emblem #6 on the radio tower, and keep a couple of rounds, or Elephant Killer ones, for the Oko in the cave: if they die in one shot, the Ustanak doesn’t notice.
- Explosives. The Mesets are very vulnerable to Flash Grenades, which are also the tool for the cabin siege; there are 2 in the FOS C cabin. The cave gives you 4 Remote Bombs for the keycard; in the siege cabin they’re dangerous (small room).
- Co-op. The chapter doesn’t split until the cave, where Jake boosts Sherry and she takes the Mine Keycard; Serpent Emblem #8 is much easier with 2 people. In split-screen, each crate’s contents go to one player only.
- Saving. RE6 saves on its own: the save point (SAVE) is where you resume if you quit and the checkpoint (pin) is where you go back to if you die. The Chapter Select stages are 2-1 Mountain Path, 2-2 Snow-Covered Mountain (Evil Resource has it start at the siege cabin, with the avalanche following in the same stage) and 2-3 Cave. The Famitsu Official Complete Guide marks the cave’s save point at its entrance and 8 checkpoints inside (given below). There are frequent checkpoints on the snowmobile run too.
- Skills. Breakout (2,800) helps with grabs; for the siege, one guide recommends Combat Gauge Boost, but it costs 70,000 SP (Lv1): don’t obsess over it. J’avo Killer pays off along the whole mountain path.
- Fixed SP: 4,000 (FOS C cabin) + 4,000 (ice wall, optional) + 2,000 + 5,000 (cave) = 15,000, plus whatever enemies drop (a Meset can drop a 500 piece).
- A rank: 70% accuracy or better, 5 deaths or fewer and 50 kills or more; Gamer Guides leaves the A time blank, but B starts at 60 minutes: aim for under 60 minutes.
- Missables and points of no return: Serpent Emblems #5 and #6 must be taken before you enter the shelter (you never go back to the mountain afterwards); #7 can only be run over on the way down; the 4,000 SP behind the ice wall only appear if the Ustanak breaks the wall. Everything can be replayed from Chapter Select.
Difficulty: what changes in this chapter
- On every difficulty: if the Ustanak catches you in the cave, it’s an instant Game Over.
- Amateur: the life-and-death QTEs complete themselves (the drill’s QTE, the avalanche “Jump!”) and mash QTEs fill faster. Action Button Assist: Auto does the same on any difficulty.
- Normal: this guide’s baseline.
- Professional: a clean hit takes at least 2 blocks, so the snipers’ knockdown on the slope, which already slides you to the bottom, also leaves you badly hurt. Enemies rarely drop items and never drop Green Herbs: the endless J’avo “farm” near FOS B gives very little ammo, so don’t hang around. Mash QTEs fill more slowly: if you can, turn on Action Button Assist: Auto for the drill and the avalanche jump.
- No Hope: skills are disabled and, according to the wiki, every SP piece is worth double, so the fixed 4,000, 2,000 and 5,000 SP cases should give 8,000, 4,000 and 10,000. If you die, you continue with the health you had at the checkpoint.
2-1 Mountain Path: the Sniper Rifle
When the helicopter went down, Sherry’s 3 data devices were lost in the snow. Climb the ladder: a minimap appears at the top right of the screen with the 3 red dots of the devices. Green Herb to the right of the ladder. Follow the walkway and drop down: 1 wooden barrel. Drop down again: 3 crates and the Sniper Rifle by the bench with the tarp. One device is visible to the right, on higher ground, but you can’t reach it from here: head north-east first and you’ll loop round to it. On the way, 2 J’avo jump you from behind.
This chapter’s mutations. The mountain J’avo mutate into four forms, besides the Mesets:
- Glava-Smech (the head opens into mandibles): shoot its mouth to make it close, then the glowing core. It can bite and grab you: it can be countered.
- Ruka-Bedem (shield arm): bullets bounce off. One melee hit to the face and the coup de grâce, or have one player hold it from the front while the other flanks it.
- Glava-Begunats (the head split in two): it charges berserk. Counter that charge: the counter kills it.
- Telo-Krljusht (scaled torso): head or legs only; it’s weak to explosives.
2-1 The first Mesets and FOS Memory Device B
The first Mesets. At the top of the path, by a bridge, 2 chrysalids release the first Mesets: huge birds that circle, dive at you and sometimes land. The dive can’t be countered: shoot them first, especially when they land or hover in place. A Flash Grenade can kill them, several at once if they’re bunched up. Fight on the rope bridge rather than letting them follow you: snipers and Mesets together are a very dangerous mix. A Meset can drop a 500 SP piece.
FOS Memory Device B. Drop down: 2 J’avo come from the north. Endless waves of J’avo spawn here: if you want SP and ammo, this is your farming spot (on Professional it barely pays). Some J’avo mutate into Mesets when damaged, others into Glava-Smech and others into Ruka-Bedem (tactics above). To the south-east, leap a gap: 1 crate, 1 barrel and FOS Memory Device B, by a tree on the slope east of the start. The guides disagree on which letter each device carries; it doesn’t matter, you need all 3.
2-1 The herb tunnel and the snipers’ slope
The herb tunnel. Go back north: 1 barrel and a ladder. Climb up, go left along the path and, at the end, 1 barrel (the ladder there leads to an empty ledge). To the left of the barrel there’s a crawlspace. Before you go in, free up 2 slots and mash Y during the slide: you pick up a Green Herb and a Red Herb on the way through. You come out again by the Sniper Rifle spot.
The snipers’ slope. Go north and keep right as you climb the slope. If a sniper knocks you down here, you slide all the way to the bottom: kill the snipers first with the Sniper Rifle (the laser tells you where they are). At the top you no longer slide.
2-1 The sawmill: Serpent Emblem #5 and FOS Memory Device A
A big clearing with stacks of logs. There are J’avo on snowmobiles: don’t get run over. If you kill the driver, you can ride the snowmobile (ZR accelerates, ZL brakes and reverses, X gets off) to reach the next device. The bronze medal “Defeated a flying B.O.W. with the snowmobile” probably comes from running over a Meset with it.
- Serpent Emblem #5: in the operator’s cab of the crawler excavator in the sawmill, on the driver’s seat (one guide says “on its door”). File: Sherry Birkin.
- FOS Memory Device A: on the ground next to the excavator, beside a wooden barrel. Grab both at once.
2-1 The wooden bridge and the radio tower
Go south to the bridge: 1 crate to its right. Cross the rickety wooden bridge east: 2 crates by a truck on the right.
Serpent Emblem #6: on the tip of the iron radio tower. You need the Sniper Rifle. There are 2 angles: from the western ridge where FOS A was, looking south, or from the supply cabin you reach shortly (see the next section). File: The G-Virus. One guide counts this emblem as #5 and the excavator one as #6; the order changes nothing, you need both.
2-1 The supply cabin and FOS Memory Device C
To the north there’s a corpse and the cabin: 2 barrels, 2 crates and a case with 4,000 SP and 2 Flash Grenades. The cabin has 1 or 2 entrances and is a good place to hold off the Mesets. The best angle for Serpent Emblem #6, according to one guide: from the top of this cabin, through the left window facing south, you’re level with the tip of the radio tower.
Outside, FOS Memory Device C is next to the cabin; according to one guide it sits on a rock you climb from the right. As soon as you take it, the corpse turns into a Meset: have your gun ready. All 3 devices give the copper medal “Recovered all the lost data”.
On to the shelter. Head back toward the base of the tower, then go north and north-west. One more Meset at the door. Point of no return: as you go in the cutscenes start, then the siege and then the snowmobile, and you never get back to the mountain path. Before you cross, make sure you have Serpent Emblems #5 (excavator) and #6 (radio tower). Go in: cutscenes (the story of Sherry’s G-Virus).
2-2 Snow-Covered Mountain: the cabin siege
Chapter Select’s stage 2-2 starts here. The J’avo surround the shelter. If you didn’t take the Sniper Rifle, it’s propped against the cabin wall (it only appears if you don’t have it).
- Phase 1: the J’avo only come in through the 2 windows. 9mm Ammo on a counter in the corner. Stun with a shot, finish with melee and stomp the heads of the ones that go down.
- Phase 2: after 4 or 5 kills, a cutscene: the J’avo blow a hole in the wall (or come in through the roof). A Flash Grenade into the hole stuns 4 or 5 at once so you can finish them with melee.
- The guides’ trick: burn the combat gauge on melee and take a tablet (R): it refills the gauge too, and you keep hitting.
- Don’t use Remote Bombs here: the room is small and the blast reaches you. In co-op, each of you watches one window and then the hole.
- If you kill every J’avo around the cabin, bronze medal “Wiped out all enemies around the cabin”.
2-2 The avalanche on the snowmobile
You ride down on the snowmobile with the avalanche behind you. ZR accelerates, ZL brakes or reverses, the left stick steers. There are frequent checkpoints.
- Start: it’s linear. Don’t turn hard right at the beginning. When Sherry says so, hug the right: the avalanche comes from the left.
- Forest: mostly right and then down the middle, dodging trees. Ease off the throttle rather than crash: every crash slows you down and the avalanche catches you.
- The ice: an icy stretch with lots of small jumps that leads to a cave.
Serpent Emblem #7. On the right-hand side of the slope, on one of the last small jumps, about 50 m before the entrance to the ice tunnel (it’s also a checkpoint). The cue: Jake tells Sherry to keep her speed up so the snow doesn’t bury them (“Keep your speed up. I don’t want to be buried out here!”) and 6 to 9 small jumps follow. Run it over to break it: no need to get off. Brake if you need to in order to hit it: it counts even if you then crash and die. If you miss it, press − and pick Return to the latest checkpoint before you pass the tunnel entrance: a new checkpoint is set there and you can’t go back (one guide places it just inside the tunnel). File: Mesets.
The tunnel and the breaking ground. Inside the tunnel, keep your speed up: the avalanche is still there. On the way out the ground splits into blocks: aim for the solid pieces, don’t clip the edges or cut corners over cracking ice. Trick: brake for a moment to line up, then go full throttle. When you hear the order to jump (“Jump!”), press the on-screen button in time (on Amateur or with Action Button Assist: Auto it’s automatic). One guide recommends, in this second part, staying close to Sherry, who marks the safe line. Going over the edge is Game Over. Copper medal “Escaped the avalanche on snowmobile”.
2-3 Cave: the stealth rules
The cave starts with a save point at the entrance. There are ordinary bats, which don’t matter. Then a co-op door (checkpoint) and a cutscene: the Ustanak and the Oko.
- The Oko are bat-like creatures that come out of the Ustanak’s back: they have no eyes and track by ultrasound, which doesn’t go through walls. Their tumours glow blue when calm and red when they detect you; then they shriek and the Ustanak comes. They only detect what’s in front of them. Running doesn’t alert them.
- How to kill them: sneak up from behind and press the context attack (ZR) that appears: a silent instant kill. Shooting an Oko is only safe if it dies in one shot (Elephant Killer or Sniper Rifle).
- If they see you or you fire, the Ustanak comes, and if it catches you, you die.
- Hiding spots: the dumpsters. Count on hiding safely only once (sources disagree: one says the 2nd time kills you, another that you get 2 chances). The official guide draws three before the exit: in the first Oko corridor, right after the entry door; at the drop past the second checkpoint, next to the ice walls; and at the maze’s east entrance.
See Boss — Ustanak (cave) for the summary.
2-3 The ice-wall corridor
Kill the first 2 Oko in the corridor and drop down (checkpoint). In the corridor below there are 3 ice walls on the left, with the Ustanak patrolling the room behind them.
- Optional 4,000 SP (if you move on without them, you can’t go back for them this run): the case is in the north-west corner of the Ustanak’s room, behind the walls. Let the first Oko spot you by the first ice wall while the Ustanak is close behind it, and run to that drop’s dumpster to hide. The Ustanak smashes the wall. Once it leaves, kill the Oko and grab the case: 4,000 SP. Another guide says you can break the wall with a Remote Bomb and then hide. Only do this if you’re comfortable running.
- Short ladder on the left (on the east side, just before the container you push together): a box with 2,000 SP on a ledge. There’s a checkpoint at that ladder. Don’t jump off that ledge: go back the way the marker shows.
2-3 The Oko maze
On the lowest level, push the container together (A): a short cutscene takes you to the maze room (checkpoint before you enter), with 5 Oko and dumpsters along the walls. Inside, only the first dumpster on the left wall works as a hiding spot. Before you go in, follow the left wall down the stairs: box with 5,000 SP. Take it before you enter the maze. From a small lookout you can watch the patrols. Order:
- Oko 1, by the ladder (right wall): does a long clockwise loop. When it passes the ladder, drop down and kill it from behind.
- Oko 2 and 3, left of the stairs: a short path with 2 Oko, one on a short loop and one on a long loop. Kill the short-loop one while the other is far away and go back to the stairs; then the long-loop one. You can also kill them at the same time when both face away (one each).
- Oko 4, on the back path, parallel to the stairs: goes back and forth without turning the corner. Hit it as it turns at the corner.
- Oko 5, on the exit stairs: follow it up and kill it at the top.
With the AI, your partner won’t let you leave until all 5 are dead. The bronze medal “Beat the cave area without killing any enemies (excluding Ustanak)” clashes with these kills: it’s unclear how the Oko count.
2-3 Serpent Emblem #8 and the slide
Serpent Emblem #8. On the water tank by the exit, opposite the door (bottom left of the tank): it’s behind you as you climb the last stairs. The shot alerts the Ustanak. Method:
- First turn the door’s valve together, but don’t go through.
- One of you shoots the emblem (the Sniper Rifle from near the dumpster works well).
- Both of you use the door straight away (A): once through, the chase ends (checkpoint after the door).
With the AI, your partner runs to a dumpster instead of the door and you can die; in split-screen it’s easy. If you die after breaking it, carry on. File: Oko. With all 4 from this chapter: the Sherry Birkin and Sherry Birkin VER.2 figures.
The slide. Outside, on the ice, the Ustanak smashes through the wall on the left. Run and slide (dash, then ZL) under the gap just in time: slide too late and you end up crawling and it catches you.
2-3 The Mine Keycard
Climb the ladders to the first big cavern, open to the sky. Cutscene. The Ustanak patrols the middle. Here the pair splits the job:
- On the right (east) side of the area there are 4 Remote Bombs, in two pairs: take them. One guide warns not to step on the ice at first.
- The broken ladder on the left is for Sherry: Jake boosts her (A).
- The Mine Keycard is in the hand of a corpse at the north end, on the far side, near the Ustanak.
- Jake (player 1) plants a Remote Bomb far away, on the right (where the bombs were), heads back toward the exit door and detonates it. The Ustanak (and any Oko) goes to the noise and Sherry (player 2) takes the keycard.
- Use the keycard on the security door (checkpoint at the cavern’s exit).
2-3 The 4 heavy doors and the drill
The 4 heavy doors. 4 doors in a row follow (checkpoint at the start of the corridor): turn the wheel, open, repeat. Each one takes longer than the last and the Ustanak is right behind you. Get through fast, without stopping. There’s another checkpoint after the fourth.
The drill. On a giant mining drill against the Ustanak: rotate the left stick and press the prompted button in time (ZR when asked and, to finish, B; watch the symbol on screen). Repeat until you throw it off. Copper medal “Defeated Ustanak with the drill”. Walk toward the light: cutscene with Carla and the capture. End of chapter.
Boss — Ustanak (cave)
It’s not a damage fight: shots only draw it to you. It hears very well but sees poorly, which is why it uses the Oko. The whole of 2-3 is stealth, distraction and a final QTE. If it catches you, it’s Game Over, on every difficulty.
- Oko: sneak up from behind while its light faces away and press ZR. Running doesn’t alert them; shooting does, unless it dies in one shot (Elephant Killer or Sniper Rifle).
- If they see you: run to the nearest dumpster and hide. Count on hiding only once.
- 4,000 SP: get the Ustanak to break the first ice wall and take the case in the north-west corner once it leaves.
- Maze: 5 Oko, in the order above. Only the first dumpster on the left wall works.
- Serpent Emblem #8: valve turned, shot, co-op door.
- Ice: run and slide (ZL) under the gap it opens.
- Mine Keycard: Remote Bomb far away, detonate, and Sherry takes the keycard.
- Doors and drill: 4 wheels without stopping and the stick QTE.
Reward: the copper medal “Defeated Ustanak with the drill”, the A Revolting Development achievement and the Virus Shot - Light Green dog tag template. Fixed SP in this chapter: 4,000 (FOS C cabin) + 4,000 (ice wall, optional) + 2,000 + 5,000 (cave) = 15,000, plus whatever enemies drop.
Don’t leave without:
- The 4 Serpent Emblems: #5 in the sawmill excavator’s cab, #6 on the tip of the radio tower (Sniper Rifle, before you leave the mountain path), #7 on the last small jumps on the right before the tunnel (run it over: there’s no other chance this run) and #8 on the water tank at the maze exit (valve turned before you shoot). All 4 give the Sherry Birkin and Sherry Birkin VER.2 figures.
- The 3 FOS Memory Devices (the “Recovered all the lost data” medal).
- The Sniper Rifle and the 4,000 SP with 2 Flash Grenades case in the FOS C cabin.
- The Green Herb and Red Herb in the tunnel (2 free slots).
- The cave’s 2,000 and 5,000 SP boxes, and the 4,000 SP behind the ice wall (only if the Ustanak breaks it).
- Everything can be collected again from Chapter Select.