Six months have passed. It’s 30 June 2013 and Jake and Sherry are prisoners in a Neo-Umbrella facility hidden inside a luxury estate in China, where Jake’s blood is being studied. The chapter has three very different parts: an escape in which Jake fights unarmed while Sherry sneaks through her own cell block (the pair is split, and Jake covers her with machine-gun cameras); the mansion, where they get their gear back and hunt 16 ID Medals through waves of J’avo to open the Bear Commander room; and the flight from a tank that can’t be destroyed, to a motorbike. In local co-op, P1 is Jake and P2 is Sherry: in 3-1 each plays their own map, and in 3-3 Sherry holds a room alone while Jake solves the statue puzzle.
Chapter order: 3-1 Research Facility - Detention Center (split: Jake unarmed in his cell, Switchboard Key, the power cut, the white machinery room, the cart and the duct, the camera booth: Serpent Emblem #9 through camera 3 and the door code; Sherry sneaks to terminals 3 and 4) → reunion in the locker room → 3-2 Research Facility - Living Quarters (gear back, the bas-relief and the gunmen above, Serpent Emblem #10 in the storage closet, the chandelier hallway, the library, the smoking lounge, the bedroom, the statue hall: the hunt for the 16 ID Medals, the nightclub and the piano, the study, the fountain, the pool, the north gate with the Bear Commander, the comms room) → 3-3 Research Facility - Entrance (the tank: Serpent Emblem #11 in the Buddha rubble, the swing pipe, the corridor, the pond garden with Serpent Emblem #12, the lever room, the rotating statue, the briefcases and the bike).
Before you start:
- 3-1 with nothing. Jake starts with no weapons and no items (all of 3-1 with his fists); Sherry only has her Stun Rod, and that map has nothing to pick up, no breakables and no fixed items. Your gear comes back at the start of 3-2.
- Ammo for the mansion. Keep Elephant Killer ammo for the Strelats (the first one hatches on the bas-relief stairs). Flash Grenades pay off in the mansion’s waves.
- Remote Bomb. You need 1 for the smoking-lounge ID Medal (it sits under a table you have to blow up), but you don’t need to bring one: the gold jar in that same room always holds one. If you spent yours in chapter 2, no problem.
- ID Medals. In every room of the mansion, kill every enemy first and take the preset ID Medal last: 2 carriers only appear if you haven’t taken any preset medal yet.
- New weapon. The Bear Commander (a 30-round assault rifle with a 1-shot grenade launcher; switch modes with X while holding ZL) is behind the gate that the 16 ID Medals open, and you’ll want it in chapter 4 for the helicopter and the Ubistvo.
- Co-op. Player 1 (Jake) has Serpent Emblem #9, the gun-camera medal and the briefcases at the end; player 2 (Sherry) does the stealth route and, in 3-3, holds the lever room alone. In split-screen only one of you takes what’s in each breakable; the Bear Commander drops for both.
- High Voltage (10 kills with the charged Stun Rod, ZL + ZR) can still be farmed here as Sherry, and the start of 3-1 is a good place for it: the Stun Rod is her only weapon there (reload the checkpoint and repeat; easiest on Amateur).
- Saving. RE6 saves on its own: the save point (SAVE) is where you resume if you quit and the checkpoint (pin) is where you go back to if you die. Per the Famitsu Official Complete Guide maps, there are save points in Jake’s cell and Sherry’s cell (3-1), in the locker room at the start of 3-2 and in the corridor by the main hall at the start of 3-3. The checkpoints are given in each section.
- Skills. J’avo Killer (3,000 SP, unlocked by 30 J’avo kills) is the best value in the chapter; the manual’s recommended “Power” skill set (Melee Lv1 + J’avo Killer Lv1 + Combat Gauge Boost Lv1) suits 3-1, but Combat Gauge Boost costs 70,000 SP: Melee Lv1 (10,000) plus J’avo Killer already makes a difference.
- Fixed SP: 300 + 300 (gold jars) + 2,000 + 300 + 300 (north gate) + 300 (glass room) + 4,000 + 300 (bike room) = 7,800.
- A rank: 70% accuracy or better, 2 deaths or fewer and 55 kills or more; Gamer Guides leaves the A time blank, but B starts at 60 minutes: aim for under 60.
- Missables and points of no return: Serpent Emblem #9 before you leave the camera booth (Jake only); all 16 ID Medals and the north-gate room before you go through the comms-room door (afterwards the tank destroys the statue); Serpent Emblem #11 before you leave the wrecked hall. Everything can be replayed from Chapter Select.
Difficulty: what changes in this chapter
- Amateur: the life-and-death QTEs complete themselves, and High Voltage is easier at the start of 3-1, because one Stun Rod charge usually kills.
- Normal: this guide’s baseline.
- Professional: a clean hit takes at least 2 blocks (a Ruka-Srp slash or a Noga-Skakanje back kick hurts much more), enemies rarely drop items and never drop Green Herbs: ammo and herbs come mostly from the gold jars and the fixed cases below. The ID Medal carriers still drop their medals. The tank’s shell is already death on Normal: nothing changes, dodge it the same way.
- No Hope: skills are disabled (Jake fights 3-1 without Melee or J’avo Killer), every SP piece is worth double and, if you die, you continue with the health you had at the checkpoint.
3-1 Jake’s cell
China, 30 June 2013: Jake is unarmed in his cell (save point). 2 J’avo guards with stun batons walk in. Equip Hand-to-Hand: aiming (ZL) and striking (ZR) doesn’t drain the combat gauge. For combos, hold ZL and tap ZR; for the special strike, hold ZL, hold ZR for a moment and release. Finish off anyone on the floor. A 3rd J’avo comes in: the last one you kill in the cell drops the Switchboard Key. Use it on the switchboard box on the wall: cutscene, power cut, and both cells open (checkpoint). From here the pair is split until the locker room.
The enemies in 3-1. The official guide lists J’avo, Chrysalid and Napad on this map, and you’re both unarmed:
- If a J’avo cocoons into a Chrysalid, don’t stay to punch the cocoon: it soaks up a lot and without weapons you won’t break it in time. A strong hit before it closes can stop it; once it’s a cocoon, move on.
- Napad (where it appears is unconfirmed: no guide says): an armoured brute. Its armour takes ×0.6 damage and its arms and legs ×0.3; only the flesh on its back, under the armour, is weak (×1.8). Watch for its charge (4 blocks and a knockdown; the wind-up shows) and sidestep it. Unarmed, get behind it and hit its back.
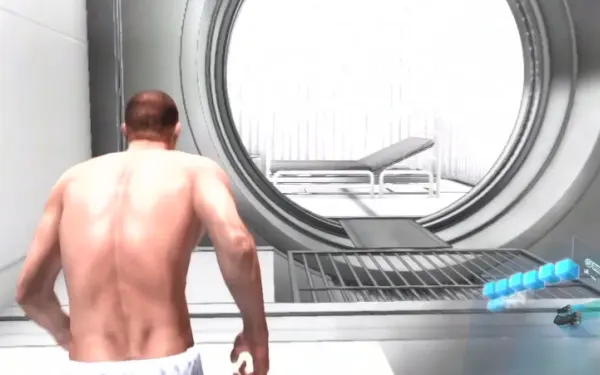
3-1 The machinery room and the duct (Jake)
1 J’avo in the hallway. Then a big white machinery room: 3 J’avo, then 3 more. Two ways:
- Fight: wait for them to bunch up and go in with the charged strike. Finish them on the floor.
- Stealth: move along the right wall and slip past. If one has its back to you, stealth attack from behind (ZR).
The cart and the duct. Past the loading dock there’s a high air duct. Push the cart underneath it, climb onto it and get into the duct.
3-1 The camera booth (Jake)
You reach a security room with 3 cameras you control with the stick. Cameras 1 and 3 have machine guns: use them to kill the J’avo on Sherry’s route. Camera 3 is the most useful. Kill 5 or more enemies with the cameras for the bronze medal “Destroyed 5 or more enemies using the turret-mounted cameras”.
- Serpent Emblem #9 (Jake only): with camera 3 (the one that can zoom onto Sherry’s door keypad), look on top of a shelf in the lower-left corner of the room, by the exit. It’s the terminal-4 corridor Sherry walks through. Shoot it with the camera’s machine gun. Window: before you leave the booth. No source says whether Sherry can break it from her side. File: Jake’s Childhood.
- The code: when Sherry reaches the door camera 3 watches, zoom onto the keypad and note the symbols she enters. Then enter them on your own panel, outside the booth (the official guide calls it terminal 2; there’s a checkpoint at that door) and your door opens. The code changes every playthrough: one guide prints “Omega, atom, two boxes”, but 2 other sources say it’s random. Always read it off the screen. Tip: memorise the position of each symbol on the pad in the order they’re pressed, not the picture. If you miss it, reload the last checkpoint: you can’t brute-force it.
The way to the locker room (Jake). It’s linear: a low passage, right, tunnels and ladders to the locker room. Cutscene: reunion with Sherry. Somewhere along this stretch the story gives you the copper medals “Successfully escaped captivity” and “Reunited with your partner”.
3-1 Sherry’s route (player 2)
Sherry starts in her own cell (save point). It’s a stealth section: if you’re seen, all you have is the Stun Rod (its charged strike, ZL + ZR, stuns and finishes). Sherry has nothing to pick up on the whole map either, so focus on staying unseen. According to the official guide:
- The cell block: her door opens when Jake uses the switchboard (checkpoint on the way out).
- The square of corridors: a loop of corridors patrolled by J’avo, with a camera turret over the middle corridor. Watch the patrols, wait for their backs and go, or stealth attack from behind (ZR). The patrols shift slightly each playthrough; retrying teaches you the pattern.
- The terminal-3 room (checkpoint as you enter): patrolled by a gun J’avo and a stun-baton J’avo on 2 separate routes. Sherry opens the door by entering the code at terminal 3. One guide explains how to get it: hide in a locker facing the keypad; a J’avo walks up and enters the code; memorise the pattern and repeat it. According to that same guide, the baton J’avo loops round behind the back locker while you type, which buys you time (single source).
- The long hall (checkpoint past the terminal-3 door): another camera turret. At the end is terminal 4, in the corridor of Serpent Emblem #9: here Jake covers you with camera 3. If enemies are around, let Jake gun them down; then enter the code at terminal 4 and the door opens (the code is random each run but, per the guides, it’s the same one throughout that run: the one from terminal 3).
- The locker room: a shared goal.
3-2 The locker room, the bas-relief and the first Strelats
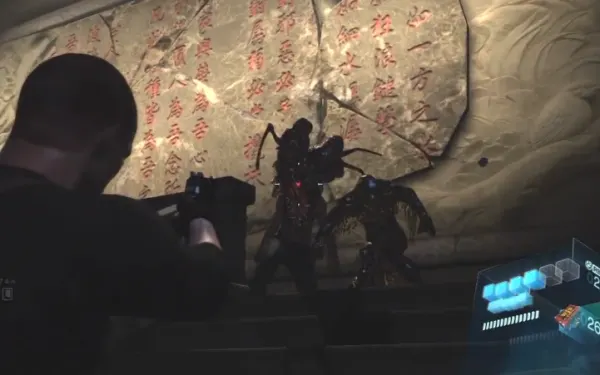
In the locker room (save point at the start of 3-2) all your gear is returned. Head down the hallway to the stairs on the right, by a big Chinese stone bas-relief. J’avo here: gunmen shoot from above and the rest come down. A Flash Grenade helps. One cocoons into a Chrysalid and the first Strelats hatches: it fires needle volleys from its neck fins (they steam just before: don’t stand in front of it), releases a vision-blurring gas and spits a toxin that drains health fast up close. It’s weak to melee: slide into it (dash with the stick forward + B, then ZL) and finish it; or 1-2 Elephant Killer shots. The last enemy on the stairs drops an ID Medal.
The mansion’s mutations. The official guide lists J’avo, Chrysalid, Glava-Sluz, Glava-Dim, Ruka-Srp, Noga-Trchanje and Strelats in 3-2:
- Glava-Sluz: spits a web that pins you. Shoot the orb at the back of its head, which lifts while it spits; if it catches you, Breakout or your partner frees you.
- Glava-Dim: fires a red smoke dart that blinds you. Only the red spheres on the back of its head take damage: circle it, or have one player distract it while the other shoots from behind.
- Ruka-Srp: a scythe arm; one slash can put you straight into Dying. A shot or a hit to the head stuns it: coup de grâce. Body shots barely slow it; shoot its legs and stomp it.
- Noga-Trchanje: spider legs; one stomp kills it on any difficulty. Don’t let them surround you.
3-2 Serpent Emblem #10: the storage closet
On the ground floor, under the stairs, go through the blue door on the left before the big staircase: it’s a storage closet. The emblem is on the 2nd shelf, middle row, of the shelves dividing the room, between boxes. There’s also an oriental crate. File: Detention Center.
3-2 The chandelier hallway
On the 3rd floor, 1 J’avo. Then a long hallway with 3 J’avo: shoot the chandelier hanging above one to drop it on him. 3 oriental jars on the right. This is the hallway with the 2 bust doors into the bedroom (checkpoint), and it has 2 gold jars with fixed contents: one holds 7.62mm NATO Ammo (for the Sniper Rifle) and the next, 9mm Ammo.
In the red-carpeted corridor leading to the main hall there’s a gold jar on a plinth, on the right: break it for a Bishop (a chess-piece pickup worth 300 SP).
Before the first preset ID Medal: in each room, kill every enemy first and take the preset medal last. Which enemy carries a medal depends on the order you visit the rooms, and 2 carriers by the starting stairs only appear if you took no preset medals. The library shelf is the first preset on the route: wait until the 4 reinforcement J’avo are down.
3-2 The library and the end of the hallway
The library. On the left: 3 J’avo below and a balcony above; the tables by the entrance make cover. An oriental crate downstairs. Preset ID Medal on the back bookshelves, upstairs. Then 4 more J’avo arrive: the last one drops an ID Medal.
End of the hallway. A J’avo with a sniper rifle on the left and 2 more: the last one drops an ID Medal. An oriental jar.
3-2 The smoking lounge
Go back to a sitting room with armchairs (the official guide calls it the waiting room). There’s a gold jar that always holds a Remote Bomb, plus an ordinary oriental jar. There’s an ID Medal under the left table and you can’t reach it:
- Break the gold jar and take the Remote Bomb.
- Place the bomb by the left table, back off and detonate it.
- The blast breaks the table and frees the medal.
The back door of this room leads to the upper stairs of the pool room (the door a cart blocks from that side).
3-2 The bedroom
Back in the chandelier hallway, the 2 doors with busts (one silver, one bronze) lead to a fancy bedroom. ID Medal on the desk to the left of the bed. In the hallway, by the bronze-bust door, an oriental crate.
3-2 The statue hall and the medal machine
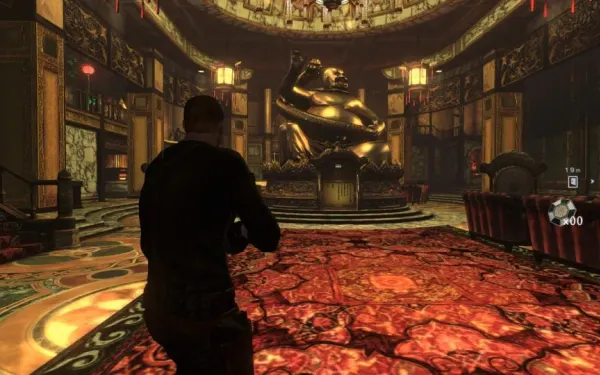
The hall. The objective is the great hall of the dragon Buddha statue: a drop-off on the left and a swing pipe for Jake on the right. J’avo come in: one drops an ID Medal, another turns into a Strelats and more arrive. Safest: stay in the corner you dropped in from and hit them as they come. The last reinforcement drops another ID Medal. Careful: reinforcements sometimes get stuck in earlier hallways (one guide found one in the library): if you’re a medal short, go back for it. There are lots of jars; to the right of the statue, facing the slot, a gold jar holds another Bishop (300 SP).
The statue machine. Insert the medals in the slot; there’s a checkpoint when you insert the 1st, the 3rd and the 10th. The thresholds (every source agrees on the numbers):
- 3 medals open the west gate: the stairs that loop round to the first wing (nightclub, study, fountain and pool).
- 10 medals open the south-east gate, the way to the comms room (the minimum to finish the chapter).
- 16 medals raise the north gate, the treasure room.
The Famitsu Official Complete Guide draws the gates this way (3 west, 10 south-east); one English guide reverses them. If in doubt, follow the marker (L).
3-2 The first wing: nightclub, study, fountain and pool
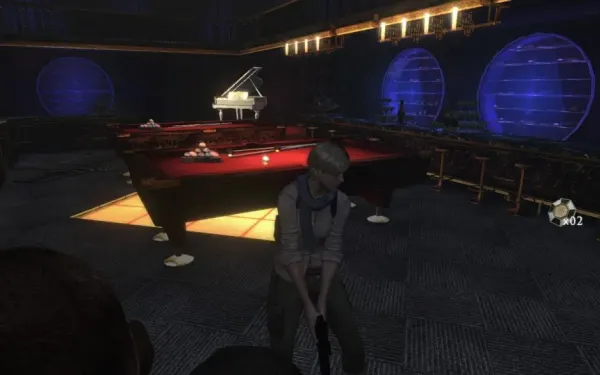
The nightclub and the piano. Through the doors on the left: a small room with J’avo on a balcony who shoot or drop down. Fight under the balcony or from the hallway. There are at least 7 J’avo and 2 drop ID Medals. Then play the piano: ID Medal.
The study. In the room opposite (the official guide’s reception room): ID Medal above the fireplace and a gold jar with a Green Herb. Taking the medal brings 5-6 J’avo in from behind: leave a Remote Bomb by the door first. In some runs one of them drops another medal.
The fountain. Through the glass doors: the small fountain holds an ID Medal.
The pool. A room with a big purple pool; no enemies at first. By the corner stairs, a gold jar with a Red Herb.
- Stairs in the corner: at the top, push the cart blocking the door: ID Medal (that door leads to the smoking lounge).
- Get into the pool and crawl through the tunnel at the back, under the calf statue’s hindquarters: ID Medal.
- Then 5 or more J’avo arrive (Flash Grenade; watch the ones that mutate). One drops an ID Medal.
3-2 Making sure of all 16, and the north gate
All 16. There are 8 preset medals (library shelf, smoking-lounge table, bedroom desk, piano, fireplace, fountain, pool cart and pool tunnel) and 8 dropped by enemies. Which enemy carries a medal changes with the order you visit the rooms, and the game may stop spawning carriers once you have enough. Rule of thumb: in each room, kill every enemy first and take the preset medal last. One guide’s list of carriers: the locker-room stairs, the library, the hallway to the statue hall, the hall at the double doors, the nightclub, the study or the pool (they vary), and 2 extra enemies by the starting stairs that only appear if you took no preset medals. If you’re one short, sweep the hallways for stuck reinforcements.
The 7 gold jars in 3-2 (fixed contents, per the official guide): Remote Bomb (smoking lounge), 7.62mm NATO Ammo and 9mm Ammo (chandelier hallway), 300 SP Bishop (red-carpet corridor), 300 SP Bishop (right of the statue), Red Herb (pool) and Green Herb (study). On Professional they’re almost all your ammo and healing.
The north gate (16 ID Medals). Inside: the Bear Commander (drops for both), 2 oriental crates and a chest with 2,000 SP + 2 Bishops (300 + 300 SP). Bronze medal “Found all ID medals”. One guide says that if you don’t collect all 16 you still get the Bear Commander at the end of the chapter; that’s unconfirmed: get them anyway for the SP and the medal.
3-2 The comms room
Take the 10-medal path to the 2-person door (A, both together) and the comms room: cutscene, contact with the US government. Point of no return: that cutscene leads into 3-3, where the tank destroys the Buddha statue holding the medal slot, and the north gate can no longer be opened. Before you go through the door, have all 16 ID Medals and empty the treasure room (the Bear Commander, 2,600 SP and the “Found all ID medals” medal).
3-3 The tank breaks in, and Serpent Emblem #11
You start in the corridor by the main hall (save point). Back in the great hall, J’avo come down the stairs. At the door, a tank smashes through the wall. It can’t be destroyed: keep circling it to dodge its shots. In 3-3 the J’avo mutate into Ruka-Srp (a slash to Dying: go for the head) and Noga-Skakanje: grasshopper legs; shoot the sac under its abdomen (1-2 shots bring it down) or slide into it and stomp its head. Its back kick takes half your health: don’t stand behind it.
Serpent Emblem #11. Stand behind the Buddha statue so the tank blows it apart. The emblem turns up in the rubble. Shoot it right away: shortly after, the tank moves into the middle of the room and blocks your line to it, and once you leave the room it’s gone. File: Lab Report.
3-3 The swing pipe and the tank corridor
The swing pipe. Run up the stairs. The path turns into a swing pipe: Jake swings across, kills the J’avo on the other side and pulls Sherry up (A) quickly, or the tank targets you. If Jake is the AI, Sherry gets boosted onto the balcony instead. Co-op double doors: cutscene, and a checkpoint in the corridor beyond.
The tank corridor. The tank chases you down a corridor: run toward the camera. Watch the barrel and move away from the side it points to: a hit knocks you down and that’s death. At the end, duck right into a cubby, jump the concrete block and drop down. 2 wooden crates (a little ammo). Go up the stairs to the co-op door.
3-3 The pond garden and Serpent Emblem #12
There’s a checkpoint as you enter the garden. 3 J’avo fire from above: take cover and shoot back. Go right: the tank bursts through the wall. Facing it is a stone staircase up to a pagoda-style building. Before you climb, go round it: the emblem is behind the staircase, at ground level, resting against the wall. File: Strelats.
3-3 The lever room (split)
At the top, on the right, a room that gives better cover from the tank: 4 oriental crates (2 in each corner). Pull the lever at the far end: a swing bar for Jake extends.
- Sherry (player 2) stays in the lever room and holds off J’avo and tank shells. When they bunch up on the walkway or in the doorway, use a Remote Bomb or Bear Commander grenades. The room’s 4 crates are hers.
- Jake (player 1) swings across. Green Herb on the rocks and 2 oriental crates at the end of the path. Then the statue puzzle: you need the tank to rotate the statue clockwise until you can swing over it. Walk up to the end of the path to draw the tank forward (it grazes the statue and turns it) and go back to the start to make it reverse. It takes 3 turns to the right. Sometimes the tank fires at Sherry.
3-3 The briefcases and the bike (Jake’s route)
Go up the path: 3 J’avo (Flash Grenade). In the glass-walled room, on the table between 2 red seats: briefcase with 300 SP and .500 S&W Magnum Ammo. In the bike room (the one with the sports car), on the corner table: briefcase with 4,000 SP + 300 SP. According to one source, only Jake can reach the 2 briefcases. Use the bike: Sherry holds off J’avo and the tank until Jake is done. Cutscene, end of chapter. No need to fight: run for the bike and save ammo.
Boss — Tank (facility)
It isn’t a damage fight: the tank can’t be destroyed. You dodge it and use it to break things. It appears in the statue hall, chases you down a corridor, smashes through the garden wall and, at the end, is how you turn a statue.
- Statue hall: keep circling it. Stand behind the Buddha statue so it blows it apart, and shoot Serpent Emblem #11 in the rubble at once, before the tank blocks it.
- Stairs and swing pipe: Jake swings, kills the J’avo and pulls Sherry up (A) right away.
- Corridor: run toward the camera and move away from the side the barrel points to. A hit is death. At the end, into the cubby on the right.
- Garden: Serpent Emblem #12 behind the staircase before you climb. Take the 3 J’avo above from cover.
- Lever room: Sherry holds it with Remote Bombs or Bear Commander grenades.
- Rotating statue (Jake): draw the tank to the end of the path and back to the start, 3 times, until the statue has turned right.
- Bike: Jake starts it and Sherry holds out.
Reward: copper medal “Evaded the tank’s attacks”, the Let’s Blow This Joint achievement and the Wings dog tag template. Fixed SP in the chapter: 300 + 300 (gold jars) + 2,000 + 300 + 300 (north gate) + 300 (glass room) + 4,000 + 300 (bike room) = 7,800, plus enemy drops.
Don’t leave without:
- The 4 Serpent Emblems: #9 through camera 3 before you leave the booth (Jake only), #10 on the middle shelf of the closet under the stairs, #11 in the Buddha rubble before you leave the hall and #12 behind the garden staircase before you climb it. All 4 give the J’avo 1, J’avo 2 and J’avo 3 figures.
- The 16 ID Medals (enemies before presets; the gold jar’s Remote Bomb for the smoking-lounge table), the Bear Commander and the 2,600 SP chest behind the north gate.
- The 7 gold jars in 3-2 (2 Bishops, the Remote Bomb, 7.62mm and 9mm ammo, a Red Herb and a Green Herb).
- Jake’s briefcases in 3-3 (.500 S&W Magnum Ammo and 4,600 SP in all).
- For the camera medal, 5 kills with the machine guns in 3-1.
- Everything can be replayed from Chapter Select.