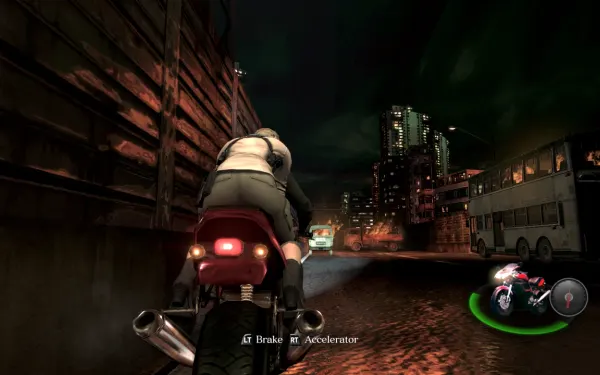
Jake (player 1) and Sherry (player 2) have just escaped the Neo-Umbrella facility and are crossing Lanshiang on 30 June 2013 with the Neo-Umbrella helicopter on their tail. It’s the campaign’s longest and most varied chapter: it opens with a motorbike chase (Jake drives, Sherry shoots), runs through three Story Intersections in a row (Chris and Piers in the Poisawan pit, Leon and Helena at the crash site, Ada at the stilt houses) and has 4 big fights: the attack helicopter, the chainsaw Ubistvo twice and the Ustanak alongside Leon and Helena. In the shopping district’s alleys and streets the J’avo mutate and cocoon non-stop, and that’s where the only new weapon is: the Shotgun. This is where Sherry learns the truth about Simmons.
Chapter order: 4-1 City and Highway (motorbike chase: helicopter missiles, Molotov bikers, Sherry hanging from the helicopter, the tanker with Serpent Emblem #13, the trailer ramp) → 4-2 Poisawan Courtyard (intersection with Chris and Piers: the construction pit, the red-marker J’avo, the swing pipe, Attack Chopper and Hard Choice) → 4-3 Poisawan - Shopping District (barricades, the 2,000 and 5,000 SP chests, Serpent Emblem #14 on the car with its headlights on) → 4-4 Shopping District (the Strelats street, Jake’s ladder, the market, the 4,000 SP chest and the Shotgun, the fall, Serpent Emblem #15, Sherry’s high road, Serpent Emblem #16 by the red ladder, Ubistvo) → 4-5 Airplane Crash Site (intersection with Leon and Helena: the Ustanak, the bus, the east wing and the shaft) → 4-6 Stilt Housing Area (intersection with Ada: the barge, the Ubistvo on the roof and on the boat, the helicopter rotor).
Before you start
Ammo: it’s still 30 June 2013, straight after the escape, and you arrive with whatever you had in chapter 3. Save the Bear Commander’s 40mm Explosive Rounds (if you got it in chapter 3; grenade mode: X while holding ZL) for the helicopter (about 6 on Normal) and the Ubistvo; without it, Hard Choice doesn’t need you to bring it down: you just have to reach its rope before Chris and Piers do. Save the Elephant Killer’s .500 S&W Magnum Ammo for the Strelats and for Hard Choice, and 2 Remote Bombs for the boat Ubistvo. The new weapon is the Shotgun (8 shells, 12-gauge), in the lockers at the top of a stairwell in 4-4, for both of you: use it on the Strelats and the mutating J’avo. The rifle is for the 4-4 streets: shoot from range and keep the heavy stuff.
Skills (there’s no shop): bought with SP between chapters. Breakout (2,800 SP) shortens the Ustanak’s claw grabs and the Glava-Sluz’s web; J’avo Killer (3,000) is still the best pick for a chapter full of J’avo.
Co-op: player 1 (Jake) drives the bike, does Hard Choice and opens doors via his ladders and swing pipes; player 2 (Sherry) shoots from the bike and only she can break Serpent Emblem #13; in 4-4 she takes the high road (2 crates + Green Herb) and opens the door for Jake. At the crash site, Sherry drives the bus with Leon while Jake dodges the Ustanak with Helena. In the stilt-housing finale, Jake shoots from the pier and Sherry dodges the Ubistvo on the boat. Intersections: 4-2 is the same section as Chris Chapter 3 (point 3-2), 4-5 is Leon Chapter 4 (point 4-2) and 4-6 is Ada Chapter 3 (point 3-4). Offline, the other pair (or Ada) is AI; on Switch the intersections have their own menu and the host picks which one to join. The silver medal “Aided a partner in need during a story intersection” counts even when you help the AI.
What slips away without warning: Serpent Emblem #13 only exists during Sherry’s slow-motion shot, before you blow up the tanker; Hard Choice is lost if Chris and Piers bring the helicopter down before Jake gets on its rope; Serpent Emblem #16 has to be broken before you leave via the scaffolding (IGN: before you open the door to the Ubistvo’s arena); and the bronze medal for the crash site’s canisters needs every canister crate blown up before the tower falls on the Ustanak.
Saving: RE6 has no typewriter and no manual save: it only saves at checkpoints (a save icon appears). Every sub-area (4-1 to 4-6) is a Chapter Select entry point: 4-2 lets you replay the helicopter and Hard Choice without redoing the bike. To retry a stretch without dying, use the COMS menu (−) → “Return to the latest checkpoint”.
Difficulty: on Amateur most life-or-death QTEs complete themselves and mash meters fill faster (Sherry hanging from the helicopter, the Hard Choice rope, claw escapes). The about 6 40mm Explosive Rounds for the helicopter is a Normal figure (IGN) and no source gives the count for the higher difficulties: on Professional and No Hope bring every explosive round you have, or go up the Hard Choice rope, which ends the fight however much health it has left; if all else fails, Chris and Piers bring it down on their own. On Professional every hit takes at least 2 blocks, enemies never drop Green Herbs and boxes only give SP. On No Hope there are no skills, SP are worth double and you respawn with the health you had at the checkpoint. There’s no other per-difficulty data for this chapter. A rank: 70% accuracy or better, 5 deaths or fewer and 40 kills or more. The time is disputed: ST-RANK gives 60 minutes or less, while Gamer Guides’ B range (80 to 110 minutes) implies an A at 80 or less (and one player reports an S at 1:12). To be safe, aim for under 60 minutes.
4-1 City and Highway: the bike
Jake drives (ZR throttle, left stick steers) and Sherry shoots (ZL aim, ZR fire). The bike has a health bar: scraping the sides damages it, and hitting a stationary vehicle is Game Over. Tight turns are handled by cutscenes: keep the throttle floored. If you play solo as Jake, you still switch to Sherry for the slow-motion shots. Each player has their own QTEs, and both have to land them to carry on.
- The helicopter: its missiles explode ahead of you, then it gets in front to strafe you: weave.
- The rooftops: slow motion. Sherry shoots the explosive barrel by the RPG J’avo, on the right.
- The street: J’avo bikers throwing Molotovs ahead of you: avoid where they land, because the fire damages the bike. Sherry, knock them off: shoot 10 J’avo off their bikes for the silver medal “Shot 10 J’avo off of their motorcycles”. On the wide street there are 2 more bikers plus cars and trucks: stay central and take the jump on the right.
- Sherry hanging on: the helicopter carries her off. Timed button: Jake revs to catch her and Sherry mashes to hang on. The bamboo thrown down on the left can be driven through. Don’t drift too far right. Another jump and you’re back together.
- The tanker: the helicopter blows it up. Timed button to skid underneath. Then Sherry gets a slow-motion shot.
4-1 The tanker: Serpent Emblem #13 (Sherry only)
Heads-up: this emblem only exists during the slow-motion shot. Sherry, get ready before you skid under the tanker.
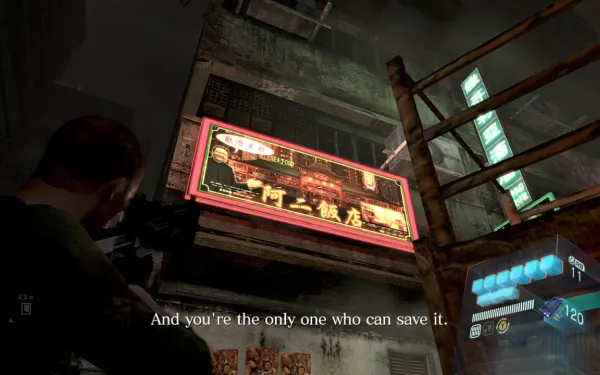
During that slow-motion shot, look upper left: the emblem is on a building’s neon sign. Shoot it before the tanker, which is leaking fuel: there’s just enough time for both shots. Jake can’t: he’s driving. In split-screen player 2 has to take it; according to the wiki, an emblem player 2 breaks also counts for player 1 (unconfirmed on Switch). If you miss it, replay from the checkpoint. File: Sherry and the Raccoon City Incident.
4-1 The end of the highway
Jump left into a building. The helicopter waits in front: timed button so it doesn’t mow you down. More traffic and Molotovs (slow down if you need to). A trailer drops cars: dodge the first 2 by moving left and the next 2 by moving right. Use the trailer as a ramp: cutscene. Copper medal “Avoided the helicopter’s attacks”.
4-2 Poisawan Courtyard: the pit (intersection with Chris and Piers)
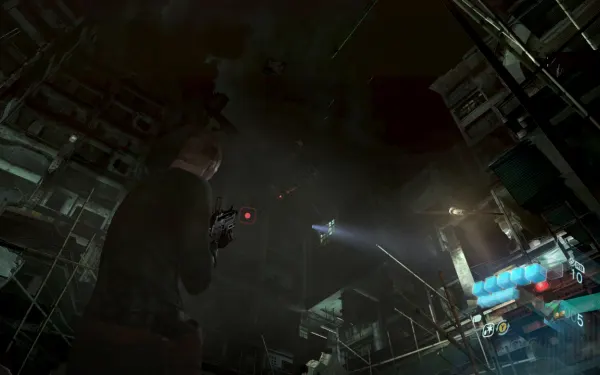
This is the same section as Chris Chapter 3 (point 3-2): they help from above (only if they’re human players; the AI barely does anything), but you’re down in the construction pit, exposed. Kill J’avo while dodging the helicopter’s machine gun; melee works. 3 wooden crates around the edge. The J’avo keep coming until the ones with red markers appear: only those have to die. The best spot is a narrow alley in one corner of the pit, too far back for the machine gun; from there only the J’avo right in front of you can shoot you. In co-op: one kills, the other draws the helicopter.
Noga-Skakanje (grasshoppers): their weak spot is the sac on the lower abdomen (1-2 shots), or slide into them and stomp their heads. Their back kick takes half your health: don’t stand right behind one.
4-2 The swing pipe, the door and the helicopter
The helicopter blows a column apart and leaves a swing pipe for Jake. Jake swings across, climbs the ladder and lowers the ladder for Sherry (kicks it down). Go through the 2-person door (A). A hallway, drop down: 2 wooden crates. Objective: “Shoot down the helicopter”. J’avo come down, some already mutated, plus more Noga-Skakanje. If you take too long, Chris and Piers bring the helicopter down and you move on after a cutscene (and lose Hard Choice).
The pit’s crates (optional). If you’re going for Hard Choice, don’t linger: grab only the ones on your way and get up to the helicopter before Chris and Piers bring it down; you can collect the rest by replaying 4-2. Look for 40mm Explosive Rounds in them for the Bear Commander. Full route: left ladder, 3 crates. Toss Sherry up (A) to kick down another ladder: 4 crates, then kick down another on the other ledge. Drop down: 3 crates on the left. Far right, across 3 swing pipes, a ladder: 2 crates. Left ladder: 2 crates; the next ladder: 2 more.
The fight, step by step, is in Boss — Attack Chopper (Poisawan). Once it’s gone, head straight on to the grey metal door and open it together.
4-3 Poisawan - Shopping District: the barricades
A long alley with barricades to vault; the J’avo run on ahead of you.
- On the way in: 1 crate on the right.
- 1st barricade: vault it toward the truck: 1 crate to its left, 2 to the right and 3 behind.
- 2nd barricade: as soon as you’re over it, look left straight away: in the corner there’s a metal chest with 2,000 SP (King (Bronze)). Then 2 crates on the left, and a street with cars on both sides; 2 crates behind the truck on the right.
- Serpent Emblem #14: on the windshield or hood of a car with its headlights on, parked on the left of the alley. It’s after the 2nd barricade and before the 3rd (the last one), on your left as you approach the 2-person door. File: Life without Freedom.
- Chest with 5,000 SP (Queen (Gold)): carry on almost to the end of the alley and pass the last green dumpster on the right: behind it there’s a metal chest with the SP.
- 3rd barricade: 2 crates on the right. 2-person door.
4-4 Shopping District: the Strelats street
Some J’avo walk off to the right: you can let them pass. Green Herb on the right and a wooden box on the left. The J’avo here cocoon often and Strelats hatch: use the Elephant Killer (or, up close, slide into them and finish them). The Strelats that come out of the chrysalids drop a Queen (Bronze) worth 1,000 SP: if you have the ammo, they’re worth killing. Supplies: 2 crates on the left and 1 on the right; there’s a small stall to shoot from. At the end of the street: armed J’avo and another Strelats. 2 crates mid-street, 7.62mm NATO Ammo next to them and 2 crates at the end on the right.
This chapter’s mutations, and how to stop them. From here on almost every J’avo mutates. The fastest counter for each (the site’s enemy cards, after the official guide):
- Chrysalid (the cocoon a Strelats hatches from): stop the J’avo cocooning with a heavy melee hit or a Bear Commander grenade; once it’s closed it soaks up damage and isn’t worth the ammo.
- Glava-Sluz (web-spitting head): when it spits, the orb on the back of its head lifts: get behind it and shoot there (a few handgun shots). If it pins you, your partner kills it.
- Glava-Dim (red smoke dart that blinds you): its only weak spot is the red spheres on the back of its head: one player draws it from the front and the other shoots it from behind.
- Ruka-Srp (scythe arm): no weak spot, but a shot or hit to the head stuns it → finisher. Roll away from its horizontal swing and, at low health, its overhead slam.
- Ruka-Khvatanje (tentacle arm): shoot the tip of the tentacle when it lashes out, and put a wall between you: it recoils.
- Noga-Let (moth legs): counter its charge or its air grab, then stomp it.
- Telo-Magla (moth wings on the torso): stomp its head while it releases the gas cloud; at low health it can get back up: finish it.
- Noga-Skakanje (grasshopper): the lower-abdomen sac, as in the pit.
IGN also mentions a Gnezdo in these streets (no other source puts one here). If an insect swarm shows up: scatter it with the Shotgun or a grenade and kill the queen it exposes; better still, snipe it with the rifle before it reaches you.
4-4 Jake’s ladder and the market
Jake’s ladder. Jake climbs the ladder at the end of the street (left side, under a red sign), 2 flights, jumps the gap, shoots the enemies below, drops into the alley and removes the wooden plank to open the door for Sherry (if Sherry plays solo, the AI Jake does it by himself). Strelats may emerge when it opens: have a Remote Bomb ready. Alley: 2 crates and a 2-person door (green).
The market. Follow the marker to a red door. Stalls and corpses: about 6 J’avo come from the very back, and some of them cocoon. Fight head-on or climb the left ladder and shoot from the striped roof. By their door: 2 crates and another 2-person door (green).
4-4 The stairwell: 4,000 SP and the Shotgun
Break the door and head up: 2 crates on the left. At the top of the fourth flight, two flights above those 2 crates, there’s a chest with 4,000 SP (King (Silver)). At the very top: 2 crates and the Shotgun in the lockers on the left, for both of you. There’s also a metal cabinet you can hide in. Climb a short ladder, cross the rickety metal pipes and you fall to the street (scripted). Mutating J’avo and a Strelats wait below: try out the Shotgun.
4-4 The fall: Serpent Emblem #15 and Sherry’s high road
Serpent Emblem #15. Where you land, before moving on, turn left into the dark dead end: the emblem is at face height, between wooden crates. Another guide describes it as a newsstand in the corner, to the right of a parked taxi; it’s probably the same corner. File: Experiment Log.
Sherry’s high road. Head up the street: 7.62mm NATO Ammo on a box on the left and 2 crates on the right. At the special ladder, Jake boosts Sherry (A).
- Sherry (player 2): has a great vantage point on the 1st and 2nd storey: shoot the street’s gunmen from there. On the 2nd storey, find the way to the right side of the street: 2 crates and a Green Herb. Drop down and open the door for Jake.
- Jake (player 1): holds the street below. When a J’avo cocoons, back off: the Strelats hang back until the door opens.
4-4 The second street and the red ladder (Serpent Emblem #16)
Another street with gunmen, mutations and a couple of Strelats: send Sherry up one of the 2 ladder points to open the way; the Strelats may wait until the door opens. Alley: 2 crates.
Heads-up: Serpent Emblem #16 is before you climb the red ladder. If you leave via the scaffolding without breaking it, it’s gone until you replay 4-4.
Serpent Emblem #16. After you destroy the barricade, the exit is a red ladder up to the scaffolding. Before you climb, at the foot of the ladder, look through the gap between a box and the wall to the right of the ladder: the emblem is on a closed newsstand. You can also see it from above: climb, turn round and look down at the street. Window: until you leave via the scaffolding. File: Ubistvo. All 4 in the chapter give the Strelats figure.
4-4 On to the Ubistvo
Climb, follow the pipes and drop down: 3 crates and a 2-person door (green, metal). 2 crates on the left and a cutscene: the Ubistvo (see Boss — Ubistvo (shopping district)). Pick up whatever the opening J’avo drop. Afterwards: a narrow path on the right through the corridors, a short scene (the plane coming down), 5 crates at the end and the red metal 2-person door. Cutscenes.
4-5 Airplane Crash Site: the Ustanak with Leon and Helena
This is the same fight as Leon Chapter 4 (point 4-2), with Leon and Helena alongside you (AI-controlled offline): the Ustanak among containers, forklifts, a bus and a cage. Come with ammo and healing. The full fight, including the 2+2 bus split, is in Boss — Ustanak (crash site).
4-5 The east wing and the shaft
The fight ends when the metal tower falls on the Ustanak.
- Break the crate by the tower and turn round: the objective marker is behind you, in the east wing of the building, which the fight has just opened.
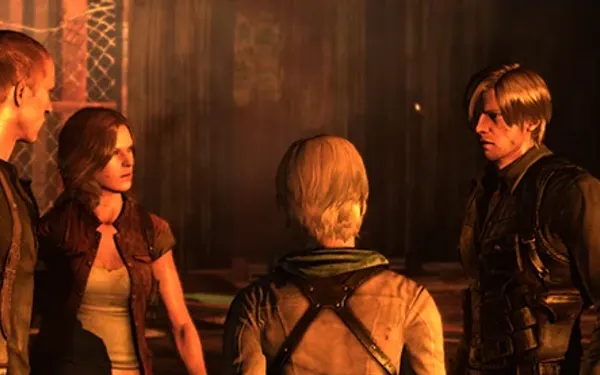
- Open its door: cutscene with Leon and Helena at the comms system. Leon tells Sherry the truth about Simmons.
- Break 3 crates and jump down the shaft (the hole).
- At the bottom: left door, 2 crates; 1 crate at the end of the hallway; another door on the left: 2 crates, a small wooden box and a Green Herb.
- The grey 2-person door leads to the pier and the barge.
4-6 Stilt Housing Area: the barge (intersection with Ada)
This is the same section as Ada Chapter 3 (point 3-4); Ada covers you with gunfire throughout. The barge: after the cutscene, follow the prompts (rotate the stick) to dodge the river’s obstacles until you reach a sunken, burning building, the A Er Restaurant. Jump onto the roof: 2 crates on the right and a cutscene: the Ubistvo on the long roof, with J’avo that keep coming (they drop ammo). See Boss — Ubistvo (stilt housing), rounds 1 and 2. Afterwards: a box and an oriental vase on the right, and jump onto the other barge.
4-6 The boat and the finale
The boat: start the engine (on-screen prompts) and steer. A light in the water brings towers down and swinging iron girders block your way: follow the prompts. The Ubistvo comes back, this time climbing onto the boat: shoot it until Ada drops the girders on it. Let the barge drift to the objective. Cutscene, wait, cutscene.
The Ubistvo’s last moment (playable). Jake falls off the barge and gets control back on the pier; the Ubistvo goes for Sherry, who’s still on the boat.
- Jake (player 1): aim and keep shooting the Ubistvo that’s attacking Sherry, to slow it down.
- Sherry (player 2): dodge the Ubistvo one last time; don’t try to fight it.
- The rescue is automatic: Ada (AI or the player running her) swings down, grabs Sherry and drops her by Jake, and the downed helicopter’s rotor shreds the Ubistvo.
Then climb the pier ladder, follow the path and go through the 2-person door: cutscenes (Simmons at the rendezvous with Leon and Helena, the escape and the capture) and the end of the chapter. The copper medal “Lit the approaching B.O.W. on fire” belongs to this chapter and, like the other copper ones, comes with the story: you don’t have to do anything.
Boss — Attack Chopper (Poisawan)
The helicopter over the Poisawan pit, from Jake’s side (Chris and Piers attack it from the rooftops). It drops Noga-Skakanje and J’avo every time it hovers.
- Get to the highest section of the pit: it gives the best angle. Jake can use his swing pipes; Sherry can’t, so her firing window is narrower.
- Put the Bear Commander in grenade mode (X while holding ZL). About 6 40mm Explosive Rounds on Normal anywhere on the hull drive it off (the higher difficulties need more: nobody has published the figure). The grenade launcher reloads slowly: fire when it stops to drop enemies. Look for more rounds in the pit’s crates.
- Clear the nearby J’avo between shots: they can knock you off the ledges.
- Hard Choice (Jake): when it hovers over the high roof, a rope hangs down. Kill the J’avo around you first, grab it, mash to climb (B) and, once over the glass, aim down and shoot the pilot. To be safe, have the Elephant Killer in hand and loaded: the achievement is for shooting the pilot with a magnum at point-blank range, and what follows the climb is a QTE. Do it as Jake (one guide says Sherry works too; unconfirmed). The rope ends the fight even if you haven’t damaged it.
- If Chris and Piers bring it down first, quit to the menu at once and replay from the last checkpoint: the game autosaves, and if it reaches the next checkpoint you’d have to replay 4-2 to try again.
Reward: the Hard Choice achievement and the bronze medal “Personally finished off the helicopter pilot” (if you climb the rope).
Boss — Ubistvo (shopping district)
A closed arena with a structure in the middle. The Ubistvo is a B.O.W. with a chainsaw arm, and here any slash leaves you Dying or kills you outright. It’s slow, but it chains slashes and can go berserk and chase you very fast. Weak point: the heart at the base of the chainsaw (its own file says destroying it kills it); shots to the face and eye make it stagger, and leg shots make it kneel.
- 1-2 J’avo join at the start: get them out of the way first.
- Weapon: Elephant Killer; otherwise Shotgun or Bear Commander. 40mm Explosive Rounds make it easy.
- Shoot the base of the chainsaw (or the face) from range. If it closes in, shoot the legs to force a kneel.
- Attacks: a wild straight-line slash (dive to the side), a torso cut if you’re on your back or Dying (roll away), a neck slash, a 180° swing if you’re behind it (those 4 kill instantly), and the leap strike and the back-to-back double slash (6 blocks each).
- Climb the central structure and jump down when it follows; you can repeat this. Or circle low obstacles: it leaps onto high ledges, but you get over low cover faster. Never stay close.
- When it finally staggers, both of you move in and follow the on-screen prompts: Jake and Sherry’s team finisher ends the fight.
Reward: a King (Silver), 4,000 SP (this first encounter only).
Boss — Ustanak (crash site)
A 4-character intersection with Leon and Helena (AI-controlled offline). You can’t win with bullets: the real damage comes from the explosive-canister crates. Flash Grenades do nothing to it. Shots to the face make it stagger; the metal arm takes less damage.
- Phase 1: lower the forklift (red button by the ladder) and climb onto the containers: 6 wooden crates and 2 canister crates to push. They’re separate: blowing one doesn’t set off the other.
- On the ladder across from the forklift: 3 crates and 1 more canister crate. Jump to the next container: 3 more crates.
- Push the canister crates down, lure it underneath and shoot them. The container tops are a refuge: it rarely climbs up.
- If it grabs your partner into the cage on its back, hit it with the partner button (A) to free them.
- 2+2 split: when it retreats, Sherry and Leon start the bus (4 boxes there): they open the rear panel together, Leon does the wiring (5 times) and Sherry drives it through the gate. Jake and Helena dodge the Ustanak, now carrying a grenade launcher: keep moving and don’t stand on its 3 grenades.
- Phase 2: the right side opens. Past the truck: 3 crates (2 behind it and 1 by the cage) and another further on. Another forklift leads to a platform with 4 canister crates, and on top of the cage there’s 1 crate and 1 more canister crate. At the far end of the new area, 1 crate with a ladder vantage point. Climb onto the bus at the far end of the first area: the last container has 3 crates and a small box.
- Optional, all 4 together: push the “tower” against the wall of containers to reach a suitcase with a First Aid Spray + 3 Remote Bombs in the middle. Handy if you’ve used up the canisters.
- The Ustanak swaps the grenade launcher for a spare claw; with more damage it loses that arm too, leaving only grabs, throws and kicks. The fight ends when a metal tower falls on it.
Attacks: kick (3-4 blocks plus a stun), foot crush followed by a kick, stuffing you into the cage on its back, grab and throw, extending claw and charge. Breakout speeds up claw escapes.
Reward: copper medal “Defeated Ustanak with Leon and Helena” and, if you blow up every canister crate, the bronze “Blew up all the fuel tanks at the crash site”.
Boss — Ubistvo (stilt housing)
Three rounds in a row at the intersection with Ada: the long roof, the boat and the finale.
- Roof: it has more health than in the shopping district and J’avo drop in non-stop (5-6 at once) until it goes down. Here its wild slash is a QTE (mash while your partner helps) instead of putting you straight into Dying.
- Use Flash Grenades on the J’avo, Remote Bombs and Bear Commander grenades on it (a couple of grenades per round). Let its blind swings kill the J’avo. Ada shoots it from cover.
- Boat: a tiny arena, but it has less health. About 2 Remote Bombs do it: plant them and get clear of the blast. Use the steering column to block its path. The Elephant Killer or a quick rifle shot also work. Ada drops some girders on it.
- Finale (playable): Jake falls onto the pier and keeps shooting it to slow it down; Sherry dodges it on the boat. Ada zip-lines down and grabs Sherry and the downed helicopter’s rotor shreds the Ubistvo: that part is automatic.
Reward: end of Jake’s chapter 4: the Still on the Run achievement and the Wings - Gold dog tag template. Fixed SP in the chapter: 2,000 + 5,000 (alleys) + 4,000 (stairwell) + 4,000 (Ubistvo) = 15,000, plus enemy drops (the Strelats, 1,000 each).
Don’t leave without:
- the 4 Serpent Emblems: #13 on the neon sign before you shoot the tanker (Sherry only), #14 on the car with its headlights on past the 2nd barricade, #15 in the dark dead end where you land and #16 on the newsstand by the red ladder, before you leave via the scaffolding. All 4 give the Strelats figure;
- the Shotgun (lockers at the top of the stairwell) and the 4,000 SP chest on the fourth flight;
- the 2,000 (left corner past the 2nd barricade) and 5,000 SP (behind the last green dumpster) chests in 4-3;
- Hard Choice (Jake on the rope before Chris and Piers down the helicopter);
- the 2 crates and Green Herb on Sherry’s high road, and every canister crate at the crash site;
- whatever 40mm Explosive Rounds and Elephant Killer ammo you have left: chapter 5 ends with the Ustanak.
Everything can be replayed from Chapter Select.