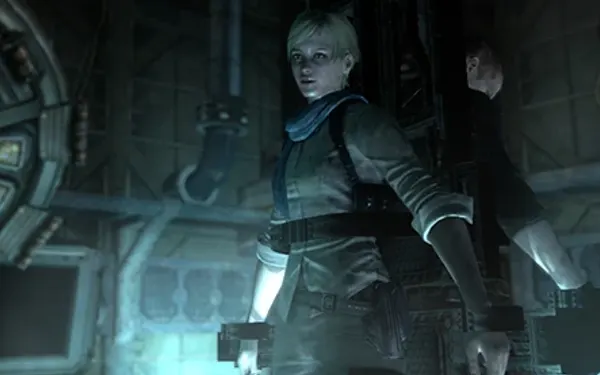
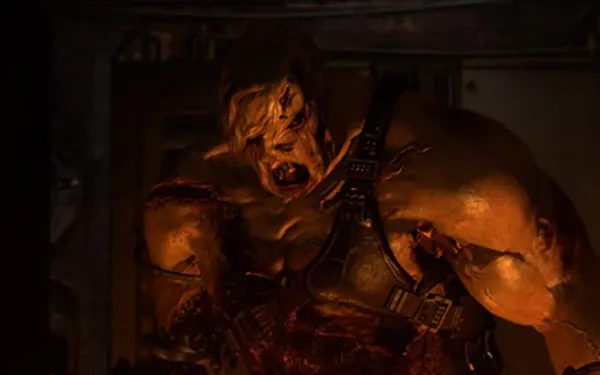
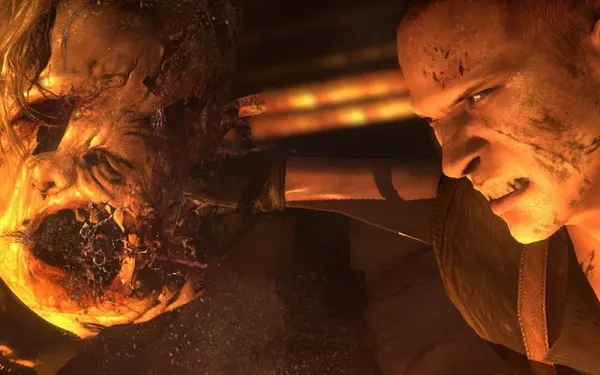
The end of Jake’s campaign. Jake (player 1) and Sherry (player 2) wake up locked in and unarmed in Neo-Umbrella’s underwater facility on 1 July 2013. The first half is a race through the machine rooms to charge an elevator’s reserve battery 4 times, with a Rasklapanje that can’t be killed for good hard on your heels and an electric-fence split on the last charge. Then you cross paths with Chris and Piers in the room where Haos is born, fight the Ustanak one last time in a lava arena (ending in a fist fight for Jake alone) and escape on a cargo tram with the Ustanak hanging off the back. There are no new weapons and only one fixed SP suitcase.
Chapter order: 5-1 Underwater Facility 1 (the cell: Sherry through the vent, gets the weapons back; Rasklapanje; Serpent Emblem #17 in the cell; charge 1 at the console; the machine arm and charge 2 at 50%; the lab with Serpent Emblem #18; the body-bag room and charge 3 at 75%; the split by the electric fence: both to Door D (5,000 SP, Jake only), Sherry gets off at Door I and Jake rides on to Door G; charge 4; the Rasklapanje on the barrier; the runaway platform) → 5-2 Underwater Facility - Lower Levels (intersection with Chris and Piers: the switch, the levers, the lifts; Haos is born) → 5-3 Underwater Facility 2 (the incinerator, the container, Serpent Emblem #19, the Ustanak in 3 stages: walkways, lava platform and fist fight) → 5-4 Shipping Center (Serpent Emblem #20 by the silver tank, the tram, the climb, the Elephant Killer and the final shot).
Before you start
Ammo: you start unarmed in a cell; Sherry gets the weapons back within minutes. All of 5-1 is a lever run while a regenerating Rasklapanje stalks you through the drains: it can’t be killed for good, so don’t spend your heavy ammo on it more than you need to. What works: shoot the hands first, use the Shotgun or the Elephant Killer to split it in half and finish the parts before they re-join (Jake’s campaign has no Incendiary Grenades). Flash Grenades do nothing to it, but they do work on the J’avo on the lifts. Save Elephant Killer ammo, the Bear Commander’s 40mm Explosive Rounds (if you got it in chapter 3) and some rifle ammo for the end: the lava-arena Ustanak is the campaign’s last boss and there’s nothing to spend it on afterwards.
Skills (there’s no shop): between chapters, Firearm (IGN recommends Lv3 for the Ustanak), Defense and Breakout (2,800 SP: shortens the Rasklapanje’s grabs).
Co-op: Sherry solves the cell (Jake boosts her into the vent). On charge 4 an electric fence splits you: both of you ride up to the Door D room, where only Jake can reach the loot (5,000 SP and .500 S&W Magnum Ammo); then Sherry gets off alone at Door I, by the fence, and holds off the enemies while Jake rides on to Door G (12-Gauge Shells and 9mm Ammo) to pull his lever at the same time as her. On the 5-2 lifts, one player melees and the other shoots the snipers. The final fist fight is Jake only; Sherry helps by sending containers down the rails. For the final shot, Sherry fires and Jake presses his partner button.
What slips away without warning: Serpent Emblem #19 has to be broken during the Ustanak’s stage 1, before the fight drops to the lava platform; Serpent Emblem #20, before you board the tram; the 5,000 SP suitcase at Door D can only be taken by Jake; and the bronze medal “Ground a B.O.W.’s hand” needs a Rasklapanje hand destroyed in the incinerator or the trash compactor, which only exist in 5-1.
Saving: RE6 has no typewriter and no manual save: it only saves at checkpoints (a save icon appears). Every sub-area (5-1 to 5-4) is a Chapter Select entry point: 5-3 replays the lava Ustanak and emblem #19, and 5-4 replays emblem #20 and the tram. To retry a stretch without dying, use the COMS menu (−) → “Return to the latest checkpoint”.
Difficulty: on Amateur most life-or-death QTEs complete themselves and mash meters fill faster (the runaway platform, the tram climb). Per the wiki, on some difficulties (it doesn’t say which) the Rasklapanje’s grab can kill you outright, with no QTE, if your health is low: on Professional and No Hope, to be safe, go into every battery room at full health. Per the same wiki, the hand it throws only does damage (1 block) on No Hope; on the other difficulties it just covers your face. On Professional every hit takes at least 2 blocks, enemies never drop Green Herbs and boxes only give SP. On No Hope there are no skills, SP are worth double and you respawn with the health you had at the checkpoint. The final-shot buttons can change away from Normal (IGN): press what the screen shows. A rank: 70% accuracy or better, 2 deaths or fewer, 55 minutes or less and just 5 kills or more (both sources agree on that oddly low figure; it’s unclear which kills count).
5-1 Underwater Facility 1: the cell
Jake and Sherry wake up locked in and unarmed. Try the door and search the walls until Jake spots their weapons on a bench in the next room through the window: that reveals an air vent. Jake boosts Sherry (A, partner action): she crawls through the vent, drops into the other room, picks up both players’ weapons and shoots the cell lock to free Jake. In co-op, whoever plays Sherry does all of this alone; Jake waits.
5-1 The first Rasklapanje
Outside, a Rasklapanje shows up: a leech mass that splits into torso, legs and 2 hands, and each part keeps attacking on its own.
- Shoot the hands first and destroy them straight away, before they re-attach to the body.
- Then the legs and the torso. A Shotgun or Elephant Killer shot splits it in half. Stunned parts turn white (IGN: unload on the top and bottom halves until they turn white).
- Each part you kill can drop items, and the last part you kill drops 3,000 SP. The wiki gives the condition: the first time you fight it, destroy the hands before they re-attach, then kill the legs and torso; the part that goes down last drops the SP.
It never really dies: the parasite escapes through the drains and rebuilds after a while, and it follows you through the whole section. Its attacks: the grab is a QTE: mash and waggle the stick (Breakout makes it shorter; it can be countered); after you break free it tries a stomp, which you dodge by pressing repeatedly, not by holding a direction. If it throws a hand onto your face, you can still shoot and move slowly, and your partner can shoot it off. Loose legs kick and charge wrapped in acid; shoot them to break the charge.
5-1 Serpent Emblem #17 (the cell)
With weapons in hand and the Rasklapanje scattered, go back into the cell and look up: the emblem is in the ceiling corner, upper left, next to the vent Sherry escaped through. You can’t break it before you have weapons. File: Jake Muller’s Infamous Father. In split-screen either player can break it.
5-1 The charging room: charge 1
1 wooden crate on the right of the room; leave through the two-person door (both press A together) and carry straight on. You reach a room with a red-button door (1 crate to its right). As you near the marked elevator, a second Rasklapanje joins in (IGN). The elevator’s centre console says you need the reserve battery: it has to be charged 4 times in different rooms. Pull the lever by the console with Sherry: charge 1. A way opens and the Rasklapanje appears again. The way to the platform lift is the door across from the console.
5-1 The machine arm: charge 2
Ride the rotating platform (the giant machine arm) and jump off at the room the objective marks. Another Rasklapanje. Pull the 2 levers together (one per player): 50% (GameWith calls this room Door E. This chapter’s door, room and lever letters, C to I, come from the GameWith, Gamer Guides and Famitsu official guide maps: they help you follow those maps, so go by what each step describes rather than by the letter). As soon as you charge it, the Rasklapanje comes back: don’t stay to fight if there’s nothing left to take.
5-1 The lab: Serpent Emblem #18
Take the other door into the hallway. At the fork, the left path has a drain (the Rasklapanje comes out of it): take the right into the brightly lit pharmaceutical lab. 9mm Ammo on the desk. Break the glass of the refrigerated-specimen cabinets: one holds Serpent Emblem #18 and another a Green Herb. The emblem’s file: A Deal with the United States. GameWith puts it as “take platform E and go left”.
5-1 The body-bag room: charge 3
The right path leads to the machine room; ride the platform lift (the machine arm) again and get off at the room full of body bags (GameWith: Door C). Rasklapanje fight. The levers are on either side of the entrance: the left one is behind the body bags (walk through them), and there’s 9mm Ammo by the computer opposite. Pull both: 75%.
5-1 The last charge: split by the electric fence
There are 2 platform lifts, and the Door D room is the only link between them. An electric fence separates the 2 players during this charge. In order:
- Both of you, to Door D. Ride the lift and get off at Door D, the link between the 2 lifts. The loot room has a swing bar, so only Jake can reach it: 2 wooden crates on the left; shoot the glass of the far-left cabinet: .500 S&W Magnum Ammo; and on the far control panel, a suitcase with 5,000 SP (Queen (Gold)). It’s the chapter’s only fixed SP pickup and only Jake can take it.
- The upper lift, to Door I. From the D room, board the higher lift. At Door I, Sherry gets off, by the electric fence, at her lever. Enemies swarm her as soon as she arrives: Jake, hurry. Per Gamer Guides, Sherry’s room has 2 crates in the left corner and 2 more crates along the right hallway. This room has an incinerator: feed a Rasklapanje hand into the incinerator or the trash compactor (on-screen prompt next to them) to destroy it for good and earn the bronze medal “Ground a B.O.W.’s hand”.
- Jake rides on to Door G. Jake gets back on the lift and gets off at Door G. Head straight on: another Rasklapanje. 12-Gauge Shells by a computer near the door and 9mm Ammo by the computer on the right, across from Sherry. Pull the levers together: charge 4.
- The fence: its damage zone is wider than it looks; fight well away from it. But it makes a good trap: lure enemies into it to stun them.
Sources disagree on the letters: IGN says Jake reaches his switch via the swing bar at “doorway G” and Sherry gets off at the doorway to its right; the Famitsu official guide map puts Sherry’s steps in Room H, with 9mm Ammo and 2 crates. In practice: follow this order, Sherry gets off wherever the game drops her and searches her room.
5-1 The Rasklapanje on the barrier and the runaway platform
The barrier. Cutscene, then a special Rasklapanje appears: shoot it so it falls onto the electric barrier. The overload shuts the facility down and you regroup. Go back to the Door I entrance and press the button on the crane controls: the arm comes down and stops the platform long enough for you to jump onto it.
The runaway platform. A Rasklapanje climbs onto the platform with you: kill it and cross to the other side. The machine goes out of control: mash the on-screen button (B) to pull yourself up, then mash again to crawl out under the machine to Door B, with the Rasklapanje behind you. Take the lift you powered.
5-2 Lower Levels: intersection with Chris and Piers
This is a Story Intersection: the same section as Chris’s chapter 5 (5-2). Offline, the AI plays the other pair. The big screen on the right shows the Haos simulation. Press the switch on the panel to power the 2 lifts; the room has 2 crates and 2 more crates. Pull all 4 levers at once, one per character: Jake and Sherry ride one lift, Chris and Piers the other.
Partner swap. You can ride the lifts with a character from the other campaign: Chris and Jake with Piers and Sherry, or Chris and Sherry with Piers and Jake. Only the dialogue on the way up changes; gameplay is the same.
5-2 The lifts
On the way up, Neo-Umbrella J’avo drop onto your platform 2 at a time, and side doors open onto snipers and rocket-launcher J’avo.
- Split the work: one player melees the boarders (saves ammo) and the other shoots the snipers and rocket J’avo first, since they do the most damage. If you’re swamped, Flash Grenade.
- Shoot the green-lens masks first: they mutate and cocoon more often than the red-lens ones.
- Telo-Eksplozija (exploding torso): it walks at you and explodes when it gets close or when it dies. Shoot its legs so it kneels and blows up away from you, or punch or kick it to send it like a live grenade into the other J’avo or off the platform. Warn your partner before you shoot it if they’re close: on a platform this small, the blast catches you both.
- Noga-Oklop (armoured legs): shoot the torso; it barely stuns, and a finisher needs both players.
- Noga-Let (moth legs): counter its charge or its air grab, then stomp it.
- Telo-Magla (moth wings on the torso): stomp its head while it gasses; if it gets back up at low health, finish it.
You don’t have to protect Chris and Piers: damage they take doesn’t fail you. Out-killing them earns the bronze medal “Killed more enemies than Chris and Piers”.
Haos is born. At the top, cutscene: Haos hatches from its cocoon. Jake and Sherry split from Chris and Piers down another path.
5-3 Underwater Facility 2: towards the lava
2 crates on the left, 2 crates ahead and 2 crates at the end of the hall. Open the door at the end: it leads to a giant incinerator. Press the button to go down to the metal-walkway area: the Ustanak is waiting with a ball-and-chain flail. Don’t fight yet: turn around, take the left path, drop down, run along the walkway to the other side and up, and push the container at the end together (partner action). Ignoring the Ustanak until then saves ammo.
5-3 Serpent Emblem #19
Heads-up: break it during stage 1. Once the fight drops to the lava level you may lose the angle.
As soon as you’ve pushed the container, run 90° to the right (the Ustanak’s left) along the edge walkway to behind where the boss started: the emblem is at the base of one of the stone pillars rising out of the lava sea, in the maintenance-walkway area. GameWith: drop down and head forward to your right until a dead end; it’s at the foot of a pipe in the lava. On a chapter replay you can snipe it with the Sniper Rifle from the room entrance before you trigger the Ustanak. File: Ustanak 2. Then see Boss — Ustanak (lava arena).
5-4 Shipping Center: Serpent Emblem #20
After the fist fight, jump to the platform with the ladder, climb up, regroup with Sherry and go through the door. Right at the start of the section, in the hallway, look for the first big silver tank: Serpent Emblem #20 is on its right, in the bottom corner, in plain sight (Evil Resource: “to the right next to a gas tank in the corner”; GameWith: “the lower-right corner of the tank”; only Gamer Guides says left). File: C-Virus Vaccine. Break it before you board the tram.
5-4 The tram
Carry on through the area to another door, go left, through it and onto the tram (the escape vehicle): pull the 2 levers. Cutscenes, and the Ustanak comes back one last time. See Boss — Ustanak (tram). That ends Jake’s campaign.
Boss — Ustanak (lava arena)
Jake’s final boss. Metal walkways over a sea of lava, a small platform by the lava and, at the end, a catwalk for the fist fight. It now carries a flail. Its attacks: the Chain Shot in a straight line (sometimes dipped in lava first), the Chain Swing when you’re close, and a charge that does little here. Never stand in front of it.
- First things first: push the container with your partner and break Serpent Emblem #19 (above). The walkways hold 9 wooden crates in total, some at the end of the walkway: smash them in stage 1.
- Stage 1, walkways: keep moving and use the walkway loops to get out of its reach. Gamer Guides recommends the Sniper Rifle and the Nine-Oh-Nine here: save the heavy stuff. Dodge the Chain Shot by moving sideways. If you run short of ammo, run to the end of the walkway and break the crates there: they usually give a couple of magazines for your guns.
- Stage 2, the platform by the lava: after enough damage it breaks the floor and the fight drops lower. It now adds a wide-arc swing, the charge and fire attacks. It turns slowly: circle it and avoid its right side and front, because the flail sweeps to the right. Its ground slams leave lava pools that burn you for as long as you stand in them. Ammo sometimes pops up inside the pools: wait for the pool to go before you pick it up. Now’s the time for the Elephant Killer and 40mm Explosive Rounds; you won’t need them afterwards.
- The stagger: when it staggers, both of you melee it (ZR) and follow the prompts: Sherry jams her Stun Rod in automatically and Jake finishes with a kick. The cutscene separates you and destroys the flail.
- Stage 3, the fist fight (Jake only, fists only): Jake has no health bar and no stamina limit here. Repeat charged combos: per GamePressure, go to the far end of the catwalk, hold ZL + ZR and release ZR for a running strike, then keep tapping ZR with ZL held for the combo that ends in a jumping attack. Repeat. If you can land quick hits, do: it all adds up.
- Counters: when it throws punches, counter / dodge prompts appear: press the button shown in time. One counter earns the silver medal “Successfully countered one of Ustanak’s attacks”. 3 failures = it knocks you into the lava and it’s game over.
- Sherry meanwhile: she can send cargo containers down 5 rails into the Ustanak to knock it off balance, though they often miss. Have her try anyway.
- The finish: at the end, mash the on-screen button (B on Switch) to knock it off. Medal “Landed the finishing blow to Ustanak”.
Boss — Ustanak (tram)
Its last appearance: it chases the tram. It’s all team button prompts, with no shooting until the very end.
- The climb: hold ZL + ZR and, each time the screen shows one of the two triggers pointing up, release it and press it again; that alternates the hands. Releasing them in rhythm is fastest.
- Dodge: when it gets close, a dodge prompt appears (on Switch, Y + B).
- The explosive-canister crate: both press the button to release it at the Ustanak. Keep climbing.
- The iron pipes: both release them, then mash.
- The Elephant Killer: it’s stuck on the tram. Crawl to it and pick it up.
- The final shot: mid-cutscene, Sherry presses fire (ZR) and Jake presses his partner button (A). IGN warns these buttons can change on difficulties other than Normal: press what the screen shows.
Reward: the end of Jake’s campaign: the See You Around achievement, the medal “Escaped from the underwater facility” and the Wings - Copper dog tag template. The bronze medal “Upheld your promise to your partner” also belongs to this chapter and comes with the story. Clearing Jake’s campaign unlocks The Mercenaries map Mining the Depths in the original releases; on Switch it’s unlocked from the start. On unpatched PS3/360, Ada’s campaign opens once Leon’s, Chris’s and Jake’s are cleared; since the December 2012 title update, and on every later version, it’s unlocked from the start. SP in the chapter: 5,000 fixed (Door D) and the 3,000 the Rasklapanje drops, plus enemy drops.
Don’t leave without:
- the 4 Serpent Emblems: #17 in the cell’s ceiling corner (once you have weapons), #18 in a lab cabinet, #19 at the foot of a pillar in the lava (during the Ustanak’s stage 1) and #20 on the right of the first silver tank in the Shipping Center (before the tram). All 4 give the Ustanak 1 and Ustanak 2 figures, and all 20 of Jake’s give the Sherry Birkin (Rare) figure;
- the 5,000 SP suitcase on the Door D control panel, which only Jake can take;
- the 3,000 SP from the first Rasklapanje’s last part;
- the “Ground a B.O.W.’s hand” medal (a hand in the incinerator or the compactor) if you’re going for medals.