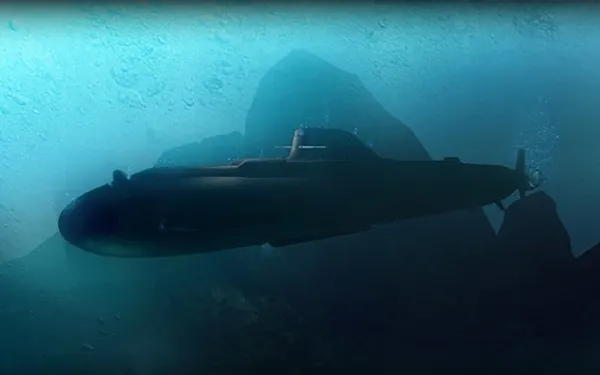
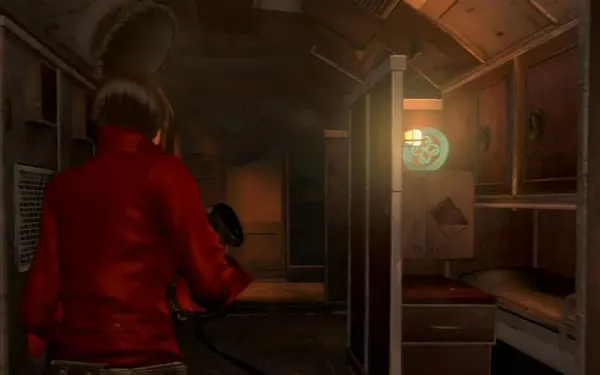
Ada Wong gets a call from someone claiming to be Derek C. Simmons and, although she turns the job down, curiosity takes her diving to a Neo-Umbrella submarine (June 2013). Its security system is keyed to her fingerprints and its crew are J’avo: inside she finds that “she” was sent to capture Jake Muller in Edonia six months earlier, a mission she never took. The chapter has three very different parts: crossbow stealth past guards and laser grids, a timed escape as the sub tilts and floods, and a defence in the Torpedo Room against J’avo and Gnezdo while you answer a voice test. In local co-op, Ada is player 1 and does everything (doors, puzzles, the grapple, the valve); Agent, player 2, only fights and reappears next to Ada every time she grapples. There are no split routes and no Story Intersections in this chapter.
Chapter order: 1-1 Submarine Interior (stealth: guards, laser grids, the bunk room, the recreation room, the “Armory” ladder and the grapple; the canister crate and its vent, which earns the shortcut medal; the alarm button and the window; Serpent Emblem #1 in the bunk room; the painting puzzle; the turret corridor; the fingerprint scanner and the projector room; the alarm and the gun cameras; the warehouse) → 1-2 Submarine - Reactor (Serpent Emblem #2 in the reactor room; the Assault Shotgun; the diving bay and the hull breach; the “Escape Pod” door; the sub tilts; flood escape with Serpent Emblem #3, the valve and the lock) → 1-3 Submarine - Torpedo Room (the 1st Gnezdo; Serpent Emblem #4 in the dead end; the unpowered handprint machine; the 5 Gnezdo; diving to the power lever with the floating First Aid Spray; the way back up the elevator shaft; the voice test against waves while the sub sinks towards 2,500 ft; the grapple out).
Before you start:
- Starting gear. Ada starts with the Crossbow (Arrows (Normal) and Arrows (Pipebomb); the alternate function switches arrow type), the Ammo Box 50 (9mm Ammo) and the grapple. The only new weapon in the chapter is the Assault Shotgun (1-2, 7-shell magazine). IGN recommends reaching the final defence with 20 to 30 12-Gauge Shells: don’t spend them on stray J’avo.
- Play it last. On Switch, Ada’s campaign is available from the start, but her story reveals what the other 3 hide.
- Stealth. If a guard sees you or reaches an alarm button, the alarm goes off and troops keep coming. The Crossbow is silent: aim for the head, because a body shot pins the enemy to the wall and raises the alert. Takedowns from behind are silent (ZR when the prompt shows), or take cover at a corner (ZL by the wall) and press ZR as the guard comes round. Guards see less than you do, there’s no time limit on the stealth part, and the objective marker (L) always points along the stealth route. Laser grids stop Ada, not the J’avo. It’s the natural place for the Silent Killer achievement (5 stealth takedowns).
- Co-op with Agent. In split-screen Ada is player 1 and does everything: doors, levers, crates that get pushed, the painting, the valve, the grapple. Agent (player 2) can’t open doors or chests, solve puzzles, move objects or use the grapple: he carries the Nine-Oh-Nine and the Survival Knife, has no silent weapon (in the stealth part, takedowns from behind only), and when Ada grapples or a cutscene starts he vanishes and reappears at her side. Agent picks up his own weapons as he goes, like any other character, and the wiki warns he can miss items or collectibles if Ada doesn’t wait for him: wait for him at every door and every workbench.
- Shared loot. In split-screen, what comes out of a crate is the same for both of you and only one can take it. Share it with Give to your Partner (in your Item Slot). The Ammo Box 50 and the Nine-Oh-Nine use the same 9mm Ammo.
- Saving. There are no typewriters and no manual saves: the game saves only at checkpoints. The 3 sections (1-1 Submarine Interior, 1-2 Submarine - Reactor and 1-3 Submarine - Torpedo Room) are Chapter Select start points, and there are more checkpoints in between. A Serpent Emblem counts the moment you shoot it: per PowerPyx, you can quit right after, without reaching the next checkpoint. If you miss #3 in the flood, retry from the last checkpoint.
- Skills. Firearm (IGN: at Lv3 a crossbow headshot is a near-instant kill on Normal), Defense (it cuts the damage you take), and Breakout for the Gnezdo grabs; Combat Gauge Boost helps in the crawling sections but costs 70,000 SP.
- SP. There are no fixed SP suitcases: points come from enemies (the Gnezdo drops 2,500 SP and the Napad 1,500 SP) and from crates.
- A rank: 70% accuracy or better, 2 deaths or fewer, under 50 minutes (Gamer Guides leaves the A time blank; B is 50 to 90) and 45 kills or more.
- Missables (this pass): the bronze medal “Discovered a shortcut” (the 1-1 canister crate), Serpent Emblem #3 (during the flood, timed) and the First Aid Spray floating in the water on the way to the lever. Everything can be replayed from Chapter Select.
Difficulty: what changes in this chapter
- Amateur: the life-or-death QTEs (the jump off the falling crate as the sub tilts) happen on their own, and the mash gauges to break free of a Gnezdo fill faster. Action Button Assist: Auto does the same on any difficulty.
- Normal: this guide’s baseline. One well-placed arrow kills a Gnezdo’s queen.
- Veteran: enemies deal and soak up more damage than on Normal. Same tactics; in the final defence, don’t let the mutants surround you at the microphone.
- Professional: every hit takes at least 2 health blocks, mash gauges (like breaking a Gnezdo’s grab) fill more slowly, enemies never drop Green Herbs and random crates only give SP. What you have is what’s fixed: the Red Herb, the Green Herb and the 2 × Incendiary Grenade in the projector room, the 9mm Ammo in the gun-camera corridor and the First Aid Spray underwater. A Gnezdo grab drains your health very fast: avoid them whenever you can here, and reach the voice test with the shotgun full.
- No Hope: at least 2.5 blocks per hit, skills are disabled (the Firearm Lv3 tip doesn’t apply), the SP enemies drop is doubled and, if you die, you continue with the health you had when you passed the checkpoint. Pass checkpoints at full health, above all before the flood.
1-1 The diving room, the junction and the “Bunk Room”
The diving room you start in is empty. Go through the door and follow the walkway to the end: stairs lead down to a junction where a J’avo guards a laser grid. Ada can’t pass through it (the J’avo can), so you go round every grid through the side rooms.
- 1st guard (the one at the junction): walk up behind him when he turns his back and take him down (ZR when the prompt shows).
- Go down through the area marked “Bunk Room” and crawl under the opening round the corner.
- 2nd guard: he watches the next corridor. Take cover behind the corner wall (ZL) and melee him (ZR) as he approaches.
In co-op, Agent should stay behind Ada and only take guards from behind: his Nine-Oh-Nine is loud and one shot sets off the alarm.
1-1 The 2nd laser grid and the recreation room
- By the 2nd laser grid, go into the small room on the left and crawl through the hole into the next room, the recreation room. Kill the Neo-Umbrella guard inside.
- There’s another guard in the hall: stand against the door and watch his shadow; when he starts moving away, step out and take him (GamePressure kills him with an arrow when he turns round).
1-1 The 3rd laser grid, the machinery room, the “Armory” ladder and the grapple
- The corridor curves towards the 3rd laser grid. Wait for the guard behind the grid to walk off and go right into the machinery room.
- The guard in that room mutates: pin him to the wall with a normal arrow and melee him before he breaks free.
- Behind the fence there’s a drop: jump down and go into the hole that leads to the far side of the grid. Inside the vent, look through the grate: there’s a guard right above you. Shoot him with an arrow through the grate. Out of the vent there’s 1 wooden box.
- At the end of the walkway, climb down the ladder marked “Armory”. There’s 1 more box at the bottom. It’s a dead end with a broken ladder: grapple up to the door on the level above. Agent reappears beside you.
If the alarm already went off upstairs, it doesn’t matter here: the patrols on this level carry on as normal.
The walkway with 2 guards. The grapple takes you to another walkway. Peek round the corner: a guard paces it back and forth. Take him from behind when he turns. Take cover by the corner, wait for the 2nd to turn and take him too.
1-1 The canister crate (shortcut medal), the alarm button and the window
Go up the small steps (per the wiki, a guard patrols the top of this staircase and another the bottom: if one sees you, kill him at once and the others won’t notice), but don’t go round the corner: behind it, steps lead down to an area where 3 J’avo patrol (IGN calls them SpecOps).
The shortcut (bronze medal “Discovered a shortcut”). By the steps there’s a metal case holding 3 gas canisters. Stand at its left side and press the action button when the prompt shows: Ada pushes it aside and reveals an air duct. Crawl to the end, kick out the vent cover at the far end and drop down. You skip the 3 J’avo and, according to players, the medal shows up on the end-of-chapter screen (check it there). If you go round the corner and fight, you miss it this pass; if you do, kill them quickly and the alarm doesn’t sound: an arrow to the head of the farthest one and takedowns from behind for the others.
The alarm button. Out of the duct (GamePressure: go left), a short cutscene shows you the next alarm button. If you’re seen, kill the J’avo before he reaches the button.
The window.
- There are more guards further on: take cover behind the boxes and move when the nearest one turns back towards the middle.
- Duck at the “window” (an opening in the wall) and, when the guard inside looks away, shoot him in the head with a normal arrow.
- Break the box at the window, hop into the room and break the other box in the corner, without letting the walkway guard see you.
- The tricky part: to take down the walkway guard, stand against the wall and angle the camera until you can see him. When he comes towards you, step out and take him, then hop back through the window so the 2nd guard doesn’t see you. If the 2nd notices his buddy is gone, kill him fast; you can also take him from behind when he walks away.
1-1 Serpent Emblem #1 and the way to the painting
Serpent Emblem #1. Past the alarm room, a corridor turns the corner to a short flight of stairs up into a small bunk room (nobody patrols here). The emblem is on top of the cabinet next to the bed, in plain sight: go up and look right. File: Ada Wong. It isn’t confirmed that an emblem Agent breaks counts on Ada’s save: let Ada shoot them.
Towards the painting. Follow the walkway to the end: there’s 1 box just before you drop down. Then a bigger room with a hatch down into a vent room, a door-less rat-infested chamber and a crawl tube. Out the other side you reach the private room with the painting, its exit door locked.
1-1 The painting puzzle
The door has a puzzle lock that gives you an electric shock (and takes health) if you operate it with a wrong combination. Don’t use it until the 4 devices are set. Only Ada can do this puzzle: Agent can’t use the viewer or the devices.
- Examine the door: Ada checks it’s locked and the puzzle starts.
- Find the viewer: the next room has a viewer (a hole in the wall) behind the mounted animal head, whose eyes are cameras pointed at the painting. When you look, the view is blocked by the horns.
- Press the button on the cabinet under the head to rotate the horns.
- Look through the viewer again: the painting slowly shows a hidden layer (the eagle and the woman dancing in the lake vanish, the trees die, the sun becomes a moon) with a sketch above the central figure. Memorise it.
- Set the 4 devices (small cabinets around the room). As you walk up to each one the action-button prompt appears: each press rotates its segment of the picture. Turn it until it matches that part of the sketch. The 2 cabinets either side of the painting set parts 1 and 2, and the 2 on the other side of the room set parts 3 and 4.
- Operate the lock by the door once all 4 are right: the door opens. If it shocks you, check the segments and try again.
The answer changes. GameWith’s and the wiki’s runs got a snake (1 = head, 2 = open jaw with fangs, 3 = body, 4 = stubby tail; head on the right, mouth open); Gamer Guides and IGN say it’s random (snake, fish, bird, human, tree or corpse), and GamePressure’s run got a black bird. Always look through the viewer and copy what you see.
1-1 The turret corridor and the projector room
The turrets. Past the door, a cutscene introduces the gun cameras. The corridor has white rings on the floor: step on one and it turns red and a wall gun fires at whatever crosses its laser. Use them on the J’avo (lure them into the laser and wait). Sources disagree on whether the guns fire at Ada (IGN says yes; other guides, only at the J’avo): to be safe, sprint through the lasers yourself. At the next corner, take cover and put 2 arrows into the guard ahead.
The projector room. At the end of the corridor, a fingerprint scanner lets you through (your prints are on file). In the room:
- Red Herb and 2 × Incendiary Grenade by the projector.
- Green Herb on the desk. Mix them before you go on (Green + Red = 6 tablets).
Ready a multi-target weapon (the Ammo Box 50 or an Incendiary Grenade) and run the projector: a film about “Ada’s” mission to capture Jake. Copper medal “Acquired information about Jake”. When it ends, J’avo storm the room.
1-1 The alarm: the gun cameras and the warehouse
Now the alarm sounds by script and the stealth is over. IGN warns the troops are near-infinite: don’t linger killing, head for the vent.
- Kill the 3 guards who come in, go back up the corridor and through the large door that was locked before; turn right: 3 more. There are 2 crates.
- Stacked crates block the other doors: climb them (action button) into the vent.
- Out of the vent you reach a two-level warehouse: drop to the lower level and step on the round floor buttons (Gamer Guides counts 2; the wiki, 3) to activate the gun cameras: they shoot the J’avo for you. Around here are 3 crates and 9mm Ammo.
- Round the corner, 2 more crates. Take cover at once: at the end of the hall a guard on a gatling gun fires in bursts. Run between bursts to the boxes ahead and activate the camera behind him: it kills him for you.
- At the far end, the Engine Room opens with the fingerprint scanner. Checkpoint 1-2.
1-2 The reactor room: Serpent Emblem #2 and the Assault Shotgun
Ada decides the sub isn’t worth staying on: the goal is the escape pod. Go through the doors to the generator / reactor room (1 box).
Serpent Emblem #2. It’s on a square column in the main reactor room, before you drop down the 1st hatch: check all its sides; the easiest way is to go to the back of the room and turn around. File: Report on Jake Muller. If you already dropped down and took the shotgun, climb the ladder back up.
The Assault Shotgun. There’s 1 box just before you drop through the hatch. In the room below, the Assault Shotgun is on the workbench on the right. In co-op, have Ada wait for Agent at the bench: Agent picks up his weapons himself as he passes them, and no source says exactly which of Ada’s weapons he gets. Check his inventory before you move on.
The walkway with the spider J’avo. On the walkway, on the left, 1 crate is guarded by a spider-legged J’avo (Noga-Trchanje): it pounces on you and climbs the walls, but it’s easy to counter and one stomp kills it once it’s down. Further on, 2 more guards, not much of a threat.
1-2 The diving bay and the hull breach
The ladder at the end climbs into a big room (the diving bay):
- As you round the corner, shoot the red canister on the left. Let the guard beside it mutate first: the blast kills him anyway.
- There are 3 crates and about 6 J’avo. The crossbow works well at range: enemies pinned to the wall can be stomped, and if they break free they keep the arrow’s damage when you shoot them with another weapon.
- Go to the back of the bay and kill one of the 2 J’avo there: cutscene, one blows the fuel canisters and ruptures the hull.
- Grapple out of the water (action button) to the level above.
From here on everything is fast: if you dawdle, the sub or the enemies catch you.
1-2 The control room, the “Escape Pod” door and the tilting sub
- Control room: a guard with a knife (watch his slashes). 1 crate.
- Turn right, go through the door and cross the broken catwalk and the pipes. Jump the gap and carry on to the grapple prompt.
- The walkways collapse: climb back up each time and carry on to the “Escape Pod” door.
- Past a winding corridor is the elevator: instead of using it, grapple up the shaft.
- Upstairs, on the walkway, kill 2 guards; per Gamer Guides there’s 1 crate in the room right before the next elevator. In the next corridor, another grapple prompt.
The sub tilts. Back in the warehouse, the sub tilts and crates slide at you. Crawl uphill (sprint-crawling is faster but costs 1 Combat Gauge block). At the top, get ready for the QTE to jump off the falling crate / elevator. The timed stretch begins.
1-2 The flood escape (timed)
It’s the chapter’s only timed section: the water rises and, if it catches you, you die. The corridors are on their side: you climb the frames like ladders and jump the gaps at the junctions. Grapple points and ladders are marked in red. IGN: slow down as you reach each ladder, because missing it and fighting the camera costs more time. In co-op, Agent follows Ada; only Ada can turn the valve.
- Grapple and run. Climb the 1st ladder, leap the gap and climb the 2nd ladder (on the right). Leap another gap, climb the 3rd and crawl through the tube to an intersection.
- At the top of the ladder where Ada says “One slip and I’m going down with the sub”, take the low vent on the left (sliding is fastest). A spider J’avo waits on the other side: don’t fight it, dodge it and keep going.
- Serpent Emblem #3: halfway up the maintenance shaft, just right of the next ladder, the one leading to the valve. Shoot it as you arrive, before you climb. File: Submarine. There’s just enough time for the emblem, the valve and the exit; if you fail, retry from the last checkpoint (the emblem already counts if you hit it).
- Climb that ladder and hop down. There are two things to do in this stretch, and both are required:
- The red valve (on your right, per Gamer Guides): turn it to stop the jet of water blocking the exit vent.
- The glowing lock on the chain fence (the explosive in its centre): shoot it to drop the fence and jump across.
- The order: the guides disagree (Gamer Guides turns the valve first; per the wiki, the fence keeps you from the valve and you shoot the lock first). If the fence blocks your way, start with the lock; if the valve is within reach, turn it now. Both have to be done.
- Carry straight on: the valve reopened the vent the water was blocking. Go through it and, on the other side, grapple up a level.
- The water rises again: run up a series of ladders without stopping to a room where you climb the boxes on your right, cross the top walkway and grapple at its end (through a door). Copper medal “Outran the incoming flood of water”. Checkpoint 1-3.
1-3 The first Gnezdo and Serpent Emblem #4
Run down the flooded corridor and hop through the opening. The first Gnezdo appears: an insect swarm in a woman’s shape around a queen. If it catches you it drains a lot of health (waggle the stick to break free; Breakout helps) and it can spit insect swarms at you: keep your distance. To kill it, scatter the swarm with the Assault Shotgun or a Hand Grenade and keep shooting until only one big insect is left, the queen; with good aim, one arrow kills her. It drops 2,500 SP. IGN suggests avoiding it by turning 180° and taking the ladder behind you, but don’t climb yet: the emblem comes first.
Serpent Emblem #4 (before climbing the ladder). Instead of heading for the ladder, keep going the way you came in, past the Gnezdo, and hop through another opening (a window) into a dead end with 2 crates. Turn around: the emblem is attached behind the central partition. File: Gnezdo. Then go back and climb the ladder.
1-3 The handprint machine and the 5 Gnezdo
- Climb 2 sets of ladders and jump down: you reach the torpedo and fire control room.
- Examine the console / handprint machine: it has no power. New objective: restore the power.
- Drop to the lower level and follow the path until you drop into the room with 4 exits. There are 5 Gnezdo here. There are 3 crates (1 north and 2 west), but Gamer Guides advises skipping them: short on ammo, fighting 5 Gnezdo isn’t worth it. Slip past the insects through the half-round hole.
1-3 The power lever (underwater)
- Go into the west room, head right and dive into the water by the “Control Room” sign. The Gnezdo won’t follow you underwater: in the water you’re safe (playing offline you can even pause), though your air is limited (GameWith): check where you’re going before you dive. Use the objective marker between dives.
- Swim north. In the flooded corridor, examine the blockage on the right and swim under it through the hole on the left (GamePressure).
- First Aid Spray: it floats in the water along this stretch, but its position varies (Gamer Guides found it under one of the pipes). Look for it now: you don’t come back this way.
- Surface and flip the lever: power is restored.
1-3 The way back to the Torpedo Room
- Head back to the room with 4 exits and take the passage on the right (the east one).
- Climb the crates into another corridor.
- Enter the room (GamePressure says the one on the right; Gamer Guides describes it on the left: follow the marker) and drop into the hole on the left into the water.
- Swim left along the tunnel until you surface at a sealed elevator shaft.
- Kick the control panel / monitor to open it, grapple up the shaft and crawl through the vent: you’re back in the Torpedo Room.
IGN mentions a “2nd breaker” through a different pool, with red klaxon lights, that opens a shortcut to the voice panel: from the description it looks like the same panel you kick on the mandatory way back, not an optional detour. The shortcut medal is the 1-1 canister crate.
As you approach the torpedo console, water starts pouring in and the computer warns that the sub is nearing its pressure limit of 2,500 ft. Use the console: the voice test begins.
Final defence — the voice test
A recording in Ada’s voice asks questions; you have to answer at the console microphone while J’avo storm the room. Some cocoon (Chrysalid) and hatch into Gnezdo and, per IGN, Napad; the mutants have more health than usual. The sub is sinking and the depth counter climbs towards 2,500 ft: answer before it gets there.
- Before it starts: arrive with the Assault Shotgun loaded and 20 to 30 shells, whatever Hand Grenades and Incendiary Grenades you have, full health and your herbs mixed.
- Answer at the microphone: press the prompt next to the console; if you answer from further away, it asks you to come to the mic. You can move around between questions.
- Kill between questions (GamePressure): clear the room and get back to the mic as soon as the next one comes.
- Mutating J’avo: a strong melee hit as they start to cocoon can stop it; breaking a formed cocoon costs a lot of ammo.
- Gnezdo: grenade the swarm, then melee and shotgun until the queen shows; finish the queen (2,500 SP).
- Napad: a Pipebomb arrow always strips its armour; get behind it and empty the shotgun into the flesh on its back. Dodge its charge at the last moment. It drops 1,500 SP.
- In co-op: Ada answers (Agent can’t use the console) and Agent guards the microphone: he should stay close to Ada and deal with anything that gets near her. Pass him 9mm Ammo if he runs low with Give to your Partner.
- The end: when the locks release and the ceiling opens, grapple out from the console. Copper medal “Escaped from the sinking submarine” and the I Spy achievement.
Don’t leave without:
- The 4 Serpent Emblems: #1 on top of the bunk-room cabinet past the alarm room, #2 on the square column in the reactor, #3 next to the valve ladder (timed, during the flood) and #4 behind the partition in the first Gnezdo’s dead end. All 4 give the Ada Wong figure.
- The Assault Shotgun, for Ada and for Agent (make sure Agent passes the workbench).
- The bronze medal “Discovered a shortcut” (the 1-1 canister crate) and the 3 copper story medals: “Acquired information about Jake”, “Outran the incoming flood of water” and “Escaped from the sinking submarine”.
- The First Aid Spray floating in the water on the way to the power lever.
- Mixed herbs and shotgun ammo for Chapter 2 (5 or 6 shells for the acid-spitting zombies, plus more for Deborah’s mine cart and the Napads at the end).
After the chapter (skills): you can buy skills on the end-of-chapter screen; player 1 (Ada) runs it and SP is one pool for both of you. Priorities: Defense Lv1 (3,200), Breakout (2,800) and Item Drop Increase (3,500); then save for Firearm Lv1 (12,000). Arrow Pickup Increase (20,000) pays off across Ada’s whole campaign. On No Hope, skills are disabled.