Chapter order: 2-1 Forest Cemetery (the cathedral roof, Serpent Emblem #5 on the big headstone, the passage and the Simmons Family Crest Piece A trap, the Simmons crypt door, the body-bag chamber and the Amber Key, the gallows room with the Sniper Rifle and the Simmons Family Crest Piece B, the electric chairs, the armoured zombies and the Simmons Family Ring, the purple door, the skull: Skull’s Red Eye on the blade route and Skull’s Gold Tooth on the 3-room route, the Simmons Family Crest Piece C, the Simmons crypt and Serpent Emblem #6) → 2-2 Altar Corridor (intersection with Leon and Helena: the ring for Leon, the ropes, Deborah Harper, the minecart and the tentacle aimed at Helena) → 2-3 Underground Lab (the prison block with 3 Whoppers, Serpent Emblem #7, the Laboratory Key, the double-health Whopper, the 2 Napads and the 4,000 SP box, the blue tunnel with Serpent Emblem #8, the lockdown room with the chrysalid Napads, the “Happy Birthday, Ada Wong” video).
Prepare: this is a chapter of zombies and puzzles, with no J’avo. You arrive with the Crossbow (normal arrows and Arrows (Pipebomb)), the Ammo Box 50, the Assault Shotgun from the submarine and the grapple; the Sniper Rifle turns up mid-chapter. There are no fixed herbs in the whole chapter: healing comes from crates, barrels and enemies, so keep what you bring. Ammo to save: at least 3 normal arrows for the armoured zombies (you have to pin them to the wall), 5 or 6 shells for the acid spitters on the eye route, shells for Deborah’s minecart, 7.62mm NATO Ammo for the last shot at Deborah, and 15 to 25 shells (IGN) plus the Pipebomb arrows for the Napads at the end. The gallows room gives endless ammo: top up there before you leave the crypt. Co-op with Agent: in split-screen Ada is player 1 and does everything that isn’t fighting: doors, chests, key items, levers, chairs, the grapple and the zip-line. Agent (player 2, with the Nine-Oh-Nine and the Survival Knife) can’t pick up key items or solve puzzles, but he can smash crates, shoot padlocks, pick up ammo and SP, and revive Ada. Wait for him at every door, because if Ada moves on without him he misses what’s in the room. In split-screen a crate’s contents are the same for both players and only one of you can take them: share with Give to your Partner, and remember the Ammo Box 50 and the 909 both use 9mm Ammo. It isn’t confirmed that an emblem Agent breaks counts on Ada’s save: let Ada shoot them. Skills (bought between chapters): Zombie Hunter Lv1 3,000 SP (unlocked after 30 zombie kills), Item Drop Increase 3,500 (more ammo at the gallows), Shotgun Shell Pickup Increase 8,000, Arrow Pickup Increase 20,000 and Breakout 2,800 for grabs. Lone Wolf, Field Medic and Team-Up do nothing in Ada’s campaign. A rank: 70% accuracy or better, 2 deaths or fewer, under 45 minutes (Gamer Guides leaves the A time blank; B is 45 to 70) and 30 kills or more.
Walkthrough
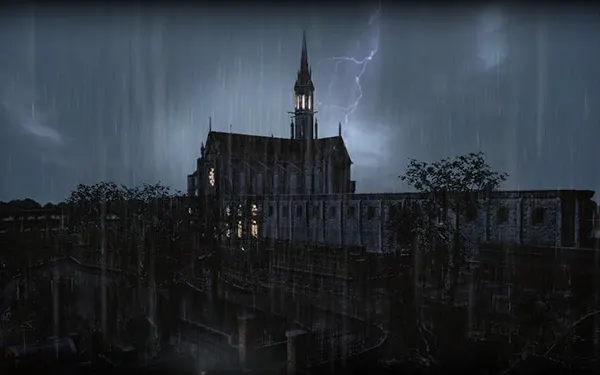
2-1 Forest Cemetery: the cathedral roof. You start on the cathedral roof: in the cutscene Ada spots Leon and Helena below. Grapple down into the cemetery. There are 2 wooden barrels behind you; don’t jump down yet, there’s another barrel in the corner.
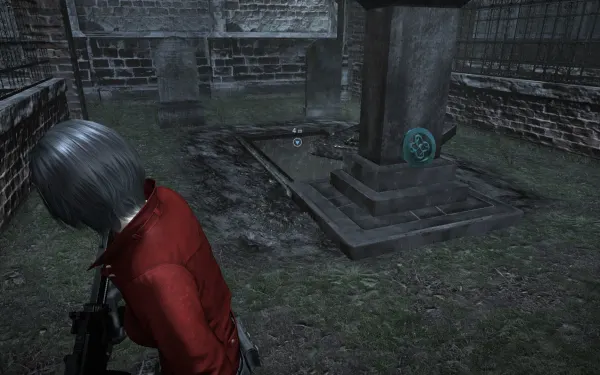
Serpent Emblem #5. It’s on the back of the largest headstone, the stone plinth Ada drops down from into the cemetery. Turn around and shoot it before you jump. File: Ada and Derek.
The passage and the Simmons Family Crest Piece A. Jump down: the moved gravestone opens an underground passage down to a waterway. 3 barrels. At the dead end there’s a chest with a gold padlock: shoot the padlock and take the Simmons Family Crest Piece A. It’s a trap: the room locks and 3 zombies attack (GamePressure counts 2). Kill them and go through the door that opens: 2 barrels on the right. At the end, grapple up through the hole in the ceiling and take the ladder to the surface: the decorated Simmons crypt door needs all 3 pieces. Inserting piece A opens another crypt; if you don’t see it, examine the door 2 or 3 times (IGN).
The body-bag chamber and the Amber Key. Enter the crypt that just opened and go down its ladder: a 3-storey chamber full of body bags, with 2 sealed metal doors and a dead lever. Go up the stairs: 1 wooden box. Shoot the lock holding up the bridge (GameWith describes it as the lock on the ladder), cross and open the green-light chest: Amber Key. It opens the green-light door below.
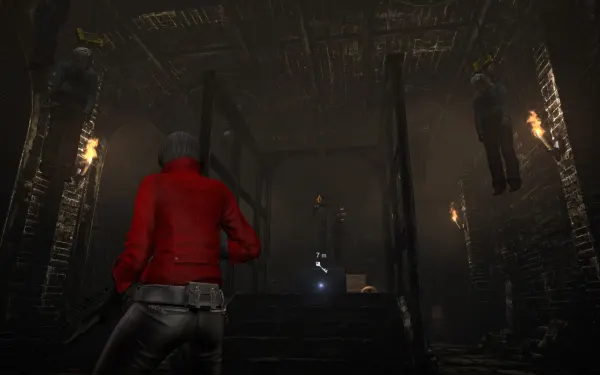
The gallows room and the Sniper Rifle. At the back there’s a zombie that can’t be killed yet: when you walk in it drops the chest down a hole; after that you can kill it. At the end of the room, next to the gallows lever, is the Sniper Rifle (6 rounds, 7.62mm NATO Ammo; it has nothing to do with the puzzle) and 2 barrels. The wiki lists Agent among the Sniper Rifle’s users: have Agent walk into the room and check his inventory, because he most likely gets his own copy (unconfirmed). If someone misses it, IGN says it turns up again at the start of Ada Chapter 3, next to the first grapple point (single source).
Endless ammo. Every hanging body has a padlock: shoot it and the body drops and releases ammo. The bodies keep being replaced, so you can top up here as much as you like (more drops with Item Drop Increase). Agent can shoot the padlocks and pick up what falls.
The gallows puzzle.
- Move the lever along its track to the right (GamePressure: push it twice) until it sits under the body closest to the track. Only Ada can move the lever.
- Stand in the middle of the room and shoot that body’s clasp.
- The corpse lands on the handle and its weight holds the lever down: the trapdoor opens.
Simmons Family Crest Piece B and the electric chairs. Drop through the trapdoor: the purple-light chest holds the Simmons Family Crest Piece B. As you leave, a cutscene locks the room: this is the electric-chair circuit.
- Push the 1st iron chair onto its metal plate (you get a harmless shock).
- Push the 2nd chair onto its plate. GameWith: the one behind the chest goes to the gap opposite the door. The “bodies” in the chairs turn out to be zombies.
- A zombie drops in. You need to leave it lying on the 3rd plate: walking it over the plate doesn’t count. Gamer Guides: shoot it so it falls back onto the plate; GamePressure: hit it once, then again when it’s by the plate; IGN: shoot it while it’s over the plate. If you miss, try again with the next zombie that drops in.
- The door opens: climb the ladder back to the body-bag chamber.
The armoured zombies and the Simmons Family Ring. Pull the lever, which now has power: the metal gate opens and 3 zombies in medieval armour drop in. That room’s floor is a trapdoor: to cross it you have to pin all 3 to the far wall with normal arrows from the Crossbow (the hint is the arrow-riddled zombie you can see at the back). This is Ada’s job: Agent has no crossbow. If you fall through the trapdoor, you kill them down there, they drop arrows, there are 3 boxes and a crawlspace back to the ladder; if you run out of arrows, it’s one way to get more. Cross to the purple chest: Simmons Family Ring. Medal “Acquired Simmons’ ring”.
The purple door and the skull. Go back to the gallows room and place the ring on the plaque on the far wall: the purple door opens. Take the zip-line and the ladder up, follow the red rug and ride the zip-line until you fall into another catacomb. Drop down. The camera makes you examine a skull: 2 hooded zombies run off, one with the Skull’s Red Eye and the other with the Skull’s Gold Tooth. You can do the 2 routes in either order; IGN suggests the eye first if you’re low on ammo, because it has more.
The eye route (left: zip-line and traps). You land next to a spinning blade: crawl-sprint forward and round the corner. Getting hit by the blades is game over. In the duct there are 2 crawling zombies that spit acid: shotgun (save 5 or 6 shells for this) or Ammo Box 50. A Whopper tries to reach you: shotgun it, or crawl through the side path on the left. IGN’s safe method: stop in the tunnel after the left-then-right bend, shoot the spitters as they follow you and let the blade chew up the Whopper at the duct entrance. Shoot the eye zombie from inside the tunnel: it can’t get down to reach you. Skull’s Red Eye. Then 2 barrels, a door, 3 more barrels and you’re back in the skull room.
The tooth route (the ladder: 3 zombie rooms). There are 2 barrels in the skull room; climb the ladder: 3 boxes. Room 1: 4 zombies, one starting very close (IGN: a dynamite zombie). Room 2: armoured zombies, spitters and a Shrieker: group them up and throw a grenade, and kill the Shrieker fast with the shotgun (its scream stuns you and enrages the rest). 3 barrels. Room 3: more zombies, another Shrieker, spitters and the tooth zombie. Two tricks: shoot the bloated orange-chested zombie so it deflates and knocks the others down, and pop the Shrieker’s sac when it’s surrounded, because its last scream kills the zombies around it. Kill the tooth zombie: Skull’s Gold Tooth. Each Shrieker drops a 1,000 SP piece.
The Simmons Family Crest Piece C. In the skull room, insert the eye and the tooth: the door opens and the chest holds the Simmons Family Crest Piece C. Grapple out and climb the ladder back to the cemetery. On the right-hand path, 2 barrels. Open the Simmons crypt with the 3 pieces and drop down the hole.
Serpent Emblem #6. As soon as you land, turn around and look up: it’s in the corner of the crypt ceiling, before the next door. File: Scorched Earth. Once you go through that door the Deborah encounter starts and you can’t come back for it on this run.
2-2 Altar Corridor: intersection with Leon and Helena. This is the same fight as Leon’s 2-6 / 2-7, seen from Ada’s side. Without an online connection, Leon and Helena are AI; on Switch, the Story Intersections menu lets the host pick the intersection when searching for an online game. Go through the door: cutscene, Ada shoots the mutant with the crossbow and gives Leon the ring (medal “Gave Simmons’ ring to Leon”; Leon uses it on the serpent door in Leon Chapter 3). When Deborah first attacks, evade until the floor gives way. On the way down: 2 jars, Leon boosts you to the rope (partner action, A), you cross, cutscene, 1 jar and another boost to the next rope: the real fight starts (see Boss — Deborah Harper). The wiki says that in crossovers Agent appears with the character left without a partner; here Ada goes with Leon, so Agent should end up with Helena (unconfirmed). The silver medal “Aided a partner in need during a story intersection” is awarded even when you help the AI.
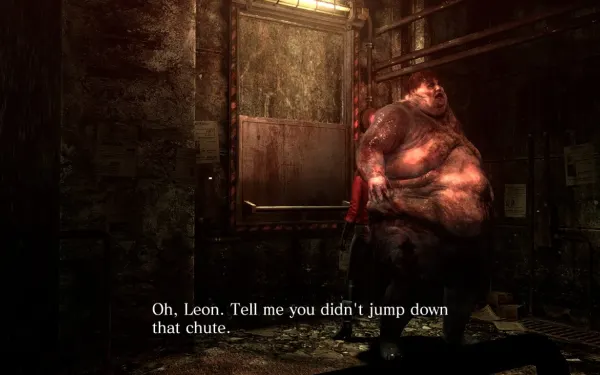
2-3 Underground Lab: the prison block. After Deborah you reach a cave: 3 jars, an elevator and 1 crate. A Whopper is waiting: Arrows (Pipebomb) help a lot. There are 2 more Whoppers in this prison block; the cell gates are half open and don’t hold them back. Stun each one through the calves or knees (2 to 4 normal arrows, one per leg, bring it to its knees) and finish it with a point-blank shotgun blast to the head. Each Whopper drops a 2,500 SP piece. Loot: 6 crates in the corners and 2 boxes.
Serpent Emblem #7. On the far side of the block, next to the square pool with the floating containers (they can’t be broken), beside a pillar. Gamer Guides: from the south-west corner of the Whopper room, look north. Evil Resource: you can see it from the slope in the corner. File: Note Found in a Laboratory.
The Laboratory Key. It’s on the dead lab tech by the north wall, the obvious corpse in the middle room (GamePressure says “inside one of the cells”). It opens the metal gate at the far end of the fenced area; then grapple up beside the chute Leon jumped down. Another Whopper climbs up behind you: Gamer Guides says it has double a normal Whopper’s health. Same method: legs, then head.
The 2 Napads and the 4,000 SP box. On the walkway, 2 crates on the right. Napad #1 bursts through a door. If you fight: a Pipebomb arrow always strips its armour; then shotgun or normal arrows into the flesh on its back until it kneels, and finish it. Its room has a box with 4,000 SP and 1 wooden crate. Then Napad #2 charges: fight or run. Each Napad drops a 1,500 SP piece. IGN’s trick: take the 4,000 SP, drop into the hole (the flooded blue sewer tunnel) and crawl into the low space: from there you can shoot the Napads without them hitting back and collect their drops.
Serpent Emblem #8. Turn around as soon as you drop into the sewer tunnel: it’s on the wall behind Ada. File: Shrieker. All 4 of this chapter’s emblems (#5-#8) unlock the Carla Radames figure.
On to the lockdown room. 2 crates on the left; go up the path, duck under the fence and ride the zip-line up to the barricade area Leon opened earlier: 3 crates and 3 boxes. In the next room, 2 crates and 1 box.
The lockdown room. This is the room where Leon and Helena pulled the levers. Heading for the exit sets off an alarm and Napads hatch from chrysalids (see Ambush — the lab Napads). The chrysalids can be destroyed before you trigger the alarm (IGN): do it if you have ammo to spare. When the alarm stops, the exit opens and you reach the video room (“Happy Birthday, Ada Wong”): a cutscene with the doppelgänger. Medal “Obtained information about your doppelganger”, the Counterintelligence achievement and the Tank dog tag.
Boss — Deborah Harper
A two-level room around the primitive altar; Deborah leaps from one level to the other. Her human body is nearly invulnerable: damage goes in through the glowing orange and yellow glands on the tentacles on her back. Body shots do little; hitting the glands staggers her and she rolls over, open to headshots. Attacks: chest strike (spins down from above and impales you; waggle the stick to break free), claw swing with long horizontal reach at ground level, dash with every claw out, and 360° spin (she leaps and lands spinning: back off as soon as she jumps). When she screams, she jumps at you: dodge.
- Shoot her a few times until a short cutscene plays; that’s when the fight really starts.
- Aim for the glands. When she poses on the upper level with her appendages out, it’s free damage: the Ammo Box 50 for Ada and the 909 for Agent.
- There are 2 explosive barrels: only shoot one when Deborah is right next to it (it hits her on the upper walkway as well as on the ground).
- With enough damage she goes down on her back with a tentacle out: run in, hit her and follow the prompts (B, then ZR) to tear off a claw. 3 tentacles destroyed triggers the cutscene.
- If Deborah straddles Helena, help her: if Helena is played by someone online and fails her QTE, she takes heavy damage.
- Zombies turn up now and then: they’re weak and drop ammo (shoot their lanterns).
- Split: Deborah smashes the floor again. Ada and Helena drop into the minecart and Leon takes the switches: cover Leon on his way down, because there are acid spitters.
- The minecart: lie on your back (hold ZL and dodge backwards: stick back + B). Ada must hold a firearm other than the crossbow, or she only does a backflip: equip the Assault Shotgun before you get in. Lying down you avoid the 4 beams and almost every attack; only get up to shoot the explosive barrels on the track (steps 10 and 11).
- When Deborah attacks, shotgun her glowing parts without getting up.
- Mandatory: shoot the TNT drum at the roadblock before the cart reaches it, or it’s game over. The other 2 barrels on the track aren’t mandatory: if the cart passes them without you blowing them up, they hurt you, but it isn’t game over.
- Second charge (after another barrel): shotgun again. Kill 5 zombies from the cart for the bronze medal Killed 5 zombies while in the minecart.
- Finish: the cart crashes and Leon pulls Ada up. Grab the ammo and shoot the glowing tip of the tentacle aimed at Helena before the platform gives way. There’s very little time: Gamer Guides recommends the Sniper Rifle. Too slow and it’s game over.
Reward: the chapter carries on. Deborah drops nothing; the ammo comes from the zombies. Health per phase from a single source (trainer readings, difficulty not stated): 5,000 on mutating, 30,000 in the room, 8,000 in the mine tunnel, 5,000 on the minecart and 3,000 for the finish.
Ambush — the lab Napads
Heading for the exit of the lockdown room sets off the alarm and the chrysalids open. Gamer Guides counts 5 Napads in all; IGN says “about half a dozen”, released 1 at a time, then 2, then 3. The exit won’t open until the alarm stops.
- Before you go near the exit: clear the room (3 boxes + 1 crate), reload everything and, if you have ammo to spare, destroy the chrysalids before they open.
- One at a time. Break the armour with a Pipebomb arrow (the Sniper Rifle or normal arrows crack it too).
- With the armour gone, normal arrows or the shotgun into the flesh on its back until it kneels, then finish it with a melee (ZR).
- The charge (4 blocks and a knockdown) is telegraphed: dodge it at the last moment or step onto a side platform. Get behind it after a swing and hit it to stun it.
- In co-op: one of you draws the charge while the other shoots its back. Agent has no arrows: Ada breaks the armour and Agent empties the 909, or his shotgun if he got a copy, into its back.
- Ammo: IGN recommends 15 to 25 shells depending on your Firearm level. Each Napad drops 1,500 SP; the bronze medal “Had 10 walls broken down by enemies” probably comes from the wall-smashing Napads and Whoppers in this lab (unconfirmed).
Don’t leave without: the 4 Serpent Emblems: #5 behind the big headstone at the start, #6 on the Simmons crypt ceiling (before Deborah’s door), #7 by the pool in the prison block and #8 on the wall behind you as you drop into the blue tunnel (all 4 give the Carla Radames figure) · the Sniper Rifle from the gallows room (and Agent’s copy, if he gets one) · the 4,000 SP box in the 1st Napad’s room · full ammo from the gallows before you leave the crypt. To farm SP: a Steam guide replays checkpoint 2-3 on Amateur (difficulty doesn’t change the points) for about 24,500 SP a run from the Whoppers, the Napads and the box (single source).