Chapter order: 3-1 Tenement - Bin Street (the playground and the slide, the red gate and the zip-line, the market street with a Pawn and Knights on the stalls, Serpent Emblem #9, the mahjong club and the 1st Strelats, the execution, the 2nd street with Serpent Emblem #10 behind the van, 3 more Strelats, the barricade) → 3-2 Shopping District (the Ubistvo hatches and chases you over the scaffolding; the zombie courtyard, the 2,000 SP box and the Back Street Key; Ubistvo, round 1 to get the key back; round 2 on the bus roof with Serpent Emblem #11; round 3 on the tracks with 2 trains) → 3-3 Train (the carriage roof, the alley, the tenement stairwell with Serpent Emblem #12) → 3-4 Stilt Housing Area (intersection with Jake and Sherry: cover with the Sniper Rifle, the crane and the girders, Sherry and the rotor, the jet-ski).
Prepare: this chapter has no new weapon. If you still don’t have the Sniper Rifle (it was in Ada Chapter 2’s gallows room), IGN says it turns up at the start, next to the first grapple point (single source): look for it before moving on, because you need it in the stilt housing. IGN’s warning: this is a tough chapter because of the Ubistvo’s many QTEs; expect to die a few times. In Ada’s campaign its wild chainsaw swing is instant death, and so is the torso cut if you’re on the ground: never stay in its reach to reload. Ammo to save: the Arrows (Pipebomb) (about 2 per train on the tracks, plus the courtyard), the Sniper Rifle’s 7.62mm NATO Ammo, the Incendiary Grenades for the courtyard zombies and Assault Shotgun shells for the Strelats. Switch buttons: action B, partner A, melee ZR, sprint left stick forward + B, slide sprint, then ZL; the 1st train’s QTE is Y, B, ZR per GamePressure (IGN warns it changes with difficulty) and the 2nd is waggling the left stick fast. Co-op with Agent: Ada (player 1) does everything that isn’t fighting: doors, the key, the grapple and the zip-lines; when Ada grapples, Agent vanishes and reappears beside her. Against the Ubistvo, Agent is the big advantage: two guns instead of one. On the bus Agent has no grapple: he has to slide or roll between swings to the far side. Pass him 9mm Ammo with Give to your Partner (the Ammo Box 50 and his 909 share it). Intersection: 3-4 is the same section as Jake’s 4-6; offline, Jake and Sherry are AI. Skills (between chapters): J’avo Killer Lv1 3,000 SP (after 30 J’avo kills), Zombie Hunter Lv1 3,000 for the courtyard, Rifle Ammo Pickup Increase 8,000 and Eagle Eye 3,000 for the stilt housing and the far-off emblems, Breakout 2,800 for zombie grabs and Arrow Pickup Increase 20,000. A rank: 70% accuracy or better, 2 deaths or fewer, under 45 minutes (Gamer Guides leaves the A time blank; B is 45 to 70) and 40 kills or more.
Walkthrough
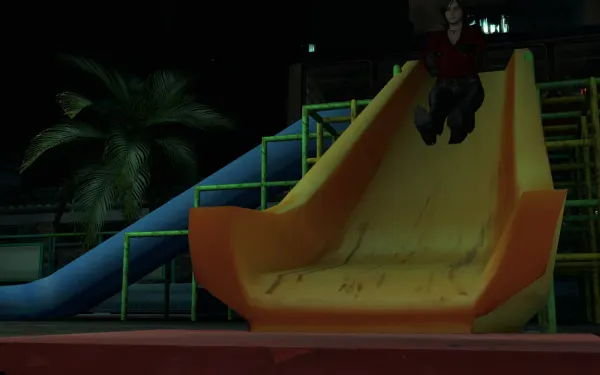
3-1 Tenement - Bin Street: the playground. The chapter starts close to where Chris’s chapter 3 begins; over the radio, HQ reports that Ada is heading south to the harbour. In the playground Ada can go down the slide: bronze medal “Slid down the slide”. (She can’t ride the hobby horse.) Follow the marker along the left side of the playground, climb the crate by the big red gate and cross over it on the zip-line. It’s one of the chapter’s first grapple points: if you’re missing the Sniper Rifle, look for it around here.
The J’avo past the gate. When you land off the zip-line there are J’avo waiting: per GamePressure, 2 attack you straight away; per Gamer Guides, if you approach from the left you can get behind them for a free stealth takedown (ZR).
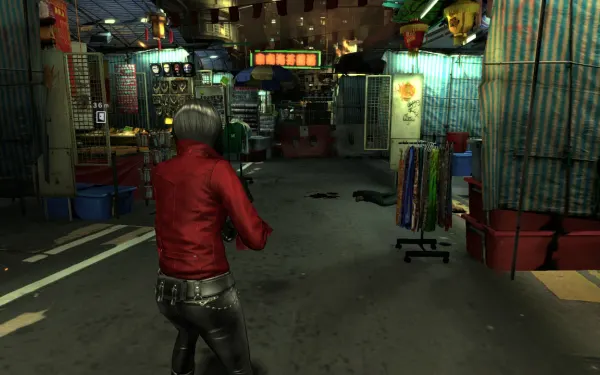
The market street. 2 J’avo with mutated arms. 1 wooden crate on the left. 2 more J’avo leap down from the rooftops (cutscene). 2 crates: one at the far right and one just behind a stall on the right. The stall tables at the entrance of the street hold fixed SP pieces: a Pawn (50 SP) on the left-hand stall and 2 Knights (100 SP each) on the right-hand one.
Serpent Emblem #9 (halfway down the street). Where the partitions cut across the street, don’t follow the marker (it points between 2 stalls): go straight to the 3rd stall on the left, the one selling jewellery, ties and scarves. The emblem is inside, on the wall, above the wares. Gamer Guides calls it “the last stall on the left”: same row. File: Two Ada Wongs.
Far left, 1 crate; 2 more J’avo; in the left-hand stalls, another crate. Before the door at the end, on the left table, 9mm Ammo.
The mahjong club. Go in through the small rusty door (red, per GameWith). Inside are 3 J’avo and one mutates into a Strelats, a lizard that fires spine volleys from its neck fins (they steam before it fires) and releases a gas that blurs your vision. Hide behind the crates, wait for the volley, then pop out and shoot; from range the Sniper Rifle works well. It’s very weak to melee: slide into it and, when it’s stunned, press action for its special finisher (ZR, B, ZR). It drops 1,000 SP. Leave by the right-hand door: 2 crates and 1 box. Out on the street, a cutscene: a J’avo guns down some civilians.
The 2nd market street and Serpent Emblem #10. Head where the civilians came from. Behind the van (green, on fire) there’s 1 crate and Serpent Emblem #10: walk round the van from the left; it’s inside a hole in a plastic roadblock, past a burning storefront (IGN: at the 3 dead civilians turn 90° right). File: Ada and Raccoon City. On the stalls: Arrows (Normal) on the left-hand ones and 9mm Ammo on the right-hand ones. IGN and the BradyGames guide count a First Aid Spray on a market stall shortly after the first Strelats: check every stall. Enemies: 1 Strelats (Gamer Guides: it’s easier to fight it a little further up), 2 J’avo and then 2 more Strelats. In the area on the right, 2 crates. Jump the car barricade and cross on the zip-line. The copper medal “Experienced a little taste of China” is a story medal that comes in this stretch (the exact trigger isn’t confirmed).
3-2 Shopping District: the Ubistvo hatches. Cutscene: the Ubistvo saws its way out of its chrysalis (“Chainsaw, huh? How elegant.”). The chase: hold sprint and run. Head for the TV screen, turn right and grapple at the end. After one of Ada’s bad jumps there’s a QTE: waggle the left stick to hang on. There’s a low obstacle: slide under it (sprint and ZL); if you end up crawling, crawl-sprint. You jump between bamboo scaffolds, cross a narrow alley on the zip-line, jump to another scaffold and climb the ladder on the right. The copper medal “Witnessed an airplane crash” (Leon’s plane coming down over Lanshiang) is a story medal from this chapter (the exact trigger isn’t confirmed).
The zombie courtyard. This is the small enclosed market Jake and Sherry run through in their chapter 4. There are about 8 zombies: bunch them up and throw a grenade. Loot: 5 crates, a Green Herb and, in the corner, a box with 2,000 SP. Kill everything before you take the key, and ready the Incendiary Grenades and a mid-range weapon (the Ammo Box 50, or quick shots with the Sniper Rifle).
The Back Street Key. It’s next to a body on the far side of the courtyard, at the objective marker. A zombie gets up when you take it: kill it. Use the key on the door at the end of the street: cutscene, the Ubistvo steals the key (“You shouldn’t take things that don’t belong to you.”). Round 1 begins: see Boss — Ubistvo (courtyard, bus and tracks).
The scaffolding and the bus. With the key back, open the door. Grapple up, 1 crate, move to the end: cutscene, and you grapple onto the roof of the bus, with the Ubistvo on it. This is round 2.
Serpent Emblem #11 (timed). At the bus’s 1st stop (short cutscene, next to some scaffolding), move to the front and look left: the emblem is on the scaffolding / building on the left. Shoot it fast, because the bus pulls away almost at once. File: The Family. If you miss it, restart from the checkpoint (or come back through Chapter Select).
The railway tracks. At the end of the bus route, a QTE to escape and a cutscene. You end up on a closed-in stretch of track: round 3. There are 10 crates, but IGN says only take them if you can afford a few seconds of dodging. After the 2nd train there’s a radio call about your double and you wake up inside a carriage.
3-3 Train. Move through the carriage and grapple onto the train roof: cutscenes. Leave through the hole in the roof; cutscene, and an abandoned alley with stairs at the end up into the tenement. Inside, 4 crates and Serpent Emblem #12.
Serpent Emblem #12 (before you climb). In the tenement stairwell, lean over the gap between the flights and look to the bottom, the lowest level: it’s past a box, under an overturned cabinet; it’s easiest to see through the right-hand crack, from the cabinet’s lower-right corner. If you reach the bedroom, you’ve gone too far. File: Bloodshot. All 4 of this chapter’s emblems (#9-#12) give the Leon S. Kennedy (Rare) figure.
Climb the stairs: Evil Resource also puts 4,000 SP in a desk drawer in the room directly ahead (single source). Go through the door: 2 crates. At the next door, cutscene: Ada spots Sherry and Jake (“Guess the rookies could use some help.”).
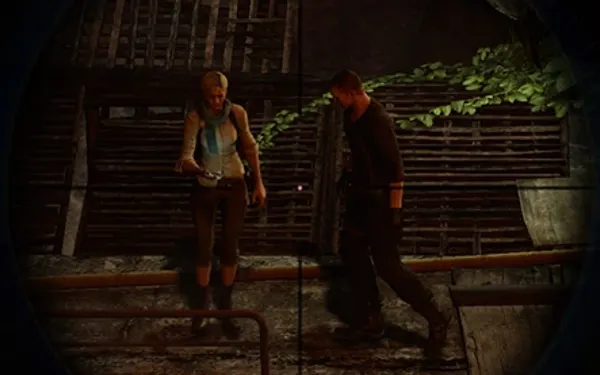
3-4 Stilt Housing Area: intersection with Jake and Sherry. This is the same section as Jake’s 4-6: they travel over the water and the roofs while Ada covers them from a distance. Drop down: 1 oriental vase; jump right: 1 box. Grapple or jump across: cutscene. 3 crates. This is where cover #1 starts (see Boss — Ubistvo (stilt housing)).
The rooftops and the crane. After the cover section: 5 boxes and a grapple. On the next roof, 4 oriental vases and 1 box; another grapple. You reach the crane: shoot the Ubistvo again and, after a short cutscene, press the action button (B) to drop the crane’s load of steel girders on it.
Sherry and the rotor. Drop down: cutscene. The Ubistvo traps Sherry on a drifting boat heading for the rotor of the downed helicopter. Do nothing until the prompt appears; then zip down and grab Sherry. The rotor shreds the Ubistvo. Copper medal “Saved Sherry from the attacking B.O.W.”. If you killed more enemies than they did during the intersection, bronze medal “Killed more enemies than Jake and Sherry (2)”.
The jet-ski. Keep dropping down to the pier. IGN: reload and equip an all-round weapon before you finish. Get on the jet-ski to end the chapter (“Now that’s the way to travel.”): the This Takes Me Back achievement and the Tank - Gold dog tag.
Boss — Ubistvo (courtyard, bus and tracks)
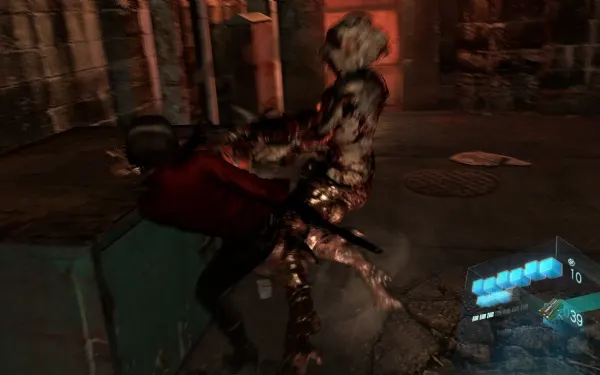
A complete mutation with a chainsaw arm. Its heart sits at the base of the chainsaw: the chainsaw arm is its weak point (its own file says so). The legs do something else: heavy damage to the legs makes it kneel, open to melee. Shots to the head and face make it flinch. Attacks: wild swing (in Ada’s campaign, instant death; it runs in a straight line: dive sideways, because sliding past it can still get you hit), torso cut if you’re lying down or dying (instant death: roll away), 180° turning swing if you’re behind it (instant death), and leap strike and double swing (6 health blocks each). Sometimes it goes berserk and chases you very fast.
Round 1: the courtyard (getting the key back).
- The real danger is the zombies: they keep dropping into the courtyard, crawl and grab you. Keep moving and use the Incendiary Grenades on them.
- Lead it to the edges of the courtyard, so it has to cross the whole thing to reach you.
- Hit it at range: Sniper Rifle and Pipebomb arrows, or the Assault Shotgun while backing off. Aim for the base of the chainsaw or the legs.
- When it drops to its knees, run in and press melee (ZR). 3 knockdowns with a finisher and you get the Back Street Key back. Pick up what it drops and open the door.
- In co-op: one of you draws it to the edge while the other shoots, then swap. The wiki is blunt: the fight is very hard for Ada alone and Agent helps a lot.
- The bronze medal “Used a B.O.W.’s attacks to kill all zombies in the area” probably comes from here, by letting its swings kill the crawling zombies (unconfirmed).
Round 2: the bus roof. The goal is to survive until it’s thrown off.
- When it charges at you, press the action button (B) to grapple to the other end of the bus (face the camera and press the prompt). Then shoot its back.
- Slide under the green signs (sprint and ZL): it smashes through them. If it isn’t near your end, use the grapple.
- Serpent Emblem #11 at the 1st stop: the scaffolding on the left, shoot fast.
- Agent has no grapple: he has to slide or roll along the roof between swings, to the side away from the Ubistvo.
- At the end of the route, a QTE to escape.
Round 3: the tracks. A closed-in space and long-reaching attacks: a single hit can mean game over. It closes in every time you reload or switch weapons (Sniper Rifle, shotgun, crossbow), so fire a few shots and reposition.
- Damage it until the 1st train cutscene: a 3-button QTE (Y, B, ZR per GamePressure; they change with difficulty).
- Keep going: about 2 Pipebomb arrows and a melee finisher take it to the 2nd train cutscene: waggle the left stick very fast.
- Win that QTE and the direct fights with the Ubistvo are over. Reward: you move on to 3-3 Train.
Boss — Ubistvo (stilt housing)
Here Ada doesn’t fight up close: she covers Jake and Sherry from a distance while they take on the Ubistvo on the long roof and the boat. IGN: from this point Ada’s useful weapon is the Sniper Rifle, and the crates only give rifle ammo.
- Cover #1: shoot the J’avo that get in Jake and Sherry’s way and, when the Ubistvo attacks them at the red building, focus on it until it goes down and they reach the next boat.
- Aim for the base of the chainsaw; with Eagle Eye the extra zoom helps a lot. Restock from the crates: they always give rifle rounds.
- In co-op: if Agent got his own Sniper Rifle, he covers at the same time; if not, he clears the nearby J’avo with the 909. The more enemies you kill, the closer you are to the “Killed more enemies than Jake and Sherry (2)” medal.
- The crane: shoot it again and, after the cutscene, press action (B) to drop the girders on it.
- The finish: Sherry is trapped on the boat. Do nothing until the prompt appears, then zip down and grab Sherry. The downed helicopter’s rotor finishes the Ubistvo.
Reward: the medal “Saved Sherry from the attacking B.O.W.” and a clear path to the jet-ski.
Don’t leave without: the 4 Serpent Emblems: #9 on the 3rd stall on the left in the market, #10 behind the burning van, #11 on the scaffolding on the left at the bus’s 1st stop (timed) and #12 at the bottom of the stairwell gap (all 4 give the Leon S. Kennedy (Rare) figure) · the Pawn and the 2 Knights on the stalls · the 2,000 SP box in the corner of the zombie courtyard (and the tenement’s 4,000 SP drawer, if it’s there) · the slide medal at the start · the Sniper Rifle by the first grapple point if you didn’t take it in Ada Chapter 2.