Ada (player 1) and, if you play split-screen, Agent (player 2) sneak aboard Neo-Umbrella’s aircraft carrier anchored off Tatchi. This is Chris’s chapter 4 played backwards: the same Forward Hangar and the same 3-passcode door, but now with J’avo that patrol and ambush you, regenerating Rasklapanje and the items moved around. Then comes a stealth stretch across the bridge with Chris and Piers behind you, Carla’s death, her mutation, a one-way escape from her slime and the fight against her giant face. There’s no Story Intersection: Chris and Piers only show up in cutscenes.
Chapter order: 4-1 Aircraft Carrier - Forward Hangar (stealth takedowns; the 3-passcode door; Passcode A in the cabin on the right; the first Rasklapanje; the fire section with 2 Rasklapanje; the crew-cabin corridor and its 2 Incendiary Grenade; the canteen; Passcode B in the cabin on the right; the 2 officer suites with 2,000 SP, 5,000 SP and the Bear Commander; Passcode C in the red-glow cabin; the door, the grapple and the elevator) → 4-2 Aircraft Carrier - Bridge (Chris and Piers chase you: the slide under the shutter; searchlight 1 and Serpent Emblem #13; the vents; the command bridge Gnezdo; searchlight 2 crawling; the ladder guard; the spider J’avo in the vents; Carla’s cabin and her fall) → 4-3 Aircraft Carrier Interior (Serpent Emblem #14 in the lockers; the deck: Carla mutates; Serpent Emblem #15 by the hatch; the slime escape with the clones, the arms and the faces; Serpent Emblem #16; the grabbing corridor; Carla Radames, the giant face; the elevator).
Before you start
Gear and skills: bring plenty of Arrows (Pipebomb): they clear groups of Rasklapanje and about 4 open the hole in Carla’s face. Keep at least 4 for the boss. For the bridge, bring Arrows (Normal) too (4 to 6), which are silent. The Assault Shotgun’s 12-Gauge Shells split Rasklapanje in two. The new weapon is the Bear Commander (30 rounds of 5.56mm NATO Ammo plus a 40mm Explosive Rounds launcher as alt-fire, 1 per reload): don’t skip it, it’s the fast gun for the boss’s nitrogen tanks. There’s no shop: between chapters, spend SP on skills. Arrow Pickup Increase (20,000 SP) if you can, Breakout (2,800) for the wall arms and the grabs, AR Ammo Pickup Increase (8,000) for the Bear Commander, and Firearm and Defense at the highest level you can afford. Lone Wolf, Field Medic and Team-Up do nothing: Ada has no AI partner. The chapter gives 7,000 fixed SP in the suites (2,000 + 5,000), plus the 3,000 SP each Rasklapanje drops when its last part dies and the Gnezdo’s 2,500 SP if you kill it.
Co-op with Agent: Ada opens every door, takes the passcodes, uses the grapple, the zip-lines and the buttons; Agent (Nine-Oh-Nine and Survival Knife) breaks crates, finishes enemies, shoots a Rasklapanje hand off your face and revives you. When Ada grapples, Agent vanishes and reappears next to her. Both officer suites are behind doors Ada opens: walk in together. No source says whether Agent gets his own Bear Commander. On the bridge, Agent should hang back: he has no silent weapon and it’s unknown whether him being seen breaks the achievement. Pass him 9mm Ammo with Give to your Partner (the Ammo Box 50 and his 909 share it).
What slips by if nobody warns you: the Bear Commander and the 2 SP suitcases sit in a free-roam area that doesn’t close, but take them before you open the passcode door: once you leave the hangar you don’t come back. If you skip it, the Bear Commander spawns 2 more times, only if you don’t have it: on the boxes opposite the deck elevator exit (Evil Resource still counts it in the bridge section) and on a chair in the comms room during the slime escape. Serpent Emblem #14 is gone once you take the elevator to the deck, and #15 and #16 sit inside the escape, which is one-way: #15 before you jump down the hatch and #16 in the face room. The Sneaking Around achievement is decided in 4-2. Everything can be replayed from chapter select.
Saving: RE6 has no typewriter: it saves on its own, at checkpoints. The ones you can pick in Chapter Select are 4-1 Aircraft Carrier - Forward Hangar, 4-2 Aircraft Carrier - Bridge and 4-3 Aircraft Carrier Interior. The slime escape has an interim checkpoint (a notice appears top-left) just before the face room, where the slime stops (IGN): if you die after it, you don’t replay the whole chase. For Sneaking Around, if you’re seen, use restart from checkpoint; dying and continuing doesn’t leave the attempt clean (a Steam achievement guide).
Difficulty: on Amateur the life-and-death QTEs complete themselves. The higher the difficulty, the faster you have to mash the melee and grab QTEs (Gamer Guides, IGN). On Professional QTE timers are shorter, enemies don’t drop Green Herbs and crates only give SP: arrive with both players healed. The Rasklapanje grab is an instant kill at low health on some difficulties, and on No Hope its hand on your face costs you a health block: have Agent shoot it off right away. Letting the wall arms of the escape grab you is only advisable on lower difficulties (Gamer Guides). On No Hope there are no skills (no Breakout, no Firearm). The RE Wiki says enemy type and placement change with difficulty, but no source gives per-difficulty enemy or item tables for this chapter.
Rank (Gamer Guides and a Steam guide agree): A with 70% accuracy or better, 2 deaths or fewer, 50 minutes or less and 15 kills or more; B with 60%, 3 deaths, 65 minutes and 10 kills; C with 50%, 5 deaths, 85 minutes and 5 kills. No source gives different thresholds per difficulty.
4-1 Forward Hangar: the first takedowns
You start with a J’avo right in front of you, to the right: melee him for an instant kill before he sees you. There’s 1 wooden crate on the left; take the right door. Another guard waits behind the hatch at the end of the corridor, and a third in the next corridor: come up behind them and take them down as soon as their backs are turned. These are the easiest takedowns for the Silent Killer achievement (5 stealth kills). In co-op, Agent waits behind: his 909 is loud.
The 3-passcode door. At the end of those corridors you reach the security door: check it and it wants 3 passcodes (“Really? Three separate passcodes?”). Checking it spawns the first carrier. Ada copies each code with her device and leaves the passcode on the floor for Chris (in Chris’s campaign they lie next to these J’avo’s corpses). You can take the 3 in any order. This is GamePressure’s route, with the turns, because it’s the one you can follow without a map: A, the fire, the cabins, the canteen, B, the suites and C. Gamer Guides takes them in another order (A, suites, B, fire, cabins, C) and that works too.
Passcode A and the first Rasklapanje
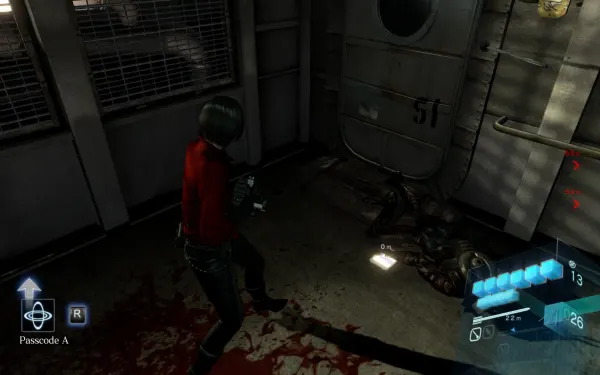
Facing the door, turn around and enter the cabin on the right: 1 J’avo there has Passcode A. Come up behind him and take him down. Taking Passcode A spawns a Rasklapanje.
Handling the Rasklapanje. It splits when damaged: torso, legs and 2 hands that keep attacking. Shoot the hands first before they reattach, then the legs and torso; stunned parts turn white. It never dies for good: the parasite flees and rebuilds itself after a while, and there are about 3 in this section.
- What it drops: the last part you kill leaves 3,000 SP; the other parts drop SP and ammo. Killing it pays if you have the bullets.
- What works: a Pipebomb arrow, a Bear Commander grenade or any grenade clears a group; a shotgun blast cuts it in half. Fire exposes the parasite (you find 2 Incendiary Grenade here). Once you’ve destroyed every part, it takes about 2 minutes to come back (Gamer Guides, in Chris’s campaign): use that time to search the area. Flash grenades do nothing to it.
- Its grab is a QTE: fail it and the parasite kills you. If a hand latches onto your face, you can still move slowly and shoot, but Agent can shoot it off.
- To get rid of a hand for good, put it in the kitchen microwave, the boiling water or the toilet.
- Running away works too: you don’t need to kill them to open the door.
The fire section
From the Passcode A cabin, go through the nearby hatch and keep going forward. At the very end of the corridor, turn right: a cutscene with fire and 2 Rasklapanje that split apart in the flames. The 1st goes with the QTE (hit the prompt and, if you like, blast it into the fire with the shotgun: it dies instantly, for a while); the 2nd with the Crossbow. Wait for the sprinklers to put the fire out before moving on. If you played Chris Chapter 4, this is that campaign’s flooded walkway.
The crew cabins
Carry on into the long corridor lined with cabins: a large group attacks as you enter, 6 J’avo coming out of the doors. Back off so they bunch up in the corridor and hit them with a Pipebomb arrow or a Bear Commander grenade; watch for the Rasklapanje reviving behind you. Afterwards, search the cabins: the northern ones hold 2 boxes and an Incendiary Grenade; the southern ones 1 box and another Incendiary Grenade. Note the cabin with a red glow: that’s where Passcode C will be (you can come back at the end).
The canteen and Passcode B
With the area clear, go through the hatch with the yellow lever and enter the canteen, on the right: the kitchen and dining room hold 4 wooden boxes and 1 J’avo in the dining room. Gamer Guides suggests quietly taking down the J’avo patrolling the north and west hallways first. The kitchen microwave gets rid of Rasklapanje hands for good.
Passcode B. On the far side of the canteen, follow the corridor forward until you see a cabin door on the right: get in fast. Kill the enemies and, above all, the yellow-eyed J’avo, who drops the code. Before you reach it, a Rasklapanje slides in through the air vent and snatches it. Follow the objective marker, wait for it to come back, kill it (for a while) and take Passcode B. Ada can’t reach the back part of the room: in Chris’s campaign the partner opens it, and Agent can’t open doors. If you played Chris Chapter 4, this is his cell area.
The officer suites (2,000 and 5,000 SP)
Go back to the corridor and turn right twice: you reach the wooden door of the luxury suite, the one the on-screen weapon icon points to.
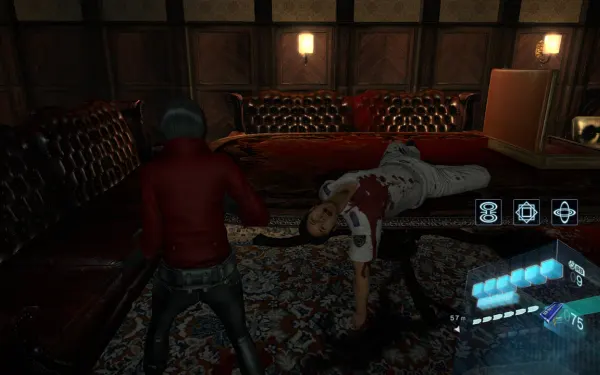
The Bear Commander suite (5,000 SP). Bedroom plus living room. The Bear Commander lies on the table, next to a naval officer’s corpse. There’s also a 5,000 SP suitcase, a First Aid Spray in the bathroom and 2 wooden boxes (1 in the bathroom, 1 in the room). J’avo ambush you when you take the gun or the SP: get ready first. In co-op, Ada waits at the door until Agent is in, and both check their inventory.
The 2,000 SP suite. It’s the one next door (the bottom one on Gamer Guides’ map; the Bear Commander suite is to its left). Optional, but worth it: 2,000 SP suitcase and 1 box in the bathroom. When you take the SP, 3 J’avo ambush you: have a Pipebomb arrow or a grenade ready before you grab it.
Passcode C and the way out
Go back to the cabin corridor and head for the one with the red glow. Open the door and kill the enemy inside: he drops Passcode C. With all 3, return to the security door and use it (“Last one. Almost too easy.”).
Before you open it, check you have the Bear Commander, both suitcases and both Incendiary Grenades: once through, you don’t come back to the hangar.
On the other side of the door you’re attacked: Gamer Guides counts 1 Rasklapanje and GamePressure 2 mutants. Kill them fast or run. 1 wooden crate ahead. Go forward and grapple up (up and to the left). Carla talks over the speakers: you can’t use the elevator until she finishes her broadcast. Go up and open the next hatch: you come out on the surface.
4-2 Bridge: Chris and Piers
You’re entering the bridge area (4-2 in Chapter Select) and the Sneaking Around stretch (see below), which starts when Chris and Piers come up the elevator. Outside, jump up to the upper floor and open the door on the left. Chris and Piers appear: sprint and slide under the closing shutter (sprint, then ZL). If Chris catches you, it’s Game Over. Copper medal Shook off the BSAA tail (most likely awarded here). There’s a Green Herb on the right. Upstairs, soldiers on the left: don’t fight them. Go right and outside.
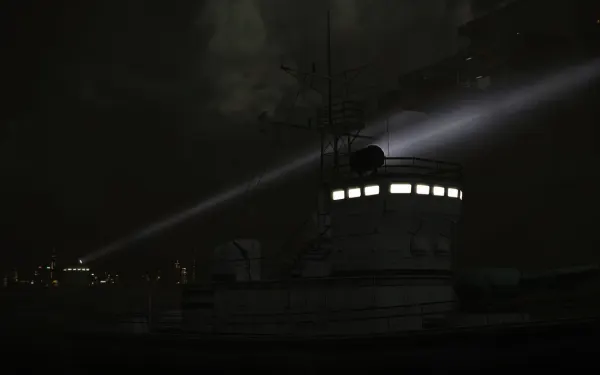
Searchlight 1 and Serpent Emblem #13. Keep going to the searchlight spot: after a short cutscene, a searchlight sweeps the deck (the RE Wiki calls them gunships; Evil Resource, a patrol boat). If it spots you, guards and rocket launchers come. Immediately run right, to the end of the walkway, and grapple up. If the light is about to catch you, aim and roll forward to drop prone in cover. On the balcony where you land, look left: Serpent Emblem #13 is in the left corner, next to 1 wooden crate. File: Carla Radames.
The vents and the command bridge
At the end of the corridor there’s a low tunnel: a duct system. Crawl to the end and drop down. While you crawl, Chris and Piers kill the J’avo below. If you get knocked out of the vents, it’s Game Over. When you come out, in a room on the left, a J’avo has his back to you: instant takedown. 4 wooden crates.
The Gnezdo. Keep going forward to the command bridge: a Gnezdo (insect swarm) roams the room. You have two options:
- Avoid it (the safe choice for Sneaking Around): circle round without getting close and press the button on the wall that opens the door. No source says whether killing it counts as being spotted.
- Kill it for the SP: its queen drops a Queen (Silver) worth 2,500 SP. Ada’s Crossbow kills the queen in one shot if you aim well (one Arrows (Normal) bolt does it); with the Sniper Rifle, one shot scatters the swarm and the next goes into the queen. Grenades or a shotgun also scatter it.
- If it catches you, it drains a lot of health: shake the stick to break free (Breakout helps). Back off or slide to dodge it.
Searchlight 2
Behind the next door is a hatch down to the deck: another searchlight. The camera is awkward.
- Hug the inner side of the ship (don’t vault the boxes on the outer side): run left over the obstacles and crawl under one of the covers.
- Before the light comes back, crawl to the left-most cover.
- Come out when the light passes to the right: crawl across the open stretch to the covered part, wait again and crawl the rest.
- Then run to the end of the walkway, turn left, vault the railing and take the zip-line up. PowerPyx warns that you need a little slide here to stay unseen.
The ladder, the spider J’avo and Carla’s cabin
At the top, 2 wooden crates on the right. Take a few steps: on the left is a room with 3 enemies and 1 guarding the ladder, next to the alarm button. Crawl under the windows to the corner and headshot the ladder guard with an Arrows (Normal) bolt. Keep crawling under the windows and climb the ladder.
The spider J’avo. There are Arrows (Normal) on the right shelf. Up there is another low tunnel: in the vents, up to 3 spider J’avo wait. Kill them with the Crossbow, because they always spot you just before you drop out of the vent. Go right, drop down and carry on to the cabin with the red carpet: cutscene. Ada finds Carla’s case (a chip with Simmons’ experiment data and a key to a lab in the Quad Tower). Carla is shot and falls to the deck. Copper medal Witnessed your own death (most likely awarded with this scene).
4-3 Aircraft Carrier Interior: the lockers and the deck
Serpent Emblem #14. When the scene ends, turn around and run down the stairs (a couple of flights and a hatch). At the end of the corridor there’s a sentry: take him down from behind. It’s a short corridor with broken lockers: Serpent Emblem #14 is inside an open locker on the left wall. 1 wooden crate on the right wall. File: Derek and Carla. Get it before the elevator.
The deck: Carla mutates. Take the elevator to the deck. On the radio, the BSAA must stop a missile fired at Tatchi. The boxes opposite the elevator exit hold 2 × 5.56mm NATO Ammo; if you still don’t have the Bear Commander, it sits on one of those boxes (it only spawns if you don’t have it). Walk up to the body: cutscene. Carla wakes, injects the enhanced C-Virus and her slime swallows part of the ship. Copper medal Faced your own destiny (most likely awarded here).
The slime escape and Serpent Emblem #15
Serpent Emblem #15. Back inside, 1 wooden crate. Before you drop down the hatch, look at its left side: Serpent Emblem #15 is there. File: From Carla’s Papers. Reload everything (above all the Ammo Box 50 and the Bear Commander) and heal both players: jumping in starts the escape, and there’s no way back.
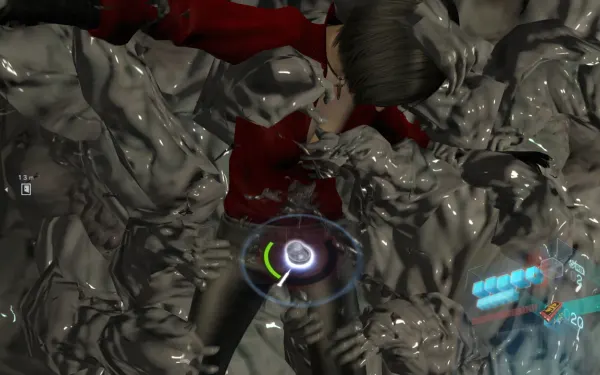
Don’t stand still: if the slime catches you, it’s Game Over. Run forward-right, down the stairs and through the door.
- If you still don’t have the Bear Commander, you’ll pass a small comms room (map on the wall, 2 leather swivel chairs): it’s on one of the chairs (it only spawns if you don’t have it). Don’t linger: the slime keeps coming.
- Ada clones (small Carla Spores): they spit acid slowly and are among the toughest creatures in the game. They can’t be destroyed for good: mostly ignore them. If one blocks your way, stun it and melee it. They drop ammo or 50-100 SP.
- Behind the first door is another one overgrown with red growths: shoot them to open it. In the next hallway, 2 more clones; door on the right.
- In the room that fills with clones, go right fast: Green Herb on the table. Carry on down the far-right hallway.
- Arms in the walls: wait for them to stop grabbing or, on lower difficulties only, let them grab you and rotate the stick fast to break free (Breakout helps). Fail and Ada dies. At the end of the hall, more hands on the left: same deal.
- Break through the door (a clone is forming next to it) and turn the red hand-wheel on the left door fast: another clone forms behind you. Soon after, the interim checkpoint notice appears, just before the face room.
The face room and Serpent Emblem #16
Here the slime doesn’t advance until you move on: catch your breath. The room has 3 of Carla’s faces sticking out of the walls.
Emblem first: face the 1st face head-on, walk up slowly, back off as it bites and, while it retracts, run along the left wall instead of heading for the door. Serpent Emblem #16 is in a side cubby on the left (the face’s own right). File: Unlimited Transformations. There are 2 wooden crates on the right.
The 3 faces. The face above-left of the door bites if you pass: shoot it in bursts with the Bear Commander so it flinches (it can’t be destroyed). There’s 1 crate next to it: shoot it and grab the contents as you pass. In the next room, another face: approach slowly, back off as it bites, and pass while it retracts. At the exit, a 3rd face with 2 blue liquid-nitrogen tanks on the floor: shoot the tanks to freeze it, grab the Arrows (Pipebomb) on the left and open the door on the right.
The grabbing corridor
Head down: 1 wooden box. Cutscene: Carla’s face chases you. In the corridor, sprint: the right wall grabs you, so stay on your left (GamePressure says the opposite, but Gamer Guides is more specific: the hands are on the right wall). If you’re grabbed, rotate the stick and keep running. Vault a barricade and keep sprinting. Ada zip-lines and everything goes slow-motion: shoot the blue tanks to stop her. Once safe, you can shoot the 3 growths on the right wall for items (optional). Go through the bulkhead door: the boss.
Boss — Carla Radames
The arena is a room with pillars, and Carla is a giant face over a doorway. She swells her blood-filled eyes until they burst, spraying acid over a wide radius, and spawns Ada clones, which are slow. All the damage you deal heals quickly: every hit you take slows you down and gives her time to regenerate, so attack from cover and don’t expose yourself. Behind the face are liquid-nitrogen tanks: that’s the real weak point. Red growths around the room drop ammo when you shoot them.
- Cover: hide behind a pillar every time her eyes start bubbling. Come out as soon as they burst.
- Burst both eyes first (that’s where GamePressure starts): they regenerate fast, so don’t linger.
- Blow a hole in the face: focus fire on one spot (next to the mouth). The quick way: about 4 Arrows (Pipebomb) in the same spot expose the tanks.
- Switch to the Bear Commander and shoot a blue tank through the hole: 4-5 bullets detonate it. One tank is enough.
- No Pipebomb arrows: chip the face with the Assault Shotgun and shoot the red growths to restock. Don’t melee them: they burst for area damage.
- Clones: ignore them unless they get too close.
- In co-op: the crossbow is Ada’s, so she opens the hole with the arrows. Agent handles the clones, pops the ammo growths and revives; once the hole is open, both of you fire at the tank.
- Reward: Carla freezes and shatters. Bronze medal Killed off your imperfect doppelganger (its exact condition isn’t documented). Take the elevator behind the face: end of the chapter and the Ada’s Demise achievement. The chapter’s 4 emblems give the Helena Harper (Rare) figure.
Achievement — Sneaking Around
“Get through the aircraft carrier’s bridge area without being noticed”. The section starts when Chris and Piers come up the elevator and ends at Carla’s cabin.
- Bring Arrows (Normal), not Pipebomb: explosive ones make noise.
- Use only the Crossbow. You must kill at least 4 enemies: 2 guards and 2 spider J’avo (the ones in the last vents).
- Stay out of the searchlights. At searchlight 2, PowerPyx warns you need a little slide (sprint and ZL) to stay unseen, without saying where.
- Avoid the Gnezdo and press the button: it’s unclear whether killing it counts as being spotted.
- If anyone sees or hears you, or an alarm sounds, restart from the last checkpoint: the section allows it. Dying and continuing doesn’t count.
- In co-op: it’s unknown whether Agent being spotted breaks the achievement. The safe way is to do it solo, or have Agent hang far back and not shoot.
- The bronze medal Cleared the chapter without being spotted by the enemy asks, by its name, for the whole chapter unseen, which is stricter (it’s unclear whether the passcode fights count).
Chapter medals
- Shook off the BSAA tail (copper): story; probably when you escape Chris under the shutter.
- Witnessed your own death (copper): story; probably with Carla’s fall.
- Faced your own destiny (copper): story; probably with Carla’s mutation on the deck.
- Killed off your imperfect doppelganger (bronze): the boss.
- Cleared the chapter without being spotted by the enemy (bronze): unseen (see above).
The exact moment the 3 copper ones pop isn’t confirmed: they’re story scenes and come on their own.
Don’t leave without:
- The Bear Commander and the 5,000 SP in the officer suite, and the 2,000 SP in the one next door (before you open the passcode door).
- The 2 Incendiary Grenade in the crew cabins (north and south) and the First Aid Spray in the suite’s bathroom.
- The 4 Serpent Emblems: #13 in the balcony corner after searchlight 1, #14 in the short corridor’s locker (before the elevator), #15 left of the hatch and #16 in the face room’s left cubby (the last 2 before you move on in the one-way escape).
- The Green Herb after the shutter and the one in the clone room, the Arrows (Normal) on the ladder shelf and the Arrows (Pipebomb) at the last face.
- At least 4 Arrows (Pipebomb) to open Carla’s face.
- If you’re going for it, Sneaking Around in 4-2 (retry it with restart from checkpoint or from chapter select).