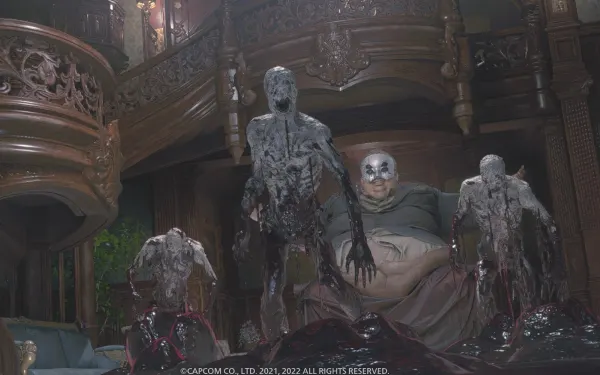
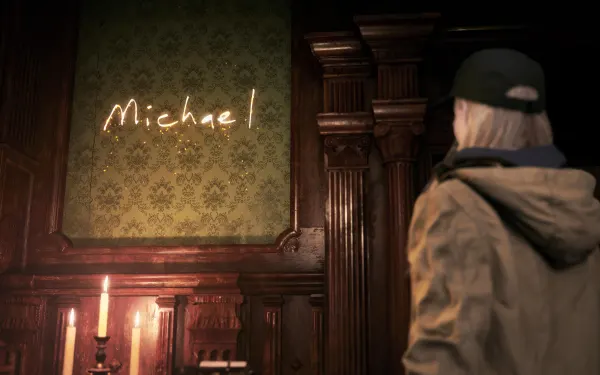
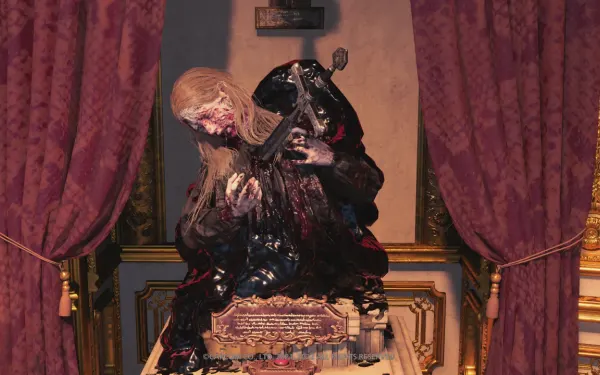
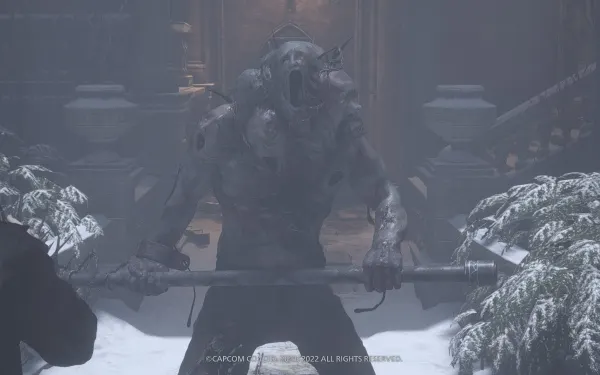
You play as Rose Winters, sixteen years after the main game, trapped inside the consciousness of the Megamycete. This first stratum is a twisted version of Castle Dimitrescu, ruled by the Masked Duke and crawling with Face Eaters. You start with no weapons and no powers: “Michael”, a presence that leaves you messages written on the walls, hands you the LEMI, ammo and the RW-Variant Flasks that awaken Rose’s power. The goal is to gather three masks (Bronze, Silver and Gold) for the Main Hall statue that holds the “Purifying Crystal”. The chapter ends with the Executioner in the Execution Yard, and after that there is no way back to the castle.
Chapter order: B1: Laboratory → Treatment Room (Cell Key) → Cell 3 → Maintenance Storage (Switch Handle) → Face Eater chase → 1F: Parlor (typewriter) → Antechamber → Entrance Hall (LEMI) → Main Hall (typewriter, mask statue) → Kitchen (Bolt Cutters) → Courtyard → Library → Atelier → RF: Workshop (typewriter, RW-Variant Flask 1) → back down breaking cores (High-Capacity Mag.) → Bronze Mask → 2F: Private Corridor (Executioner) → Armory (RW-Variant Flask 2) → Dressing Room (Monocular Key) → Salon (Compensator) → South East Wing → Hall of Ablution → B1: Main Cellar (Executioner) → Isolated Passage (Silver Mask) → Guest Room (typewriter) → Terrace Room → Guest Bathroom (Snake Painting) → Gallery: paintings puzzle (Triocular Key) → Dining Room (M1897) → Opera Hall (Gold Mask) → Special Chambers (timed cores) → Dungeon (typewriter) → Main Hall: the “crystal” → Boss: Executioner.
Prepare: Rose cannot guard, runs slower than Ethan and has no kicks or punches: most fights are won by running. There is no Duke’s shop, no Lei and no upgrades: everything comes from pickups, crafting and “Michael“‘s gifts. Don’t count on enemies dropping anything: no guide documents loot from the Face Eaters or the Executioner, and all the ammo they list is placed in the world, crafted or gifted by “Michael”. Killing a Face Eater costs bullets, so the wiki advises you to run from or avoid them: ammo is scarce and it takes quite a few shots to put one down.
Every crafting material in the DLC is in this castle (the house and the Deep Stratum have none): Herb ×5, Gunpowder ×10, Chem Fluid ×12 and only Rusted Scrap ×3, so you get at most 3 batches of Shotgun Ammo and Pipe Bombs combined. Keep Shotgun Ammo, Pipe Bombs and 2 or 3 First Aid Meds for the Executioner.
Difficulty. It’s chosen at the start (Casual, Standard, Hardcore) and cannot be changed; Shadows of Rose has no Village of Shadows. On Hardcore a single hit leaves Rose in critical condition: avoid almost every castle enemy and hoard for the boss.
Points of no return ahead (read this first):
- The Silver Mask (Isolated Passage, B1): taking it starts an escape and the way back through B1 closes. Empty B1 before you touch it.
- The Gold Mask (Opera Hall): taking it plays a cutscene that sends you straight to the Special Chambers cell. Take everything in the hall first.
- The Execution Yard: once you jump off the cliff after the boss, the castle is closed for good.
How Rose’s power works
You earn it in steps from four RW-Variant Flasks (three in this chapter). Hold the power button (R1 on PlayStation; on Switch 2 check the controls screen), and Rose must be standing.
- First flask: destroys sclerotia, the red flower-like cores that anchor the liquid void (the black mold on the floor). Red veins on walls and ceilings point to them, and breaking them costs no stocks. Many vases and hanging birdcages wrapped in a core hide ammo.
- Second flask: freezes enemies (and any close by) and breaks a grab (Mold Counter). That does cost 1 stock of a 3-stock gauge.
- Refills: a Sprig of White Sage gives back 2 stocks and a Bunch of White Sage fills it.
Stay out of the liquid void: the Face Eaters inside drag Rose under and, if you don’t get out in time, you die whatever your health.
B1: Laboratory, Cell Passage and Treatment Room
Laboratory. Rose wakes up unarmed. The file The Megamycete Theorem (file 1) is on the small whiteboard next to the door. Nothing else.
Dilapidated Passage and Cell Passage. A stone corridor to the locked door of Cell 3. Cells 1–3 and the passages are empty.
Treatment Room. On the table in the east corner of the main (northwest) room, the file How to Preserve Rabbits (file 2). The Cell Key hangs on a hook in the southeast corner of the southeast room, next to the box with Rose’s name written in blood.
Cell 3. Open it with the Cell Key: cutscene with a Rose copy. Follow her back to the Treatment Room and help her lift a body bag: under it is a crawlspace to the Cells, full of locked-up copies.
Cells and Maintenance Storage: the first fight without a gun
The Switch Handle. The Cells gate needs a handle. Go through the cell door on the left and crouch through the tunnel to Maintenance Storage (jump scare as you enter): the Switch Handle is on the old switch mechanism in the northeast room. The door back is covered in mold: climb the box and drop over the ledge.
The first Face Eater. A cutscene introduces the Face Eater. Put the Switch Handle into the mechanism in the southwest corner right away: the gate opens slowly and using it brings 2 more Face Eaters out of the liquid void. Circle the room around the first one until the gate is open, then run.
The chase. Cells (2) (3 Face Eaters), Hall of War (2), Storage (3 in the circular room) and Wine Cellar (2). Nothing to pick up and no way to fight: keep running. “Michael” saves you and you end up in the Parlor (1F).
1F: Parlor, Antechamber and Entrance Hall
Parlor. Typewriter on the table in the southwest corner. In the Bedchamber (off the Parlor), the file The Liquid Void (file 3) on the middle table. In the Northern Corridor, a First Aid Med in the cabinet by the Parlor door.
Antechamber. Cutscene: the Masked Duke (not the merchant Duke but his evil double in this realm) preys on a Rose copy and sets his Face Eaters on you; 7 come out. Run left and up the stairs; one pops out ahead, but you can run behind it. A core blocks the Salon door (come back with the first flask and the Monocular Key). In the Southern Corridor 4 more Face Eaters show up: keep running.
Entrance Hall and Carriage Gate. The castle exit is blocked. When you go back in, cutscene: “Michael” gives you the LEMI. 1 Face Eater attacks: on Standard it takes about 5 focused shots (wait for the reticle to tighten for extra damage). Handgun Ammo ×5 on the small table in the northwest corner. The Storage Room door is covered by a core: come back once you have the first flask. Continue through the Southern Corridor to the Main Hall.
Main Hall, Dining Room and Kitchen
Main Hall (the castle hub). Typewriter on the small cabinet in the southeast corner. In the middle, the mask statue holding the “Purifying Crystal”: three face slots (Bronze on the left, Silver on the right, Gold at the bottom). Cores block the Antechamber doors and hang off the main staircase: 2F stays closed until the first flask.
Dining Room. Handgun Ammo ×5 at the northeast corner of the table. The M1897 is visible in a locked cage cabinet on the south side (needs the Triocular Key). The double doors to the Courtyard are chained. “Michael“‘s cabinet (southeast corner) keeps leaving gifts: Handgun Ammo ×4 after the Bolt Cutters and a First Aid Med after the Bronze Mask. Stop by and read his messages every time you come back.
Kitchen. Through the Eastern Corridor (empty). A Face Eater lurks in the northwest corner: sneak up crouched for free focused shots. The Bolt Cutters are in a wooden box in the northeast passage, next to the locked Back Storage door. Go back and cut the chain in the Dining Room.
Courtyard and Northern Stairwell
Courtyard. Herb on the ground by the Dining Room doors. There are three cores you’ll break later: one on a vase (Handgun Ammo), one on a hanging birdcage in the northeast cloister (Gunpowder) and the one wrapped around the central statue holding the Bronze Mask; a fourth, on the steps to the north, appears once you have the first flask. Head north.
Northern Stairwell. Gunpowder in the chest of drawers in the northeast corner (1F). At the top of the stairs (2F): Chem Fluid and the file I Tried to Combine Some Things (file 4) on the chest of drawers opposite. It unlocks two recipes: First Aid Med = Herb + Chem Fluid, and Handgun Ammo ×8 = Gunpowder + Chem Fluid. The door on the left (Opera Hall) has a three-eye lock.
Library, Waiting Room and Atelier
Library (2F). Gunpowder on the stack of books between the middle shelves. A Face Eater is feeding on a copy: sneak up behind it and fire focused shots. Another rises beside it and one more drops from the ceiling to the northwest; then 2 more by the Waiting Room door. Run through that door: it shuts behind you. The Chem Fluid on the east table sits in the mold: later.
Waiting Room. Chem Fluid on the small round table by the south wall. The weapon case (the High-Capacity Mag.) is behind a core, and another core wraps a vase in the northeast offshoot: come back with the flask.
Atelier. The floor is liquid void. Go up the stairs, push the ladder down, cross it and leave through the open portrait into the Secret Passage; climb to the Attic (RF).
Workshop (RF): the first flask
Typewriter on the small table to the southeast. On the north workbench, Herb and the file On Mutamycete Disruption (file 5). Chem Fluid in the large box with the lamp. On the metal shelves to the east, RW-Variant Flask 1: you can now destroy sclerotia. Save.
Back down, breaking cores
Everything that follows is required or nearly so, and every core counts toward It’s Starting to Grow on Me (an achievement on the other platforms: use the power 20 times; Switch 2 has no trophies).
- Attic: the wall core frees the northeast area (Gunpowder in the box) and the vase core in the south passage gives Handgun Ammo ×7.
- Atelier: break the ceiling core; 1 Face Eater bursts in.
- Waiting Room: the middle core opens the case: High-Capacity Mag. for the LEMI (combine it; more rounds per clip). Some say fitting it with the LEMI at 0 rounds fills the clip for free (unconfirmed). The northeast vase gives Handgun Ammo ×6. There’s a shortcut to the Main Hall 2F.
- Library: the northeast ceiling core frees the Chem Fluid on the east table. A new core appears on top of the middle bookcase: breaking it clears the southeast corner but releases 2 Face Eaters; dodge past them instead of spending ammo.
- Courtyard: vase (Handgun Ammo ×4), northeast cloister birdcage (Gunpowder), the north steps and the statue: Bronze Mask.
- Entrance Hall: break the core on the Storage Room door: Chem Fluid on the wooden box on the south side and, after reading “Michael“‘s messages, Handgun Ammo ×6 on the same box.
Stop at the Dining Room (“Michael“‘s First Aid Med) and put the Bronze Mask in the left slot of the Main Hall statue.
Main Hall 2F and Gallery
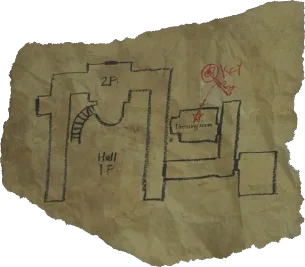
Main Hall 2F. Break the staircase cores and go up. On the floor next to the small green armchair at the top of the stairs, the Hand-drawn Map: it marks where the Monocular Key is. The northwest 2F vase gives Handgun Ammo ×4; another core covers the Waiting Room door (shortcut). On the south balcony, 1 Face Eater is devouring a body.
Gallery (first look). Chem Fluid on the small round table to the northeast. The paintings puzzle can’t be solved yet: the Snake Painting is missing.
Private Corridor: the Executioner appears
The core hanging in the southwest of 2F blocks the Private Corridor. Breaking it makes the Executioner appear on the south balcony. Don’t fight it: it can’t be killed yet. Go through the door and run straight down the corridor (2 Face Eaters rise from the mold and 3 more wait in the southeast corner) into the Drawing Room. It stalks you: running is always cheaper than shooting.
Drawing Room, Hidden Passage and Armory: the second flask
Drawing Room. Note on the table. Crouch under the fireplace into the Hidden Passage (2F): Chem Fluid on the shelf by the window.
Armory. Go up through the Hidden Passage: Handgun Ammo ×8 in the barrel in the middle, Handgun Ammo ×8 in the big box to the west, Gunpowder inside the fireplace (west) and RW-Variant Flask 2 on the table in the northwest: you can now freeze enemies with a 3-stock gauge. On the way out 1 Face Eater comes through the Hidden Passage.
On the way back. In the Drawing Room a Sprig of White Sage appears on the floor. According to Evil Resource, taking this flask also makes a new core appear in the southeast corner of the Main Hall 2F balcony; what it holds isn’t documented, but break it as you pass (it counts toward the power achievement).
Dressing Room: the Monocular Key
Getting there. The Dressing Room opens off the Private Corridor, the same corridor that links the Main Hall and the Drawing Room. From the Armory, go back down the Hidden Passage, crawl back under the fireplace into the Drawing Room and step out into the Private Corridor: the Dressing Room door is along that corridor.
There are Face Eaters on both sides of the door: two further along the corridor and two inside the Dressing Room. Deal with the corridor pair first (focused shots) so they don’t catch you from behind, and freeze the ones inside to grab what’s there and get out. Handgun Ammo ×5 in the drawers to the east. On the north desk, the Monocular Key and the file On Movement Disruption (file 7) (the number is the file menu’s; file 6 comes right after, in the Salon). Another Face Eater waits in the Main Hall on the way back.
Salon: the Compensator
Go through the Antechamber and break the core on the door. Gunpowder in the china cabinet to the east, Herb in the plant pot to the south, the file The Masked Duke’s Diary (file 6) on the northwest table and, on the chair to the south, the locked case: open it with the Monocular Key for the Compensator (more power for the LEMI).
South East Wing and Hall of Ablution
Courtyard → South East Wing. Open the Courtyard’s one-eye door with the Monocular Key. The Southern Stairwell is empty. On 2F, the South East Wing (the gallery of despair, with dead copies displayed as trophies): the file The Gallery of Despair (file 8) on the northeast table, a Sprig of White Sage on the mold pillar in the middle holding three Rose clones, Chem Fluid on the ornate table to the west and 1 Face Eater on the west side.
Hall of Ablution: the statue puzzle. Four statues of dead copies. The plaque on the middle wall says she was hanged long ago, the sharpened blade rang neither last nor first, she has just drowned and the arrows still sting: push the statues from the oldest death to the most recent:
- Hanged Corpse (the noose).
- Stabbed Corpse (the sword).
- Drowned Corpse.
- Arrow-Pierced Corpse (the arrows).
A staircase opens: take the ladder down to B1.
B1: Main Cellar, Basement and Isolated Passage (Silver Mask)
Empty B1 before you take the Silver Mask. As soon as you take it an escape starts and, once you’re back upstairs, the way you came is blocked: you don’t return to these rooms. What’s here: Small Torture Chamber, southwest vase (Handgun Ammo ×4) · Main Cellar, Chem Fluid on the central boxes and the vase between two pillars (Pipe Bomb) · Basement, Sprig of White Sage on the central boxes and the Gunpowder behind the core in the narrow north passage · Isolated Passage, west vase (Handgun Ammo ×4) and the Pipe Bomb in the wooden box at the east end.
Small Torture Chamber. The southwest vase gives Handgun Ammo ×4.
Main Cellar. The Executioner appears to the northwest as you enter and patrols. Use the central pillars as cover. Chem Fluid on the boxes in the middle; the vase core between two pillars gives a Pipe Bomb. Another core blocks the way to the Basement: break it while hidden. If it spots you, back off or run ahead. Freezing it works, but it lasts less than on a Face Eater.
Basement. Sprig of White Sage on the boxes in the middle. Crouch through the hole in the narrow north passage and break the core hiding the Gunpowder (in the barrels). 1 Face Eater lurks and another rises from the mold on the east side. The east core opens the Isolated Passage.
Isolated Passage. The west vase gives Handgun Ammo ×4. Pipe Bomb in the wooden box at the east end and, on the statue at the same end, the Silver Mask.
The Silver Mask escape. As soon as you take it, the Executioner rises from the mold to the east and 4 Face Eaters emerge across the Main Cellar. Turn around, go through the hole and immediately left; if you run fast you get out without firing. A core cuts you off and the Executioner arrives while you break it: a good moment for a Pipe Bomb, and if you’re grabbed or cornered, freeze the group. Upstairs, the way you came is blocked and the Guest Room opens.
Guest Room, Terrace Room and Guest Bathroom
Guest Room (2F). Typewriter, First Aid Med on the couch to the north and, from “Michael” on first entry, Handgun Ammo ×8 and a Bunch of White Sage on the lounge chair to the south. Save. The room has two exits: the single door to the Guest Balcony and the double door to the Guest Bathroom.
Terrace Balcony and Terrace Room. Go out the single door to the Guest Balcony and on to the Terrace Balcony: Herb on the ground to the northeast; the southwest vase gives Chem Fluid. In the Terrace Room, on the east side of the table, Rusted Scrap and the file Shotgun Shells Should Help (file 9): it unlocks Shotgun Ammo ×3 = Gunpowder + Rusted Scrap, and Pipe Bomb = Gunpowder + Herb + Rusted Scrap. Gunpowder on the west side of the table. The Terrace Room also has a door to the South East Wing.
Guest Bathroom. Go back to the Guest Room and through the double door: the Snake Painting is on the table on the east side.
Back to the Main Hall
From the Guest Bathroom carry on into the South East Wing, go down the Southern Stairwell and through the one-eye door into the Courtyard. The Executioner and 4 Face Eaters now roam the Courtyard: route around them quickly along the cloisters and watch the Face Eater by the Dining Room door. Go through the Dining Room to the Main Hall and put the Silver Mask in the statue’s right slot.
Gallery: the paintings puzzle (Triocular Key)
What you see on entering. There are 6 frames, three on each long wall (west and east), and 5 hold a painting; the missing one is the Snake Painting you’re carrying. The room holds the Sheep Painting (2nd west frame), the Frog Painting (3rd west frame) and the Spider Painting (3rd east frame), plus the Wolf and the Butterfly. The plaque in front of the barred chest reads “The predators stand united, each staring down their prey”: the three predators (Wolf, Snake, Spider) go together on one wall, each facing its prey (Sheep, Frog, Butterfly) on the opposite one.
The pairs:
- Wolf opposite Sheep.
- Snake opposite Frog.
- Spider opposite Butterfly.
The Butterfly is already hung and can’t be moved, and according to GameRant neither can the Wolf (TheGamer says it can be taken down; either way you don’t need to move it). The two sit on opposite walls at opposite ends, so the order falls into place:
- Take down the Sheep, the Frog and the Spider until four frames are free.
- Put the Spider directly opposite the Butterfly and the Sheep directly opposite the Wolf.
- The Snake goes between the Spider and the Wolf, and the Frog between the Sheep and the Butterfly.
Reading both walls in the same direction you get Butterfly, Frog, Sheep on one and Spider, Snake, Wolf on the opposite one: each painting directly opposite its pair. The bars at the south end drop: in the small chest, the Triocular Key.
Dining Room: the M1897
Open the cabinet with the Triocular Key: M1897. It’s the DLC’s shotgun and can’t be upgraded; keep it for the Executioner and Miranda.
Opera Hall: the Gold Mask
Courtyard → Northern Stairwell → the three-eye door on 2F. The hall is flooded with mold.
Take everything before the Gold Mask. Taking it plays a cutscene that sends Rose straight to the Special Chambers cell. One of the DLC’s only 3 Rusted Scrap is in here. TheGamer mentions a 2F door back toward the Library, but Evil Resource links the Opera Hall only to the Northern Stairwell: it isn’t confirmed that you can come back, so treat it as if you can’t.
Items:
- 2F, small northwest room: 2 Face Eaters, Rusted Scrap and a vase core that gives Shotgun Ammo ×2. Clear it first.
- 2F: Handgun Ammo ×7 in the southeast cabinet, Gunpowder on the round table to the south and Herb in the plant pot on the southwest balcony.
- 1F: the southeast hanging birdcage core gives Handgun Ammo ×4; Sprig of White Sage in the plant pot at the foot of the east stairs; Chem Fluid on the table behind those stairs.
The three cores that lead to the Gold Mask (statue in the northwest corner of 1F):
- On 1F, the core on the pillar to the right of the mask, between the two columns on the north side (look up). A piano falls and becomes a platform, and 4 Face Eaters appear: throw a Pipe Bomb into the group or freeze them.
- From the new platform, the core on the west wall above the fireplace.
- On 2F, the core hanging from the ceiling in the northwest corner, above the statue.
Cross the liquid void on the platforms the cores opened up (the first is the piano) to the statue and take the Gold Mask. Cutscene: the Masked Duke captures Rose.
Special Chambers: cores against the clock
The cell fills with mold and you have about 2.5 minutes to break the 3 real cores among many fakes. A wrong core costs nothing but time. “Michael” writes the clues on the wall:
- “Lower than barrel”. Use the barrel under the TV as your landmark, not a count from the left. The right core is beyond the bars, between the cell bars and the barrel (left of the barrel, right of the bars), lower than the barrel, level with the box it stands on: just above the floor, right next to the bars. Guides count it differently (Game8: “third to the left, bottom-most row”; TheGamer: “second from the left”), which is why the barrel is the better guide.
- “Broken wall / Deep shadow / Big core”. Breaking the first one opens a dark alcove in the wall to your right and 1 Face Eater comes out of the void. Freeze or kill it and break the biggest core in the alcove, straight ahead as you look in.
- “Up / Center”. The core in the middle of the ceiling.
Handgun Ammo ×6 in the small wall alcove on the east side (behind you).
Dungeon and Back Storage
Dungeon. Typewriter on the northeast table. In the northeast box, a gift from “Michael”: Handgun Ammo ×10 and Shotgun Ammo ×3. The vase in the east cell gives Shotgun Ammo ×2 and the Rusted Scrap is on the floor of the southwest cell. TheGamer also mentions a White Sage in the Dungeon, but Evil Resource doesn’t list one (conflicting sources): if you see it, take it.
Back Storage. Go up the stairs. 1 Face Eater. In the main southwest room: Shotgun Ammo ×4 on the bookcase, Gunpowder in the box and Chem Fluid in the barrel. Unlock the door: it leads to the Kitchen and on to the Main Hall.
Main Hall: craft, then take the “crystal”
Before placing the Gold Mask: craft. This is your last calm chance to use materials before the boss, and you now have all 3 Rusted Scrap. For Craftsmaster (an achievement on the other platforms: craft all 4 items; Switch 2 has no trophies) craft one of each: First Aid Med, Handgun Ammo, Shotgun Ammo and Pipe Bomb. Turn the rest into ammo: Gunpowder with Rusted Scrap into Shotgun Ammo or Pipe Bombs, the rest with Chem Fluid into Handgun Ammo, and any leftover Herbs into First Aid Meds. Save at the Main Hall typewriter.
The “crystal”. Put the Gold Mask in the bottom slot and take the crystal: the Masked Duke reveals it’s a fake and sends you to the Execution Yard.
Boss — Executioner
The arena. The Execution Yard has a main square to the east and two passages (southwest and northwest) sealed by cores that open between phases. Items:
- East square: Handgun Ammo ×9 on the south wall, Shotgun Ammo ×5 on the east window ledge and a First Aid Med on the southeast wall.
- Southwest passage: Handgun Ammo ×9 on the southeast window ledge and Shotgun Ammo ×4 by the (locked) south gate.
- Northwest passage: RW-Variant Flask 3, Shotgun Ammo ×7, a First Aid Med (north wall) and Handgun Ammo ×18.
Weak point: a glowing orange core that moves each phase (chest, right leg, back). After its weak spot takes a few hits, it gets more aggressive.
- Phase 1 (east square), core on the chest. Two attacks: it raises its weapon and slams it down or reaches out to grab you. Circle the middle of the square, run when it raises the weapon and shoot the chest when the slam misses, or freeze it and shoot. If it grabs you, Mold Counter frees you for 1 stock. The M1897 hits hardest, but save shells for later: focused LEMI shots are enough here. Grab the wall ammo between attacks.
- Phase 2 (southwest passage), core on the right leg. It goes down and mold floods the square: run to the iron bars. 2 Face Eaters come out: a Pipe Bomb or the shotgun. The Executioner gets up and now sprints and swings wildly and fast down the passage. Shoot the leg when it tires after a swing combo. Break the core at the end of the passage or it will corner you there. Take the ammo in the tunnel.
- The third flask. More bars open and 2 more Face Eaters come out; behind them is RW-Variant Flask 3 (“Michael” hands it over): 4th stock and a full gauge. Take the First Aid Med and the ammo in the northwest passage too.
- Phase 3, core on the back. New move: it sinks into the mold and erupts under you; when it vanishes, keep running, and after the strike it’s stuck for a moment. It also holds the mace upside down, charges and spreads mold across the arena: shoot it while it charges and get into a passage. The quick way: freeze it, get round behind and empty the M1897 into its back at point-blank range. About 3 freezes are enough on Standard (dynamic difficulty may ask for one more).
Reward: the Masked Duke calls it a disappointment and floods the yard with his best Face Eaters. “Michael” tells Rose to jump off the cliff: you fall into the House Beneviento stratum. The castle can’t be revisited.
Don’t leave without:
- The 9 files: Laboratory, Treatment Room, Bedchamber, Northern Stairwell, Workshop, Salon, Dressing Room, South East Wing and Terrace Room.
- The High-Capacity Mag. (Waiting Room) and the Compensator (Salon) fitted to the LEMI.
- The M1897 (Dining Room).
- The 3 Rusted Scrap: Terrace Room, Opera Hall (northwest 2F room) and Dungeon.
- One of each item crafted (First Aid Med, Handgun Ammo, Shotgun Ammo, Pipe Bomb) and the rest of your materials turned into ammo: they’re the only materials in the DLC.
- RW-Variant Flask 3 (northwest passage of the Execution Yard): a 4-stock gauge.