You carry on as Rose, who has fallen from the castle cliff into the second stratum: a nightmare version of House Beneviento, the dollhouse from the main game. There is no real combat here: your weapons and items are taken in the Workshop, and the chapter is all puzzles and stealth. You solve a padlock and three doll dioramas that tell how Rose was bullied at school, flee Mia’s mannequins (which only move when you’re not looking), hide from giant dolls as a shrunken Rose and walk through a memory of Ethan and Mia’s house. At the end, the dark-haired girl who keeps phoning you reveals herself as Eveline, and you face her in the foyer with Rose’s power alone.
Chapter order: Suspension Bridge → Graveyard Path (Claudia’s grave) → elevator → Elevator Hall B1 (typewriter, file 10) → Workshop (blackout: weapons and items taken) → Secret Room (the clue) → Study (padlock 024466, Scissors) → Workshop (Relief of a Child) → dioramas: Medicine Room (Jimmy’s Room Key) → Old Well (Doll (Pose 3)) → Storage Room (Black-haired Doll) → Workshop (Breaker Box Key) → breaker box (Fuse Map) → Mia mannequins: Study → Kitchen → Bedroom (Fuse) → elevator → shrunken Rose: giant dolls → the Winters’ house memory (Drawer Key, files 11–13) → Eveline’s mold escape → Living Room 1F (typewriter, RW-Variant Flask 4) → Boss: Eveline.
Prepare: this chapter has almost no combat and no ammo or materials. In the dark Workshop your weapons and items are taken away: the LEMI, the M1897, the First Aid Meds, the sage, the ammo and the castle’s materials. They aren’t lost: on reaching the Deep Stratum you get back the weapons and inventory you were carrying. Meanwhile you keep only the powers (breaking cores and freezing) and the little you pick up in the house. There’s nothing to prepare except saving often: the mannequins kill on touch. The only help in the chapter is 2 Sprig of White Sage in the shrunken section, a Bunch of White Sage after the memory and a First Aid Med before Eveline. Eveline only takes damage from Rose’s power, and you have no guns yet anyway.
What you can miss: the three files in the Winters’ house (11, 12 and 13) can only be picked up during the memory; as soon as you open the sideboard drawer, the Eveline cutscene and the escape begin.
Difficulty: no guide documents changes to the code or the dioramas by difficulty; what changes is how much Rose can take. On Hardcore a giant doll’s hit hurts much more: save at every typewriter.
Suspension Bridge, Graveyard Path and the elevator
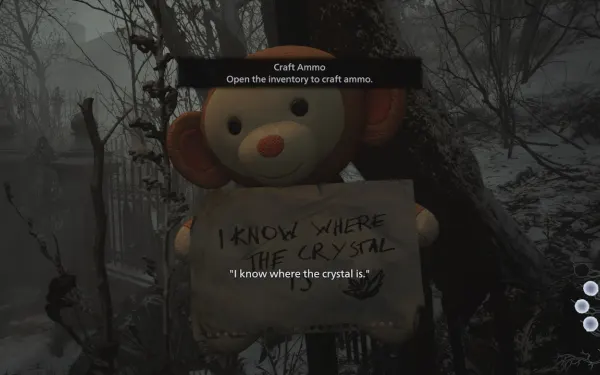
A snowy path; the bridge is destroyed behind you. Nothing to pick up. Stuffed monkeys call out to you (“I know where the crystal is”). Examine the big tombstone (Claudia’s grave, defaced): the red double doors behind it lead to the elevator through the Elevator Passage.
Elevator Hall (B1)
Typewriter on the cabinet to the southeast. The file Little Girl’s Diary (file 10) is on the small desk to the northwest, opposite the elevator: it’s Rose’s diary from when she was a little girl just starting elementary school. She is bullied for her “white sweat” until her classmate Lucy talks to her, and Rose hopes to befriend Lucy’s friend Catherine too (the names in the doll puzzle). Next to the elevator is a breaker box (later). One door needs a relief.
Workshop: the blackout
Stuffed toys and monkeys around the crystal, inside a cage. Touch it and the lights go out: your weapons and items are taken and the link with “Michael” is cut. In front of you is a stitched-up stuffed monkey you can’t do anything with yet, and to your right a red door marked “Jimmy’s Room”, locked.
Secret Room and Study: the 024466 padlock
The way there. Leave the Workshop to the left into the Medicine Room and carry on into the Connecting Corridor. Its door is locked: walk past it and through the broken wall into the Secret Room (that’s its name on the map), the corridor of children’s drawings that links the Connecting Corridor and the Study.
The clue. On the right-hand wall is a drawing you can pick up: turn it over and read the back (“the stuffed locker, the picture on the bookshelf, the desk covered in stuff”).
The padlock. In the Study examine the locker (north corner), the back of the picture frame on the bookcase and the floor behind the desk (east corner). The padlock is on the cupboard in the west corner: open it with 024466 to find the Scissors.
Workshop: the “surgery”
Use the Scissors on the stitched stuffed monkey on the workbench: inside is the Relief of a Child. The lights go out again and the monkey turns into a 4-slot diorama. On the small desk to the east (by the Medicine Room door) the Doll (Pose 1) appears (“Lucy”, arms raised as if holding a stick) with a note.
The three doll dioramas
Storage Room. Go back to the Main Corridor (the passage between the Elevator Hall and the Workshop) and put the Relief of a Child on the locked Storage Room door. On the 3-slot diorama in the middle is the Doll (Pose 2) (“Catherine”, right hand raised).
Medicine Room diorama (2 dolls). Pose 1 on the “Lucy” base (left) and Pose 2 on the “Catherine” base (right): the drawer gives you Jimmy’s Room Key (a red key). Pick both dolls back up.
Old Well (“Jimmy’s Room”). Open the Workshop’s red door with Jimmy’s Room Key. Break the core on the north side and climb down the well: at the bottom, the Doll (Pose 3) (“Jimmy”, both arms out as if carrying something).
Storage Room diorama (3 dolls, the bullying scene). Three sources (Evil Resource, Game8 and TheGamer) agree on this placement:
- Pose 1 (“Lucy”, arms raised): on the platform at the top of the ladder.
- Pose 2 (“Catherine”, right hand raised): at the foot of the ladder, directly below Lucy (bottom right as you face the diorama).
- Pose 3 (“Jimmy”, arms out): next to the present, in the middle-left.
The drawer gives you the Black-haired Doll.
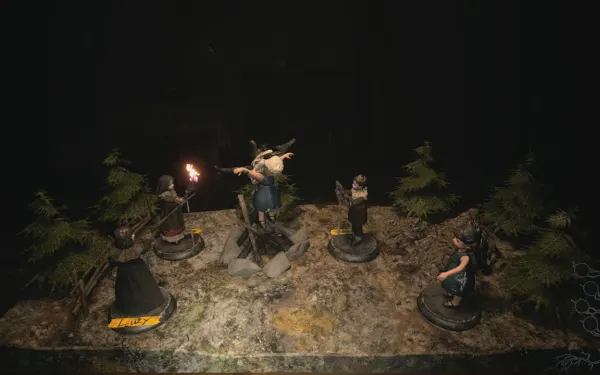
Workshop diorama (4 dolls: Rose burned at the stake while a dark-haired girl watches). Pose 1 on the base labelled “Lucy”, Pose 2 next to it, Pose 3 on the base facing the blonde doll and the Black-haired Doll on the unlabelled base. Seen from the front, left to right: Lucy (Pose 1), Catherine (Pose 2), Jimmy (Pose 3), Black-haired Doll. The Breaker Box Key turns up in the ashes of the blonde doll. On the way, a mannequin peers through the Workshop doors: just a scare.
The breaker box
Open it with the Breaker Box Key, next to the Elevator Hall elevator: the fuse is missing and inside is the Fuse Map, a hand-drawn map with a nasty message. The Fuse is in the Bedroom. In this stretch the dark-haired girl phones you.
Mia’s mannequins: the Fuse
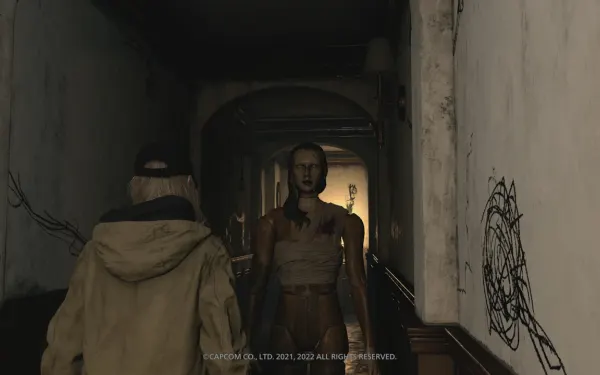
The rule: the mannequin moves only when you’re not looking at it, and if it touches you it’s game over. Walk backwards facing it; it’s slow, so you can turn and sprint for a moment. Check the map often.
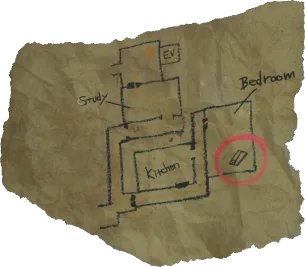
- Study. A new door opens between the Study and the Medicine Room. The first mannequin is in the Study. Walk backwards, go down a few steps and take the first door (past it is a dead end).
- Kitchen. A core (on the ceiling, to the northwest) blocks the way. Keep the mannequin in the same view as the core and break it without looking away; go round the table quickly.
- Back Corridor → Bedroom. You’re safe here until you take the fuse. The Fuse is in the fuse panel in the south corner. The mannequin breaks the door and blocks the exit: go near the floor lamp in the far corner, look away for an instant so it follows you there, then back out without taking your eyes off it.
- The way back. A second mannequin waits outside the Bedroom and a third in the hallway; they don’t trigger until you pass them. Sprint to the Kitchen and turn around: looking at them stops the two behind you.
- Study. A fourth mannequin blocks the door. Look away briefly so it steps aside, group it with the other three on the right and back out. The door shuts behind you.
Put the Fuse in the box and take the elevator.
Shrunken Rose: the giant dolls
Rose shrinks; you only have the powers. The rules:
- The dolls can’t hear and mostly see inside their white searchlight cone.
- Don’t ride their backs: Game8 warns that if you trail them too closely they can catch you even though you’re not in their sight. When you have to follow one, keep a gap and move from cover to cover.
- One hit doesn’t kill you at full health: take one, escape and your health recovers.
- Breaking certain ceiling cores drops a cage that distracts the dolls for good.
The route:
- Elevator Hall. On your left, a giant typewriter on the floor (south corner): save. A doll circles a mold pillar: follow it clockwise keeping a good gap and go right.
- Storage Room. Hug the left side, hide under the desk and go up the ramp. Wait for the upper doll to turn, cross the beam onto the table and break the core on the table.
- Main Corridor. Break the ceiling core so a cage drops (the dolls slash at it) and sneak along the left. Hide in the debris alcove, turn round and break the core behind you (second cage).
- Workshop. Two dolls circle the desk one after the other and a third patrols. Move cover to cover until you’re under the central desk; break the core in front of you (a cage drops and distracts them all), then the one above the desk to open the exit.
- Medicine Room. A mannequin bursts through the shaking door. Hide under the desk until it passes and leave through the door it came in by.
- Connecting Corridor. Sprig of White Sage in the trash can in the south corner. Two dolls: slip past the patrolling one and freeze the stationary one by the exit.
- Kitchen. Sprig of White Sage under the bench to the northeast. Reach the serving cart unseen; a mannequin comes in: circle the island around it, freeze the doll and break the core under the bench to the southeast (left of the entrance). Continue through the Back Corridor to the Bedroom (watch the circling doll: keep your distance).
- The chase. After the Bedroom cutscene a mannequin chases you. Run up the ramp and through the door, turn and break the core above and behind you, then run straight to the exit. “Michael” rescues Rose in the Study.
The Winters’ house memory
You explore, in safety, Ethan and Mia’s house from when Rose was a baby, and see Ethan’s memories. Typewriter by the front door. Take all three files before you open the sideboard drawer: the escape starts right after and they don’t come back.
- To-do List (file 11): the table next to the living room couch. Mia’s list: decorate, the wine in the dining room and “Rose’s other present in study (Hidden!)”.
- Mia’s Letter (file 12): the round table at the far end of the 2F landing, in front of the storeroom. Rose’s half birthday is on the 2nd.
- Rose’s Half Birthday (file 13): the laptop in the study. The clue: the letter is “in the sideboard; the key is behind my favourite photo”.
In the upstairs study, the glowing framed photo of Rose: behind it is the Drawer Key. Use it on the sideboard drawer and read Ethan’s letter. Cutscene: the dark-haired girl reveals herself as Eveline.
The mold escape
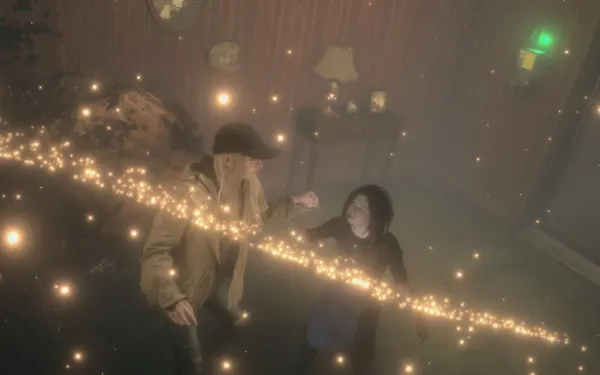
Mold floods the house behind you: run forward, break the core, turn around, run up the stairs and go left. New cores appear at the northeast end of the Back Corridor and 2 at the east end of the Main Corridor. In the Medicine Room, a Bunch of White Sage on the table in the south corner. Eveline throws dolls and mannequins at you that no longer stop when you look at them: freeze them. At a corner there are two cores facing each other: break both before the mannequins reach you and take the elevator.
Living Room (1F): the fourth flask
Typewriter on the desk opposite the fireplace (west); save. On the middle table, a First Aid Med and RW-Variant Flask 4: 5th stock and a full gauge. Cross into the Foyer.
Boss — Eveline
The arena. The house Foyer: furniture to hide behind, a staircase to 2F and mold spreading across the floor. Only Rose’s power damages her (your guns don’t come back until the Deep Stratum). Rose must be standing to use it.
- The pattern. Eveline charges up and releases wind blasts, usually three in a row. Hide behind furniture out of her line of sight until she’s done. When she’s exhausted and slumped, stand up and hit her with the power.
- She teleports. Follow her blue glow and get behind cover that faces her new spot. First she appears near the Living Room door you came through; then in the corridor to the right of the front door (hide behind the cabinet). The blasts last longer as the fight goes on.
- Mold covers the floor. Don’t step on it. Stand in the middle, between the two fallen pieces of cover, and repeat: wait out the three blasts, stand up, power.
- The stairs. She teleports upstairs and 2 cores appear on the staircase. Follow the red veins: one left of the stairs and one on the upper floor, further left. Break them and sprint up under fire to the cover at the top. She now attacks more often: wait out the last burst of three, hit her once more and “Michael” steps in for the final blow.
Reward: “Michael” shields Rose, and she falls off a cliff into the next stratum: the Deep Stratum, where you get your weapons back.
Don’t leave without:
- The Little Girl’s Diary (file 10, northwest desk of the Elevator Hall).
- The three files in the Winters’ house: To-do List, Mia’s Letter and Rose’s Half Birthday (the memory doesn’t come back).
- RW-Variant Flask 4 from the Living Room: a 5-stock gauge.
- A save at the Living Room typewriter before you cross into the Foyer.