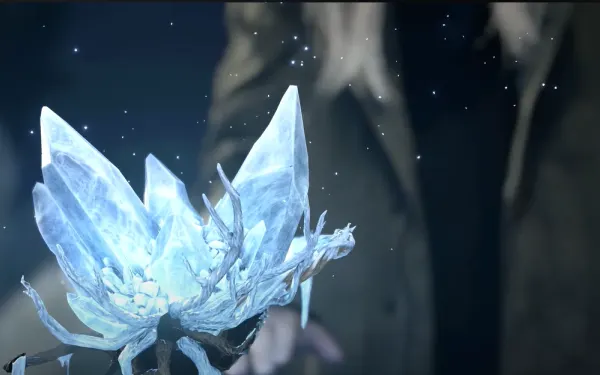
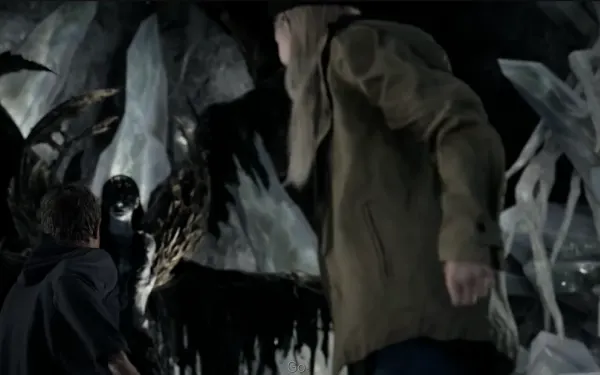
You carry on as Rose in the last stratum, the Deep Stratum: a ruined village at the very bottom of the Megamycete’s consciousness, full of Face Eaters wearing Rose’s face. Here you get your weapons and inventory back and learn who “Michael” is. The chapter is short and linear: you cross the village to a giant core blocking a pit, go down to the Pit Laboratory (the last typewriter and the DLC’s biggest ammo cache), take the Purifying Crystal in the cavern and, after escaping alongside Ethan, face Mother Miranda at Memories’ Edge with three new powers.
Chapter order: Behind a House (typewriter, weapons and inventory back) → Forest Path → Small Yard → Village Path (Face Eaters) → Clearing (giant core) → Pit Entrance → Pit Laboratory (typewriter, files 14–17, ammo cache) → Passageway (file 18) → Cavern (file 19, Purifying Crystal) → escape with Ethan → Memories’ Edge: Mother Miranda.
Prepare: here you get back the weapons and inventory taken from you in the house. It’s about 12 Face Eaters in the village and the final fight. Don’t spend the M1897 in the village: these Face Eaters drop to a couple of focused LEMI shots and a single freeze catches a whole group. The Pit Laboratory is the last typewriter and holds 42 handgun rounds, 19 shells, a First Aid Med and a Bunch of White Sage: take it all, heal, fill the gauge and save. There are no crafting materials in the Deep Stratum: whatever you had left from the castle comes back with your inventory, so craft now with all of it. Against Miranda the keys are the new powers (dodge, absorb and the Megamycete attack) and the M1897 on every stun.
Point of no return: taking the Purifying Crystal at the top of the Cavern stairs triggers the cutscene, the escape with Ethan and the Miranda fight with no way back to the Pit Laboratory. Files 14 to 19 and the lab’s ammo have to be on you before you climb those stairs.
Ammo count: before the lab you pick up 38 handgun rounds (8 + 6 + 12 + 12) and 3 shells; the lab adds 42 and 19. From the Deep Stratum alone you reach Miranda with at least 22 shells if you didn’t fire the shotgun in the village, and handgun ammo keeps appearing during the fight.
Difficulty: on Casual Rose regenerates health and enemies hit softer; on Hardcore there are fewer resources and every hit hurts far more: dodge the village Face Eaters instead of killing them. The game autosaves at many checkpoints, so a death in the village rarely sends you far back.
Behind a House and Forest Path
Behind a House. Typewriter on the collapsed cabinet by the path (south). Handgun Ammo ×8 on the small armchair to the northwest. Your weapons and the items you carried in the castle are back. Rose realises “Michael” was Ethan.
Forest Path. Handgun Ammo ×6 on the ground, halfway along, on the east side. Slide down the hill into the village.
Small Yard and Village Path
Small Yard. A Bunch of White Sage by the burning fence. A Rose copy with a black aura leads the way.
Village Path. A First Aid Med by the upturned truck at the south end. The bodies on the path rise as you approach: 4 Face Eaters. Back off so they can’t surround you, fire focused shots at the head of the one in front and, if three or more bunch up, freeze the group and finish them. Handgun Ammo ×12 on the wall by the huge flesh mound (east). Near the clearing, 2 more Face Eaters and Shotgun Ammo ×3 on the east wall.
Clearing: the giant core
To the east are 3 Face Eaters (one feeding on another; the third rises when you get close). Sprig of White Sage on the ground to the west and Handgun Ammo ×12 by the stone water trough (west). As you approach the giant core to the north, which blocks the pit entrance, 3 more Face Eaters appear. They’re turned Rose copies: they drop to a couple of focused shots, and if they bunch up, freeze the group and finish them. Break the giant core and drop down the ledges of the Pit Entrance.
Pit Laboratory (B1): the last typewriter
Typewriter on the south side of the main workbench. Files:
- On This Realm and Its Laws (file 14): the small table in the southwest corner. Miranda, dead and absorbed, sets out the laws of this realm.
- On the Recreation and Manipulation of Memory (file 15) and Recently Written Report (file 17): the east side of the main workbench. The first explains where the Masked Duke came from; the second, that Eveline slipped into the realm.
- On Vessel Synthesis (file 16): the collapsed furniture to the southeast. The failed Rose copies.
Cache: Handgun Ammo ×23 (southwest table), Handgun Ammo ×19 (by the collapsed shelves to the northeast), Shotgun Ammo ×10 (collapsed furniture to the southeast), Shotgun Ammo ×9 (northeast corner of the workbench), First Aid Med (southeast corner of the workbench) and Bunch of White Sage (shelves at the entrance to the northwest passage). Save here: there’s no other typewriter before Miranda.
Passageway and Cavern
Passageway. Leave the lab by the northwest passage. The file Wearily Scrawled Note (file 18) is on the ground in the northeast corner: someone who saw “that blue light” and couldn’t go on.
Cavern. The file Ritual Text (file 19) on the altar pedestal: a prayer to the “Black God”.
Check before you climb the stairs. Taking the Purifying Crystal triggers the cutscene, the escape with Ethan and the Miranda fight with no way back to the Pit Laboratory (the last typewriter). Make sure you have the 4 lab files, the Wearily Scrawled Note (Passageway, northeast corner) and the Ritual Text (altar pedestal), all the lab’s ammo, full health and a full gauge, and that you’ve saved.
Climb the stairs to the Purifying Crystal and take it.
The escape with Ethan
Cutscene with Mother Miranda and Ethan. Follow Ethan through the Cavern avoiding the Face Eaters; stay close to him and you shouldn’t need to spend ammo. Rose pours her power into the crystal, then takes it back to save Ethan.
Boss — Mother Miranda
The arena. Memories’ Edge, wide and open, with plenty of room to dodge. Throughout the fight boxes of Handgun Ammo ×10 keep respawning on the ground: grab them between attacks. Miranda fights mostly in her winged form and briefly in her spider form to pounce on you.
The new powers (this fight only). When they unlock, the game shows a tutorial with the buttons: read it, because the Switch 2 mapping isn’t documented (check the controls screen too, as in the castle). For reference, GamerTweak and Gameranx give these controls on PlayStation/Xbox:
- Dodge: left stick to one side + Circle (B). Free, with a moment of invulnerability.
- Absorb: L1 (LB), just before the yellow projectile hits you; you regain 1 or 2 stocks (guides disagree). TheGamer instead describes it as timing the freeze power, so trust the in-game tutorial.
- Megamycete attack: the same button with the left stick forward (according to Gameranx). Costs 3 stocks; a giant root thrusts forward at short range and stuns Miranda for a good while. It has to come up right under her or it misses.
- Final blow: R1 (the power button) when she’s down at the end.
The damage loop: absorb projectiles until you have 3 stocks → get close and use the Megamycete attack → when the root connects, she drops to the ground stunned → empty the M1897 into her head: you fit about 4 or 5 shells before she recovers and takes off again → repeat. While she flies, bullets do little to no damage (she only takes real damage stunned on the ground): don’t spend them, and don’t waste the power on her in the air. The best moment for the Megamycete attack is right after her close-range wing spin, as she recovers.
- Phase 1. Her attacks: she twirls in the air and dives at you (dodge sideways); a wing spin up close (dodge); and a mold trail that follows her, glows yellow and rushes at you (absorb it at the last moment). Later she fires several in a row or combines them with the dive. Use those projectiles to fill the gauge.
- Phase 2: the shadow realm. The arena goes dark and she swims under the ground. She feints, then lunges with her arms spread: dodge only that real lunge. Right after, she fires a projectile: absorb it. If black mold appears under your feet, she’s coming from below: dodge out of it.
- Phase 3: the tornado. She sinks and rises as a mold tornado spitting projectiles in every direction while it spins: move between the shots and dodge. The phase opens with three projectiles: absorb all three, dodge the lunge, dodge when she bursts from below and use the Megamycete attack. About three stun-and-shotgun cycles end the phase.
- The end. She moves the fight to a red-sky arena and fires projectiles you can’t block: Rose goes down no matter what (heal first if you can). Ethan lends her his last power: get close, follow the prompt for the decisive blow and use the power to finish her.
Reward: the ending of Shadows of Rose. Rose keeps her powers and visits Ethan’s grave. Finishing on Standard or higher counts for Serene Teen and on Hardcore for Supreme Teen (achievements on the other platforms; Switch 2 has no trophies).
Don’t leave without:
- The 4 Pit Laboratory files (14 to 17).
- The Wearily Scrawled Note (file 18, Passageway) and the Ritual Text (file 19, Cavern).
- All the lab’s ammo (42 handgun rounds, 19 shells), the First Aid Med and the Bunch of White Sage.
- A save at the Pit Laboratory before you climb to the Purifying Crystal.