Arsenal
Wii/HD port stats = Switch versionWhich weapon in each slot
one decision per slot: what to take, what to upgrade and when to sellHandgun
Order: Handgun (starting) Punisher Red9 Blacktail
Handgun → free Punisher (1-3) → Red9 (2-2). One handgun in the case: upgrade neither the Handgun nor the Punisher, and sell each one as soon as the next has its first upgrade.
-
Handgun (starting) 1-1 · starting weapon
-
Punisher 1-3 · free with 10 medallions (Power 1.1 with all 15)
-
Red9 2-2 · 14,000pts (or at the end of 2-1, at the Underground Passage Merchant)
- Buy
- Yes: the highest damage per bullet of any handgun
- Upgrade
- Power 1.8 (15,000pts) the same day; 2.1 in 3-1. Stock only if you have room to spare
- Sell
- Never: it is your handgun until the credits
-
Blacktail 3-1 · 24,000pts
Shotgun
Order: Shotgun (free in 1-1) Riot Gun Striker
Free shotgun (1-1) → Striker (4-1). Take the shotgun only to Power 5.0 and sell it at the very Merchant where you buy the Striker. The Riot Gun only if you prefer range.
-
Shotgun (free in 1-1) 1-1 · free, upstairs in the two-storey village house
- Buy
- —
- Upgrade
- Power 4.5 (1-3) and 5.0 (2-1); Capacity with an empty magazine. Not a peseta more
- Sell
- In 4-1, when you buy the Striker
-
Riot Gun 3-1 · 32,000pts
- Buy
- Only if you want a tight spread at mid range; it is the most expensive shotgun to upgrade
- Upgrade
- —
- Sell
- —
-
Striker 4-1 · 43,000pts, pit Merchant before Verdugo
- Buy
- Yes
- Upgrade
- Capacity with an empty magazine; its exclusive (60,000pts, 4-4) gives you 100 shells
- Sell
- Never
Rifle
No rifle in the village. Semi-auto in 3-1 and a free thermal scope in 5-1. The bolt-action only for veterans who want its power-30 exclusive.
-
Rifle (bolt-action) 1-2 · 12,000pts
- Buy
- Not on a first run: big and useless in the village
- Upgrade
- —
- Sell
- —
-
Semi-Auto Rifle 3-1 · 35,000pts
- Buy
- Yes
- Upgrade
- Power 8 when you buy it; the thermal scope is free in 5-1 (freezer)
- Sell
- Never
Submachine gun
Order: TMP
The TMP (1-2) is the tool of the whole game: shot to the leg → kick → knife. Power and the first Reload; always buy Capacity with an empty magazine.
Magnum
Order: Broken Butterfly Killer7
Broken Butterfly free in 4-1 and left unupgraded. Killer7 only if you want a serious magnum for the island, and then sell the Butterfly.
-
Broken Butterfly 4-1 · free (treasure chamber by the outside fountain, with Ashley). Do not buy it in 3-1 (38,000pts)
- Buy
- —
- Upgrade
- Capacity only, with an empty cylinder: free magnum rounds
- Sell
- In 5-1 if you buy the Killer7; at the end, if you never use it
-
Killer7 5-1 · 77,700pts
- Buy
- Optional
- Upgrade
- —
- Sell
- —
Rocket launcher
Order: Rocket Launcher
Free in the 3-3 gallery display case: keep it for Verdugo. After that, 30,000pts per boss: Salazar and, if you are struggling, U-3. Ada’s one in the final chapter is free.
-
Rocket Launcher 3-3 · free in the gallery display case; on sale from 1-2 at 30,000pts
Pistols
4Summary · price · base → max power · exclusive; the bars below are measured against the best weapon of their category
seconds between shots / per reload, base to maxed (lower is better)
| Weapon | Price | Power | Firing (s) | Reload (s) | Exclusive |
|---|---|---|---|---|---|
| ★ Red9 | 14,000pts (2-1) | 1.6 → 3.7 | 0.53 → 0.40 | 2.37 → 1.67 | Power rises to 6.5 (80,000pts) |
| Handgun (starting) | free | 1.0 → 2.0 | 0.47 → 0.33 | 1.73 → 0.87 | 5× headshot critical chance (57,000pts) |
| Punisher | free (10 medallions) or 20,000pts | 0.9 → 1.9 (1.1 with 15 medallions) | 0.47 → 0.33 | 1.70 → 0.83 | Pierces 5 enemies (40,000pts) |
| Blacktail | 24,000pts (3-1) | 1.6 → 3.2 | 0.47 → 0.27 | 1.70 → 0.83 | Power rises to 4.5 (80,000pts) |
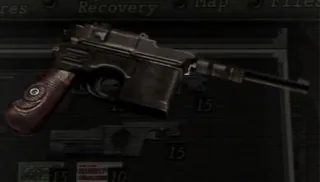
★ Red9
Verdict: Your handgun to the end. Power 1.8 the day you buy it.
★ The most damage per bullet of any handgun: saves ammo and holds up against bosses, which is why it's the Professional favorite. The price: 8 slots, a short magazine and a slow reload. The stock (4,000pts, 3 slots) steadies it a lot, but on a 1st playthrough the space is worth more.
Price
14,000pts (2-1)
Exclusive
Power rises to 6.5 (80,000pts)
Level-by-level upgrades
| Power | 1.6 1.8 15,000pts 2.1 20,000pts 2.5 24,000pts 3.0 28,000pts 3.7 45,000pts |
|---|---|
| Firing | 0.53 0.47 10,000pts 0.40 15,000pts |
| Reload | 2.37 2.20 6,000pts 1.67 10,000pts |
| Capacity | 8 10 6,000pts 12 8,000pts 15 12,000pts 18 16,000pts 22 22,000pts |
Firing
0.53 → 0.40
Reload
2.37 → 1.67
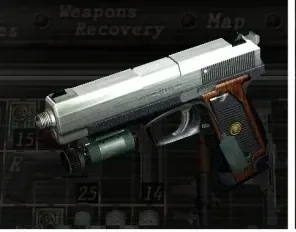
Verdict: Do not upgrade it. Sell it in 1-3 when you get the Punisher.
The cheapest to upgrade and the shakiest aim. Its exclusive (crit ×5, from an estimated ~5–10% to ~25–50%) only pays off if you commit to headshots. Once you have the Punisher or Red9, sell it: the Merchant refunds half of what you put in.
Price
free
Exclusive
5× headshot critical chance (57,000pts)
Level-by-level upgrades
| Power | 1.0 1.2 7,000pts 1.4 10,000pts 1.6 15,000pts 1.8 18,000pts 2.0 20,000pts |
|---|---|
| Firing | 0.47 0.40 5,000pts 0.33 12,000pts |
| Reload | 1.73 1.47 4,000pts 0.87 10,000pts |
| Capacity | 10 13 4,000pts 16 6,000pts 19 8,000pts 22 10,000pts 25 12,000pts |
Firing
0.47 → 0.33
Reload
1.73 → 0.87
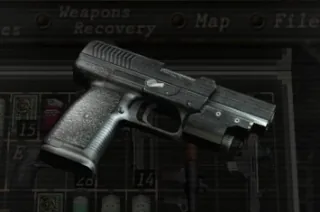
Verdict: Free bridge to the Red9: do not upgrade it and sell it in 2-2 once the Red9 has 1.8.
The weakest handgun in the game, but free, steadier than the Handgun, and it pierces shields and lines (cabin, cable car). The ideal bridge to the Red9/Blacktail: break all 15 medallions and it arrives at 1.1.
Price
free (10 medallions) or 20,000pts
Exclusive
Pierces 5 enemies (40,000pts)
Level-by-level upgrades
| Power | 0.9 1.1 10,000pts 1.3 15,000pts 1.5 20,000pts 1.7 25,000pts 1.9 35,000pts |
|---|---|
| Firing | 0.47 0.40 10,000pts 0.33 20,000pts |
| Reload | 1.70 1.47 8,000pts 0.83 18,000pts |
| Capacity | 10 13 8,000pts 16 10,000pts 20 15,000pts 24 18,000pts 28 24,000pts |
Firing
0.47 → 0.33
Reload
1.70 → 0.83
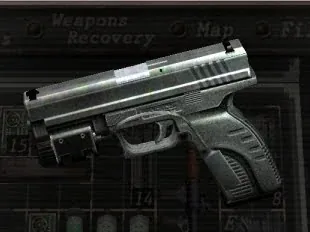
Verdict: An alternative to the Red9, not a companion: pick one.
An equally valid alternative to the Red9: the fastest-firing handgun, best handling, 35 rounds and only 6 slots. Less damage per bullet and the most expensive to upgrade. Pick one of the two and don't look back.
Price
24,000pts (3-1)
Exclusive
Power rises to 4.5 (80,000pts)
Level-by-level upgrades
| Power | 1.6 1.8 15,000pts 2.0 18,000pts 2.3 24,000pts 2.7 30,000pts 3.2 40,000pts |
|---|---|
| Firing | 0.47 0.40 10,000pts 0.27 20,000pts |
| Reload | 1.7 1.47 8,000pts 0.83 15,000pts |
| Capacity | 15 18 8,000pts 21 10,000pts 25 15,000pts 30 20,000pts 35 25,000pts |
Firing
0.47 → 0.27
Reload
1.70 → 0.83
Shotguns
3Summary · price · base → max power · exclusive; the bars below are measured against the best weapon of their category
seconds between shots / per reload, base to maxed (lower is better)
| Weapon | Price | Power | Firing (s) | Reload (s) | Exclusive |
|---|---|---|---|---|---|
| ★ Striker | 43,000pts (4-1, Pit merchant, before Verdugo) | 6 → 12 | 1.10 | 3.00 → 1.67 | Magazine 100 (60,000pts) |
| Shotgun (free in 1-1) | free | 4 → 8 | 1.53 | 3.03 → 1.67 | Full damage at any range (40,000pts) |
| Riot Gun | 32,000pts (3-1) | 5 → 8 | 1.53 | 3.03 → 1.67 | Power 10 (120,000pts) |
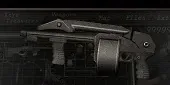
★ Striker
Verdict: Your shotgun to the end (4-1, before Verdugo).
★ The community's favorite shotgun: 10 slots, power 12, fast reload and a 100-shell exclusive that also hands you the shells. It only hits point-blank (fired from the hip): at mid range it won't even stagger.
Price
43,000pts (4-1, Pit merchant, before Verdugo)
Exclusive
Magazine 100 (60,000pts)
Level-by-level upgrades
| Power | 6.0/2.0 7.0/2.4 25,000pts 8.0/2.7 28,000pts 9.0/3.0 32,000pts 10.0/3.4 40,000pts 12.0/4.0 60,000pts |
|---|---|
| Reload | 3.00 2.40 8,000pts 1.67 15,000pts |
| Capacity | 12 14 10,000pts 16 12,000pts 20 16,000pts 24 18,000pts 28 25,000pts |
Firing
1.10
Reload
3.00 → 1.67
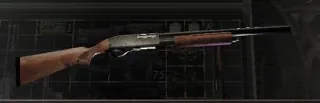
Verdict: Only up to Power 5.0; sell it in 4-1 when you buy the Striker.
Your shotgun until the Striker (4-1). Invest little: Power 5.0 and Capacity with an empty magazine; every peseta beyond that only comes back at half when you sell it. Its exclusive is the weakest in the game: the pellets still spread.
Price
free
Exclusive
Full damage at any range (40,000pts)
Level-by-level upgrades
| Power | 4.0/1.4 4.5/1.6 15,000pts 5.0/1.8 20,000pts 6.0/2.2 25,000pts 7.0/2.5 30,000pts 8.0/3.0 40,000pts |
|---|---|
| Reload | 3.03 2.43 7,000pts 1.67 15,000pts |
| Capacity | 6 8 8,000pts 10 10,000pts 12 12,000pts 15 15,000pts 18 20,000pts |
Firing
1.53
Reload
3.03 → 1.67
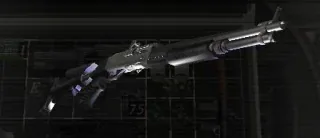
Verdict: Skip it on a first run: save for the Striker.
A valid option if you prefer range: tight spread, faster aiming and it still hits at mid range where the Striker no longer does. But it's the most expensive shotgun (415,000pts) and takes 16 slots; on a 1st playthrough, save for the Striker.
Price
32,000pts (3-1)
Exclusive
Power 10 (120,000pts)
Level-by-level upgrades
| Power | 5.0/2.0 5.5/2.3 20,000pts 6.0/2.5 24,000pts 6.5/3.3 28,000pts 7.0/3.5 32,000pts 8.0/4.0 50,000pts |
|---|---|
| Reload | 3.03 2.43 7,000pts 1.67 20,000pts |
| Capacity | 7 9 10,000pts 11 12,000pts 13 15,000pts 15 20,000pts 17 25,000pts |
Firing
1.53
Reload
3.03 → 1.67
Rifles
2Summary · price · base → max power · exclusive; the bars below are measured against the best weapon of their category
seconds between shots / per reload, base to maxed (lower is better)
| Weapon | Price | Power | Firing (s) | Reload (s) | Exclusive |
|---|---|---|---|---|---|
| ★ Semi-Auto Rifle | 35,000pts (3-1) | 7 → 15 | 1.83 (0.80 excl.) | 2.33 → 1.33 | Fire rate 0.80 s (80,000pts) |
| Rifle (bolt-action) | 12,000pts (1-2) | 4 → 12 | 2.73 | 4.00 → 2.33 | Power 30 (80,000pts) |
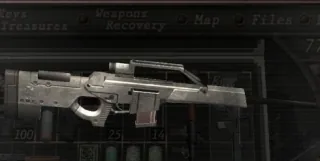
Verdict: Your rifle from 3-1; free thermal scope in 5-1.
★ The rifle for a 1st playthrough: you stay scoped between shots. The Island's thermal scope (free, 5-1 freezer) attaches to it and is nearly mandatory against Regenerators. The zoom scope (10,000pts) is optional.
Price
35,000pts (3-1)
Exclusive
Fire rate 0.80 s (80,000pts)
Level-by-level upgrades
| Power | 7.0 8.0 15,000pts 9.0 18,000pts 11.0 24,000pts 13.0 30,000pts 15.0 40,000pts |
|---|---|
| Reload | 2.33 1.90 9,000pts 1.33 18,000pts |
| Capacity | 10 12 10,000pts 14 12,000pts 17 15,000pts 20 20,000pts 24 25,000pts |
Firing
1.83 (0.80 excl.)
Reload
2.33 → 1.33
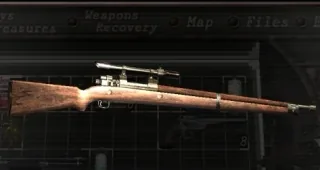
Verdict: Not on a first run.
Cheaper and slimmer (9×1). Its exclusive (power 30, double the Semi-Auto) turns it into a "poor man's magnum" on common ammo — the veterans' pick. But you leave the scope after every shot: it hurts against Novistadors and crowds.
Price
12,000pts (1-2)
Exclusive
Power 30 (80,000pts)
Level-by-level upgrades
| Power | 4.0 5.0 10,000pts 6.0 12,000pts 8.0 20,000pts 10.0 25,000pts 12.0 35,000pts |
|---|---|
| Reload | 4.00 3.23 8,000pts 2.33 18,000pts |
| Capacity | 5 7 6,000pts 9 8,000pts 12 12,000pts 15 18,000pts 18 25,000pts |
Firing
2.73
Reload
4.00 → 2.33
Magnums & heavies
5Summary · price · base → max power · exclusive; the bars below are measured against the best weapon of their category
seconds between shots / per reload, base to maxed (lower is better)
| Weapon | Price | Power | Firing (s) | Reload (s) | Exclusive |
|---|---|---|---|---|---|
| ★ TMP | 10,000pts (1-2) | 0.4 → 1.2 → 1.8 excl. | 0.10 | 2.37 → 1.17 | Power 1.8 (100,000pts) |
| Broken Butterfly | free in 4-1 (or 38,000pts) | 13 → 28 → 50 excl. | 0.70 | 3.67 → 2.33 | Power 50 (150,000pts) |
| Killer7 | 77,700pts (5-1) | 25 → 35 | 0.70 | 1.83 → 0.93 | 5x Critical Rate (77,000pts, ch. 9) |
| Rocket Launcher | 30,000pts | one shot, one boss | — | — | — |
| Mine Thrower | 9,800pts (3-1) | — | 1.33 | 3.43 → 2.57 | — |
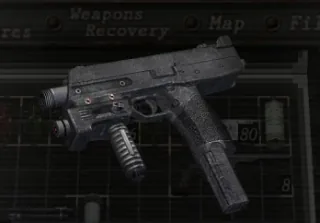
★ TMP
Verdict: Buy it in 1-2 and never let it go.
★ One shot to the leg → kick → knife: the cheapest routine in the game. Shreds El Gigante, U-3 and Krauser and clears crowds. Upgrade order: Power first (0.8 in the castle, 1.2 in 4-1) and the first Reload (5,000pts); Capacity is ammo you buy (each level refills the magazine: buy it empty) and you only need all of it if you go for the exclusive, which requires everything maxed. Its boxes hold 100 rounds and sell for 20pts each: never sell them. Stock (4,000pts, 2×2) is optional.
Price
10,000pts (1-2)
Exclusive
Power 1.8 (100,000pts)
Level-by-level upgrades
| Power | 0.4 0.5 7,000pts 0.6 14,000pts 0.8 18,000pts 1.0 24,000pts 1.2 35,000pts |
|---|---|
| Reload | 2.37 1.93 5,000pts 1.17 15,000pts |
| Capacity | 30 50 7,000pts 100 15,000pts 150 20,000pts 200 25,000pts 250 35,000pts |
Firing
0.10
Reload
2.37 → 1.17
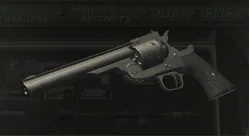
Verdict: Free in 4-1; do not upgrade it.
Take it for free in 4-1 (treasure chamber by the outside fountain, with Ashley) and don't upgrade it: 210,000pts to reach 28, and its exclusive doesn't show up until 5-3. Raise Capacity with an empty cylinder = free magnum rounds (the 12-round level opens in 5-1). A rocket (30,000pts) is cheaper for bosses.
Price
free in 4-1 (or 38,000pts)
Exclusive
Power 50 (150,000pts)
Level-by-level upgrades
| Power | 13.0 15.0 25,000pts 17.0 30,000pts 20.0 35,000pts 24.0 50,000pts 28.0 70,000pts |
|---|---|
| Reload | 3.67 3.00 15,000pts 2.33 20,000pts |
| Capacity | 6 8 15,000pts 10 20,000pts 12 25,000pts |
Firing
0.70
Reload
3.67 → 2.33
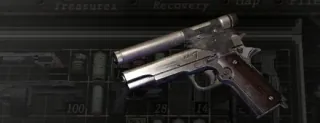
Verdict: Strong right away in 5-1; once maxed, the free Broken Butterfly outdamages it.
Higher base power and accuracy than an unupgraded Broken Butterfly, plus a built-in laser sight — solid early buy. It does have an exclusive (5x Critical Rate, unlocks in ch. 9), but several bosses negate critical hits and players report disappointing results after fully investing. Once maxed, Broken Butterfly deals more damage per shot. Keep the Butterfly if it's already invested; Killer7 is reasonable if you want power now and the Butterfly is still base level.
Price
77,700pts (5-1)
Exclusive
5x Critical Rate (77,000pts, ch. 9)
Level-by-level upgrades
| Power | 25.0 30.0 62,000pts 35.0 78,000pts |
|---|---|
| Reload | 1.83 1.53 20,000pts 0.93 30,000pts |
| Capacity | 7 10 30,000pts 14 40,000pts |
Firing
0.70
Reload
1.83 → 0.93
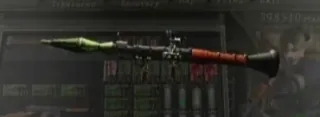
Verdict: One for Verdugo and one for Salazar.
There's a free one in the exhibition room's display case (3-3): keep it for Verdugo (frozen). After that, buy it selectively: Salazar and, if you're struggling, U-3. Fifteen rockets cost the same as an exclusive Broken Butterfly. Resells for 15,000pts.
Price
30,000pts
Exclusive
—
Power
one shot, one boss
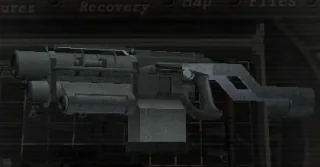
A "toy" for replays: each dart hits like a grenade and gives away invisible Novistadors, but the ammo is rare and it takes 10 slots. A bad buy on a 1st playthrough.
Price
9,800pts (3-1)
Exclusive
—
Level-by-level upgrades
| Power | 2.0 4.0 25,000pts 6.0 45,000pts |
|---|---|
| Reload | 3.43 2.57 18,000pts |
| Capacity | 5 7 25,000pts 10 40,000pts |
Firing
1.33
Reload
3.43 → 2.57
Postgame
5Summary · price · base → max power · exclusive; the bars below are measured against the best weapon of their category
seconds between shots / per reload, base to maxed (lower is better)
| Weapon | Price | Power | Firing (s) | Reload (s) | Exclusive |
|---|---|---|---|---|---|
| Matilda | 70,000pts (postgame) | 1.5 → 2.5 | 0.47 | 1.73 → 0.87 | Magazine 100 (35,000pts) |
| Infinite Rocket Launcher | 1,000,000pts (beat the game) | — | — | — | — |
| Chicago Typewriter | 1,000,000pts (complete Separate Ways) | 10, ∞ | 0.10 | 2.83 | — |
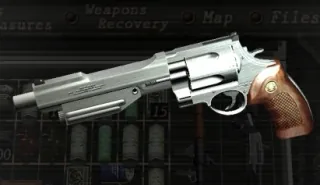
| Handcannon | free (5★ with all 5 characters in Mercenaries) | →60, exclusive 99.9 + ∞ | 1.17 | 3.67 → 1.83 | Infinite ammo (200,000pts) |
| PRL 412 | beat the game on Professional | — | — | — | — |
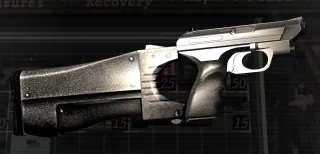
3-round bursts; the exclusive TMP outclasses it.
Price
70,000pts (postgame)
Exclusive
Magazine 100 (35,000pts)
Level-by-level upgrades
| Power | 1.5 1.7 15,000pts 1.9 17,000pts 2.1 20,000pts 2.3 25,000pts 2.5 35,000pts |
|---|---|
| Reload | 1.73 1.47 6,000pts 0.87 15,000pts |
| Capacity | 15 18 7,000pts 21 10,000pts 24 12,000pts 27 16,000pts 30 20,000pts |
Firing
0.47
Reload
1.73 → 0.87

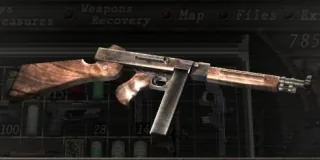
Infinite ammo, zero upgrades because it doesn't need any.
Price
1,000,000pts (complete Separate Ways)
Exclusive
—
Power
10, ∞
Firing
0.10
Reload
2.83
Price
free (5★ with all 5 characters in Mercenaries)
Exclusive
Infinite ammo (200,000pts)
Power
→60, exclusive 99.9 + ∞
Level-by-level upgrades
| Power | 30.0 35.0 40,000pts 40.0 50,000pts 45.0 70,000pts 50.0 90,000pts 60.0 120,000pts |
|---|---|
| Reload | 3.67 2.87 25,000pts 1.83 50,000pts |
| Capacity | 3 4 15,000pts 5 20,000pts 6 25,000pts 8 35,000pts 10 50,000pts |
Firing
1.17
Reload
3.67 → 1.83
Parts and equipment
stocks, scopes, attaché cases and the vest: what they do and whether they are worth it| Item | Price | From | Effect | Verdict |
|---|---|---|---|---|
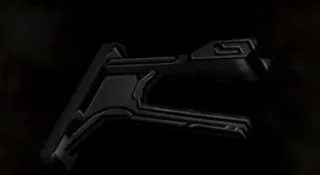 Stock (TMP) part Merchant in the 1-3 underground passage (per Evil Resource; the RE Wiki's price list already has it in 1-2) Stock (TMP) part Merchant in the 1-3 underground passage (per Evil Resource; the RE Wiki's price list already has it in 1-2) | 4,000pts (sells for 2,000) | 1-3 | Less recoil and better accuracy in bursts; takes 2×2 more slots | Only if you struggle to aim: on a first run the case space is worth more |
 Stock (Red9) part Merchant, from the 2-1 underground passage (with the Red9) Stock (Red9) part Merchant, from the 2-1 underground passage (with the Red9) | 4,000pts (sells for 2,000) | 2-1 | Steadies the aim a lot; the gun then takes 3 more slots | A replay purchase. On a first run keep the room for the shotgun and rifle |
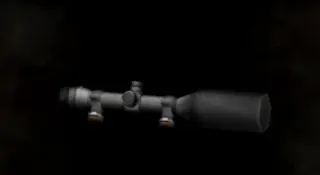 Scope (bolt-action rifle) part Merchant, from the valley storage yard Scope (bolt-action rifle) part Merchant, from the valley storage yard | 7,000pts (sells for 3,500) | 1-2 | More magnification when aiming | Optional: the stock zoom is plenty for the whole game |
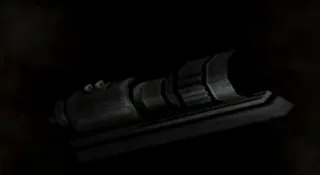 Scope (semi-auto rifle) part Merchant, from the castle entrance Scope (semi-auto rifle) part Merchant, from the castle entrance | 10,000pts (sells for 5,000) | 3-1 | More magnification when aiming | Optional. If you buy any scope, make it the thermal one (free) |
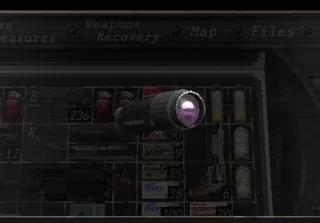 Infrared (thermal) scope part Facility freezer (2F): thaw it with the controls in the south-east room and take it from the cabinet in the north-east room. Taking it wakes a Regenerator hanging from the ceiling Infrared (thermal) scope part Facility freezer (2F): thaw it with the controls in the south-east room and take it from the cabinet in the north-east room. Taking it wakes a Regenerator hanging from the ceiling | free (sells for 10,000) | 5-1 | Fits either rifle (bolt-action or semi-auto) and reveals the hidden Plagas of Regenerators and Iron Maidens | Essential on the Island. Sell it at the Merchant after Ashley's rescue (5-4): the last Regenerator is in the cell wing |
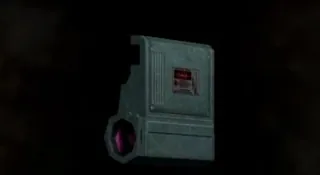 Scope (Mine Thrower) part Merchant, from the castle entrance Scope (Mine Thrower) part Merchant, from the castle entrance | 8,000pts (sells for 4,000) | 3-1 | Zoom for the mine launcher | Only if you run the Mine Thrower, and that is already a replay |
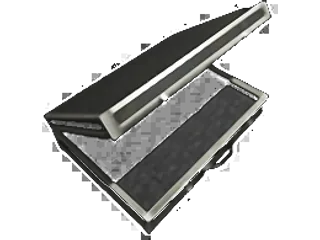 Attaché case M case Merchant, from the valley storage yard Attaché case M case Merchant, from the valley storage yard | 24,000pts | 1-2 | 7×11 = 77 slots (+17 over the starting 60) | First purchase of the game, before any weapon |
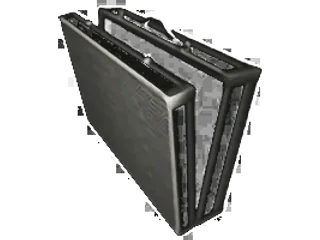 Attaché case L case Merchant, from the castle entrance Attaché case L case Merchant, from the castle entrance | 40,000pts | 3-1 | 8×12 = 96 slots (+19) | Buy it as soon as you reach the castle: the semi-auto rifle and the Striker fit without juggling |
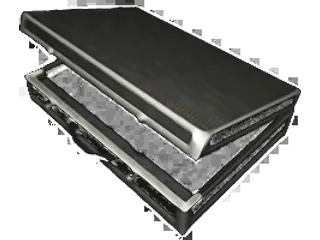 Attaché case XL case Merchant, from the 3-3 connecting passage Attaché case XL case Merchant, from the 3-3 connecting passage | 73,000pts | 3-3 | 8×15 = 120 slots (+24), the maximum | Yes, the moment you see it: the last space problem you will have |
 Tactical vest vest Merchant in the armoury (the Main Passage merchant room, facility 1F) Tactical vest vest Merchant in the armoury (the Main Passage merchant room, facility 1F) | 60,000pts (sells for 30,000) | 5-1 | −30% damage taken, takes no slot | Worth it for the Island if pesetas are left over; does not exist on Professional (except GameCube) |
Ammunition and grenades
which weapon each box feeds and what the Merchant pays per unit| Item | Feeds | Sells / unit |
|---|---|---|
 Handgun ammo (9 mm) Boxes of 10; you start with 20 Handgun ammo (9 mm) Boxes of 10; you start with 20 | Handgun, Punisher, Red9, Blacktail, Matilda | 50pts |
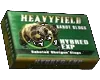 Shotgun shells Boxes of 5 (25 on Easy) Shotgun shells Boxes of 5 (25 on Easy) | Shotgun, Riot Gun, Striker | 120pts |
 Rifle ammo (.223) Boxes of 5 Rifle ammo (.223) Boxes of 5 | Bolt-action rifle, semi-auto rifle | 150pts |
 TMP ammo Boxes of 50 (100 in chests); the cheapest: never sell it TMP ammo Boxes of 50 (100 in chests); the cheapest: never sell it | TMP | 20pts |
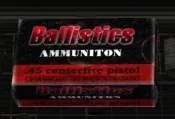 Magnum ammo (.45) Boxes of 3 to 5; the magnum Capacity upgrade on an empty cylinder gives it for free Magnum ammo (.45) Boxes of 3 to 5; the magnum Capacity upgrade on an empty cylinder gives it for free | Broken Butterfly, Killer7 | 500pts |
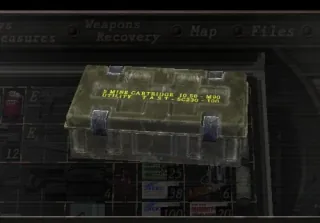 Mine darts Mine darts | Mine Thrower | 500pts |
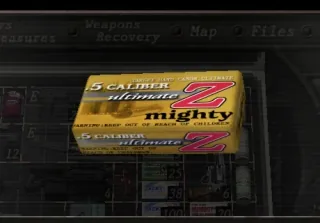 Handcannon ammo Handcannon ammo | Handcannon | 600pts |
 Hand grenade 6 m radius; the biggest damage Hand grenade 6 m radius; the biggest damage | — | 2,000pts |
| Incendiary grenade 2.5 m ring of fire for 5 s | — | 1,000pts |
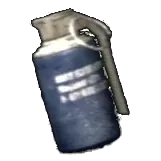 Flash grenade Stuns and kills exposed Plagas Flash grenade Stuns and kills exposed Plagas | — | 500pts |
Buy order
optimal build · 1st playthrough · NormalThe full plan comes to about 915,000pts. Looting and selling everything, a Normal run gathers roughly 1.1 million before the final boss (this guide's estimate), so there is slack; if you fall short, cut the TMP exclusive and the vest first.
1-2
This stop 37,000pts · Running total 37,000pts
Case M 24,000pts · TMP 10,000pts · Village Map 3,000pts
↳ Spinels, Pearl Pendant, Ruby
✗ Bolt rifle (bulky and useless in the village) · base handgun upgrades (everything you put in only comes back at half)
1-3
This stop 22,000pts · Running total 59,000pts
Shotgun Power 4.5 15,000pts · TMP Power 0.5 7,000pts · free Punisher (with all 15 medallions it comes with Power 1.1)
↳ Pocket Watch, Ruby, Headdress · your Handgun (make room for the Punisher)
✗ TMP stock (4,000pts, 2×2): only if you struggle to aim
2-1
This stop 49,000pts · Running total 108,000pts
In priority order: Red9 14,000pts (the Underground Passage Merchant already sells it at the end of 2-1: go down from the graveyard path before entering the church) · Shotgun Power 5.0 20,000pts · Red9 Power 1.8 15,000pts · Shotgun/TMP Capacity only with an empty magazine (it refills for free)
↳ Antique Pipe, Gold Bangle w/Pearls
✗ TMP Power (14,000pts for a tenth: wait for the castle)
2-2
This stop 5,000pts · Running total 113,000pts
Red9 14,000pts + Power 1.8 15,000pts at the Underground Passage if you didn't buy it at the end of 2-1 · TMP Reload 5,000pts before the cabin
↳ Punisher (it's done its job)
✗ Red9 stock (3 slots that hurt) · if you prefer the Blacktail, hold on with the Punisher until 3-1 and skip the Red9
2-3
Running total 113,000pts
—
↳ Full Beerstein 20,000pts (after the Yellow Catseye) · Elegant Mask with 3 gems 20,000pts · Ruby 10,000pts
3-1
This stop 134,000pts · Running total 247,000pts
Case L 40,000pts · Castle Map 6,000pts · Semi-Auto Rifle 35,000pts · Red9 2.1 · Rifle 8 · TMP 0.8 · Shotgun: stop here (you'll sell it in 4-1 and only get half back)
↳ Bolt rifle if you bought one
✗ Riot Gun (415,000pts to max; the Striker is cheaper and more compact) · Mine Thrower · Broken Butterfly (free in 4-1) · Blacktail, unless you pick it over the Red9
3-3
This stop 73,000pts · Running total 320,000pts
Case XL 73,000pts (Connecting Passage Merchant)
↳ Mirror w/ Pearls & Rubies and Hourglass w/ Gold Decor (12,000pts each)
✗ Selling the free Rocket Launcher from the display case (15,000pts): keep it for Verdugo in 4-1, buying another costs 30,000pts
4-1
This stop 102,000pts · Running total 422,000pts
Free Broken Butterfly (treasure chamber by the outside fountain, with Ashley) · Rifle 11 · TMP 1.2 · Striker 43,000pts at the Pit merchant (before Verdugo) · Rocket Launcher: the one from the 3-3 display case; if you sold it, 30,000pts before Verdugo
↳ Base shotgun as soon as you have the Striker (you get half of what you invested; empty it first)
✗ Broken Butterfly upgrades (210,000pts to reach 28 and its exclusive doesn't arrive until 5-3) · buying the Butterfly (38,000pts) when it's free
4-x/4-4
This stop 223,000pts · Running total 645,000pts
Striker Power 7–8 (25,000 + 28,000pts) · Rocket Launcher for Salazar · the last merchant of 4-4 unlocks the Exclusives: Striker 60,000pts (100 shells, handed to you) and Red9 80,000pts, in that order
↳ Salazar's full Crown 48,000pts · Staff of Royalty 20,000pts
✗ Killer7 (shows up in 5-1 at 77,700pts: only if you want a serious magnum for the Island)
5-1 →
This stop 230,000pts · Running total 875,000pts
Remaining Exclusives: Red9 80,000pts · TMP 100,000pts · Semi-Auto to Power 15 before the lab · Tactical Vest 60,000pts (−30% damage; not available on Professional)
↳ Thermal Scope 10,000pts (once there are no Regenerators left) · Broken Butterfly if you buy the Killer7
Final
This stop 10,000pts · Running total 885,000pts
First Aid Sprays · keep an 8×2 block (16 slots) free for Ada's rocket launcher
↳ Full Golden Lynx 35,000pts · Thermal Scope · Incendiary and Flash Grenades (Saddler is immune to both)