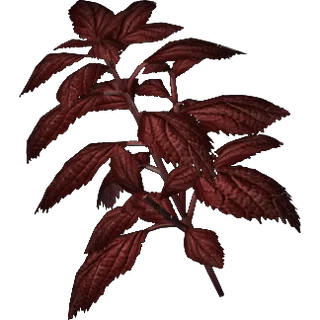
Green + Red — full heal (save these for emergencies)
Yellow — raises MAX health: never use it alone or sell it; always add it to a mix
Routine: Green+Yellow for minor heals, Green+Red+Yellow when it counts
Eggs and critters
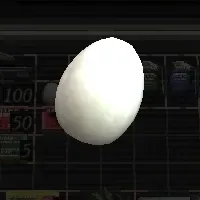
White < Brown < Gold (heals to full, 1 slot) — keep a couple in reserve
Chickens lay if you wait; leaving and returning resets the flock
Cut snakes drop eggs; in crates, they bite
Crows: pesetas, Spinels and sometimes grenades — or a Flash Grenade into the flock of 15 at the quarry (1-3): it kills them all
Grenades
Frag — crowds and bosses; essential in the Garrador cage and the finale
Incendiary — Colmillos, slow groups, and ×3 splits Mendez apart
Flash — stuns almost everything (Gigantes included) and instantly kills Plagas
Ashley
Wait before hot zones · Follow me to advance
Hide her in containers/lockers during every big fight
If she's carried off to an exit: game over — kidnappers are the top priority
"Catch" when she jumps from a height
She has her own health bar and it does not regenerate: if she dies it is game over. Any healing item Leon uses with her next to him restores her health too: heal her that way, with one green herb and together
In 3-4 (her solo stretch) she opens Leon's own attaché case: whatever she spends there is yours lost. There is no fighting, only fleeing, so heal her only if she is in the red before taking the Serpent Ornament, and with the cheapest item (a lone green herb or a white egg)
Shooting gallery
Four stalls that add a game type, always next to a Merchant: 3-1 (type A), 4-1 (B), 4-2 (C) and 5-1 (D); the one in 5-3 adds none. Earlier types stay available at every stall
Free and it never spends your ammo: before going in you pick a weapon set from the stall, “Rapid-Firing” (shotgun + TMP) or “Sniping” (rifle + handgun), each with a grenade
Points: body 50 · male head 100 · female head 200 · Salazar 500 (pops up at the back after 5 hits in a row) · fireworks 300 (shoot the moon and the castle in the backdrop) · Ashley SUBTRACTS 1,000: never shoot her
Caps: six per type, earned by playing that full type (not per separate weapon set — the Rapid-Firing/Sniping set is just personal preference, not two separate reward tracks). Five of the six come from runs scoring OVER 3,000 (in some versions the first only asks 2,000); the sixth, distinct, requires hitting all 25 wooden targets without touching Ashley or scoring over 4,000 (source: IGN Shooting Gallery FAQ, 2005)
Watch out: winning the fourth cap of a type switches the targets to a harder pattern. And once you hold a set's two regular caps, a 3,500 run gives nothing: it takes 4,000 or all 25 targets
Plan: with each set, two 3,000+ runs and a third one hitting all 25 without Ashley (easier than 4,000; the TMP sweeps well). Once a type is complete, talk to the Merchant and pick “End Game” to collect: A 15,000 · B 25,000 · C 35,000 · D 50,000pts. All 24 caps are also an achievement (checklist under Achievements) and show on the Keys/Treasures screen
The game never tells you a type is complete: the sign is the full row on the Keys/Treasures screen and the bonus paid. You can keep playing it, but it gives nothing more
⚠ The Ashley waiting in the corner of the lobby is the real one: shooting her is Game Over and you lose everything unsaved, caps included. Save at a typewriter as soon as you collect a row
Switch version
Based on the Wii port (full PS2 content): Separate Ways, Assignment Ada and Mercenaries included
No motion controls
Modern-port stats: Red9 exclusive at 6.5 (it was 5.0 on GameCube) — your version is the generous one
Difficulty
This guide is written for Normal
Easy: you start with the Shotgun (there is none in the village), shell boxes hold 25, more ammo and money, and the castle maze is closed off (goodbye to its Red Gem and loot)
Professional: no tactical vest (except JP/US GameCube), no dynamic difficulty, tougher enemies and the 5-4 helicopter does not help you — the Red9 and the bolt rifle gain value per bullet
Prices, bottle caps and treasures are the same on every difficulty · Amateur exists only in Japan (you start with a shotgun and stretches are skipped) · Inside each difficulty a hidden dynamic rank moves: explained under Mechanics
Environment objects
Bear traps and tripwires (village): walk around them or shoot the wire; an open trap catches Ganados too
Red barrels and oil drums: one shot and they blow — position so the group stands on them
Hanging lanterns: drop them on a group to set it on fire (breaking the one in the 1-3 Underground Passage reveals the Elegant Headdress and two Spinels in the ceiling)
Crates, barrels and vases: knife them, never shoot. What is worth a bullet: the 15 blue medallions, bird nests in trees, embedded jewels and hanging treasures (the well stick first)
Typewriters: unlimited saves on every version from Wii/HD on
Merchant treasure maps (3,000 / 6,000 / 9,000pts): mark treasures on the in-game map; with this guide's interactive map they are redundant
Containers and cupboards: hide Ashley inside before every big fight